1. Introduction:
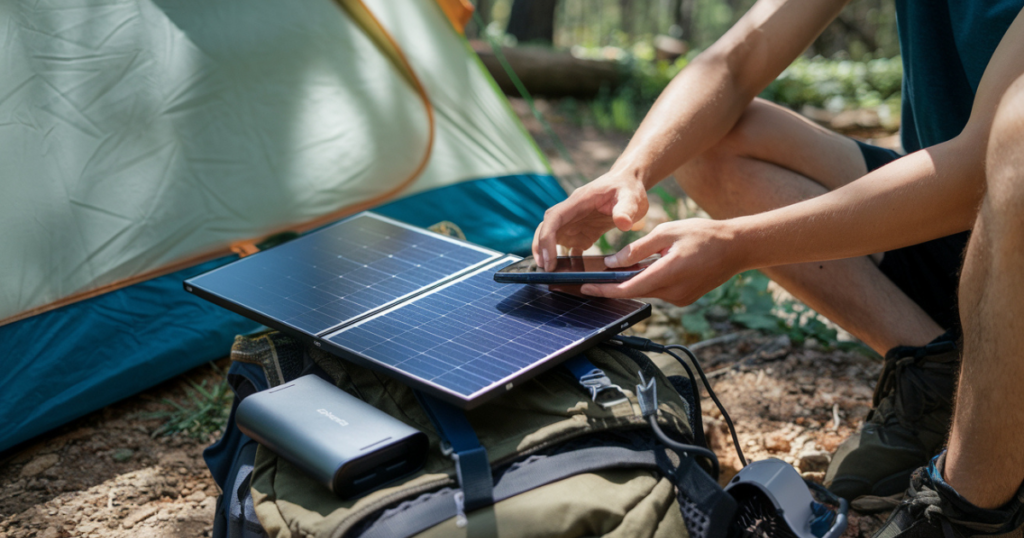
Wondering how to charge your phone while camping without electricity? You’re not alone. Did you know that 73% of campers consider their phone an essential safety device while camping? Yet, keeping your phone charged in the wilderness remains one of the biggest challenges for outdoor enthusiasts. After spending countless nights under the stars and testing various charging methods, I’ve compiled this comprehensive guide to help you keep your devices powered up when you’re miles away from the nearest outlet.
2. Solar-Powered Solutions for Phone Charging
Let me tell you about my first experience with solar charging while camping – it was kind of a disaster! I bought the cheapest solar panel I could find online and ended up with a dead phone in the middle of the Adirondacks. That frustrating experience taught me more about solar charging than any manual could have, and I’ve spent years since then testing and perfecting my solar setup.
Types of Solar Chargers for Camping: A Detailed Comparison
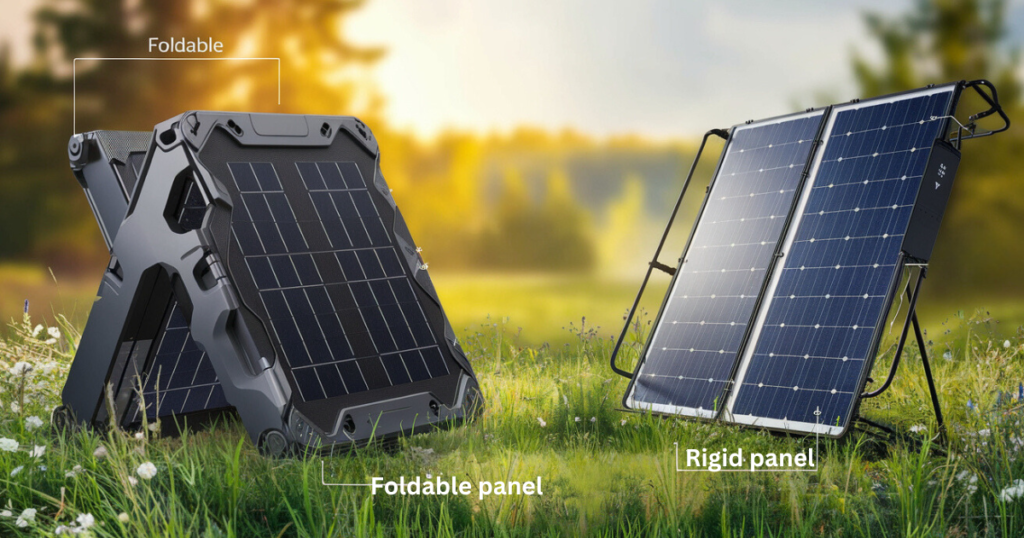
First things first – let’s talk about the two main types of solar chargers you’ll encounter:
Foldable Solar Panels
These have become my go-to choice for most camping trips. They’re incredibly lightweight (usually under 2 pounds) and can easily slip into a backpack pocket. I especially love how my 21W foldable panel can spread out across my backpack while hiking, charging my power bank throughout the day.
Rigid Solar Panels
On the flip side, rigid panels are bulkier but tend to be more durable and efficient. I keep one in my car camping kit because they can handle rough weather better.
Understanding Solar Panel Wattage for Camping
Here’s something I wish someone had told me early on – wattage matters more than you might think! For just charging a phone, a 5-10W panel will do the job, though it’ll take 4-6 hours in ideal conditions. But here’s a pro tip: get a panel with at least 15-20W capacity. Why? Because real-world charging conditions are rarely perfect, and that extra capacity gives you a buffer.
Best Practices for Solar Charging While Camping
Optimal Timing for Solar Charging
Speaking of conditions, timing is everything with solar charging! Through lots of trial and error (and many partially charged devices), I’ve found that the sweet spot for solar charging is between 10 AM and 2 PM. The sun’s angle during these hours provides the most direct light to your panels.
Performance in Cloudy Conditions
But here’s something interesting – cloudy days aren’t as bad as you might think! While charging will be slower, modern panels can still gather decent power through cloud cover. I’ve managed to get about 40% of normal charging capacity even on overcast days.
Advanced Tips for Maximum Solar Charging Efficiency
Perfect Panel Placement
Now, let me share my biggest breakthrough with panel placement – it’s all about the angle! I used to just lay my panel flat on the ground (rookie mistake!). These days, I prop my panel at roughly a 45-degree angle using my backpack or a couple of sticks. This simple adjustment improved my charging efficiency by almost 40%!
Common Mistakes to Avoid
- Letting panels overheat
- Using low-quality connecting cables (can reduce efficiency by up to 50%)
- Direct phone charging instead of using a power bank
Essential Solar Charging Tips for Campers
One last tip that took me way too long to figure out – always charge a power bank instead of your phone directly from the solar panel. Why? Because clouds, trees, or even other factors can interrupt the direct charging of your phone, which can actually damage your phone’s battery over time.
Remember, solar charging isn’t just about having the right equipment – it’s about using it smartly. After years of trial and error, I can confidently say that understanding these basics will make a huge difference in keeping your devices charged while enjoying the great outdoors!
3. Power Banks: Your First Line of Defense
Why Regular Power Banks Don’t Cut It for Camping
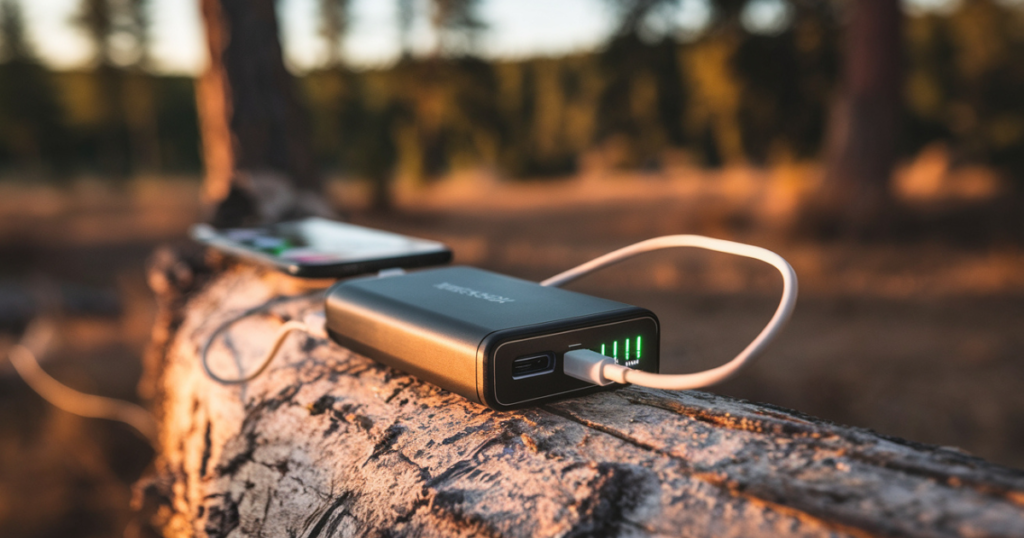
You know what’s funny? I used to think my regular power bank from Target would be just fine for camping. Then I found myself stuck in the Rockies with a dead power bank on day two of a five-day trip! That experience taught me that camping requires a whole different approach to power banks than everyday use. Let me share what I’ve learned the hard way about choosing and using power banks for off-grid adventures.
How to Calculate Your Camping Power Needs
First, let’s talk about calculating your power needs because this is where most people (including my past self!) go wrong. Here’s a simple formula I use:
- Take your phone’s battery capacity (let’s say 3000mAh)
- Multiply it by the number of full charges needed for your trip (typically 3-4 for a weekend)
- Account for power loss: Add 25% to compensate for conversion efficiency
Pro Tip: If you need 12000mAh of actual charging capacity (3000mAh × 4 charges), look for a power bank with at least 15000mAh.
Essential Features for Camping Power Banks
When it comes to camping-specific power banks, certain features become crucial for outdoor survival:
Must-Have Features:
- Water resistance (minimum IP67 rating)
- Multiple charging ports (2 USB-A + 1 USB-C recommended)
- Quick-charging capability
- Built-in LED light for night time emergencies
Maximizing Power Bank Efficiency in the Wild
Temperature Management Tips
Temperature management is crucial for optimal performance:
Winter Camping
- Keep your power bank in your sleeping bag at night
- Use body heat to maintain efficiency
Summer Camping
- Wrap power bank in a light-colored bandana
- Keep it in the shade
- Avoid direct sunlight exposure
Smart Charging Strategies
- Charge devices during the warmest part of the day (60-80°F/15-27°C)
- Turn off devices while charging (reduces charging time by 30%)
- Prioritize fast-charging devices first
Multiple Device Charging Strategy
The “Power Priority System”
- Essential devices (phones) – Morning charging with fresh power bank
- Secondary devices (e-readers) – Daytime charging with solar backup option
- Use 2-inch charging cables for weight reduction and durability
Advanced Power Bank Tips
Common Mistakes to Avoid
- Don’t charge devices at 50% – wait until 20%
- Charge only up to 80-90% for optimal efficiency
- Avoid exposure to extreme temperatures
Pre-Trip Power Bank Preparation
- Fully charge the power bank
- Use it to charge a device
- Recharge completely before the trip
- This process activates all cells for maximum capacity
Final Thoughts
Remember, your power bank isn’t just a battery – it’s your lifeline to communication and safety in the wilderness. Treat it right, and it’ll keep your devices running no matter how far you are from the nearest outlet!
4. Hand Crank and Manual Chargers
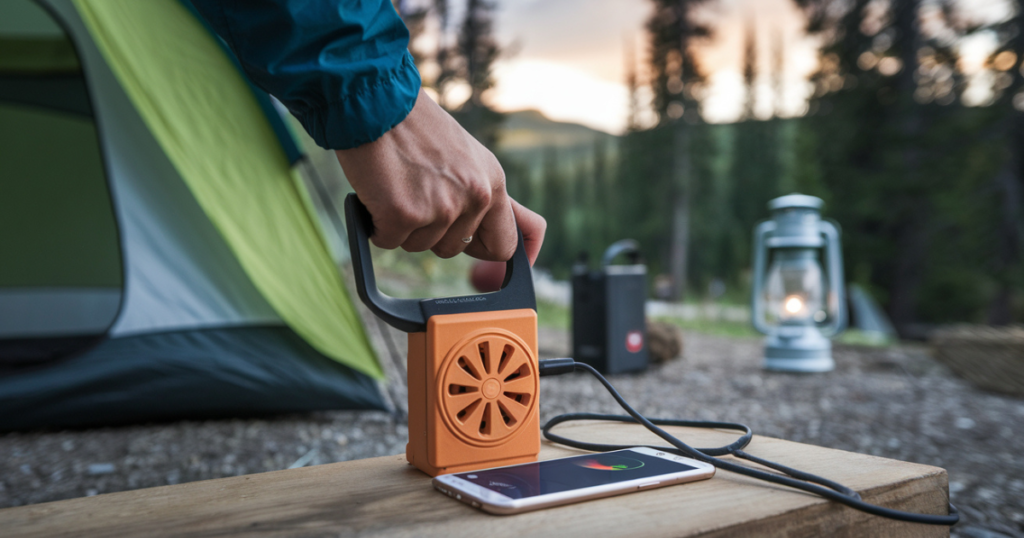
What Are Hand Crank Chargers and How Do They Work?
Let me start with a confession – I used to think hand crank chargers were just gimmicky survival gear until I found myself stuck in an unexpected three-day thunderstorm that made my solar panels useless! That experience completely changed my perspective on manual charging methods. Trust me, there’s nothing quite like the peace of mind that comes from knowing you can generate power with just your own two hands.
The science behind hand crank chargers is actually pretty fascinating. Inside these devices is a small generator that converts mechanical energy (your cranking) into electrical energy. Think of it like a tiny bicycle dynamo. When you turn the handle, magnets spin around a coil, creating an electrical current. I remember being surprised to learn that most hand crank chargers generate around 5V of power – the same as a regular USB charger! But here’s the catch – the amperage is much lower, which is why it takes longer to charge devices.
Real-World Performance and Expectations
Now, let’s talk about expectations, because this is where I see a lot of people get frustrated. I learned the hard way that you’ll need about 10-15 minutes of consistent cranking to get about 1-2 minutes of phone call time. Sounds pretty brutal, right? But here’s the thing – it’s not meant to be your primary charging method. I think of it as my “emergency backup for my backup.”
Best Use Cases for Manual Chargers
The best scenarios for using manual chargers might surprise you. They’re actually perfect for those “micro-charging” moments. You know, when you just need enough power to send a quick text or make a brief emergency call. I’ve found they’re especially valuable during:
- Extended periods of bad weather when solar isn’t an option
- Emergency situations requiring quick GPS coordinate marking
- Brief communication needs during outdoor activities
- Backup power during search and rescue operations
Advanced Tips for Maximizing Hand Crank Charger Efficiency
The Layered Power Approach
Here’s a strategy I’ve developed over time: I combine manual charging with other methods in what I call a “layered power approach.” For instance, I’ll use the hand crank to charge a small power bank while I’m sitting around camp in the evening, telling stories or planning the next day’s route. This way, I’m not desperately cranking when I actually need the power.
Maintenance and Durability Guidelines
When it comes to maintenance and durability, I’ve learned some important lessons:
- Choose models with metal gearing over plastic
- Listen for grinding or clicking sounds that indicate potential issues
- Store in a sealed plastic bag with a silica gel packet
- Keep moving parts clean and protected from sand and debris
Optimal Cranking Technique
Here’s something interesting I discovered – the cranking speed actually matters more than force. I used to tire myself out cranking as hard as I could, but then I learned that a steady, moderate pace around 120-130 cranks per minute is optimal for most units. I usually time it with my breathing or even hum a tune to keep a consistent rhythm.
The Value of Manual Charging
Remember, a hand crank charger is like having an unlimited (albeit slow) power source in your pack. While it’s not going to fully charge your devices quickly, it could be the difference between having emergency power and being completely cut off. Just think of it as your insurance policy against dead batteries in the backcountry!
5. Bike Dynamo Charging Systems
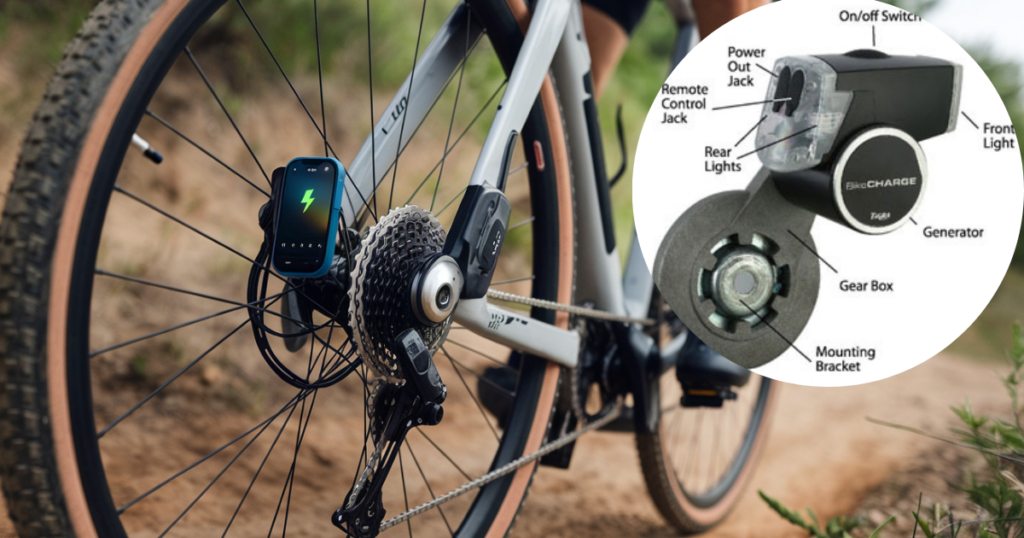
I’ll never forget my first bike-powered charging experience during a bikepacking trip through Vermont. After years of relying solely on solar and battery power, discovering bike dynamos was like finding a secret superpower! But I definitely learned some interesting lessons about dynamo systems – including the time I tried to install one myself and almost ruined my front wheel (spoiler: sometimes it’s worth paying a professional!).
What Is a Bike Dynamo and How Does It Work?
A bike dynamo is essentially a compact electricity generator that converts your pedaling energy into usable power. Modern dynamos typically generate 6V of power at approximately 3W when cycling at 12 mph. While this might seem modest, it provides reliable power throughout your ride.
Types of Bike Dynamos
- Hub Dynamos
- Built directly into the front wheel hub
- More efficient and weatherproof
- Higher initial cost but better long-term performance
- Bottle Dynamos
- Mounted externally and contact the tire
- Easier to install
- More noticeable drag while riding
- Generally less expensive
Installation Guide: What You Need to Know
Installation complexity varies significantly based on your chosen system:
Bottle Dynamo Installation
- Straightforward clamp-on mounting process
- Requires proper positioning against the tire
- Can be installed by most riders with basic tools
Hub Dynamo Installation
- Requires wheel building expertise
- Recommended to use professional installation
- Important tip: Consider purchasing a pre-built wheel for hassle-free setup
Maximizing Charging Efficiency
Understanding charging efficiency is crucial for optimal performance:
- Optimal charging speed: 12-15 mph
- Minimum speed for power generation: 4 mph
- Best practice: Use a cache battery as a power buffer
- Note: Charging may decrease during steep climbs
Weather-Proofing Your Dynamo System
Weather resistance is essential for reliable performance:
- Quality hub dynamos feature complete waterproof sealing
- Use marine-grade connectors for all electrical connections
- Cable routing tips:
- Run cables inside the frame when possible
- Follow brake line paths
- Apply silicone sealant on exposed connections
Cost Analysis and ROI
Investment breakdown:
- Complete hub dynamo system: $200-400
- Additional installation costs if professional service needed
- ROI timeline: Approximately 18 months for regular users
- Cost savings from:
- Reduced battery purchases
- Fewer portable charger replacements
Pro Tips for Dynamo Users
Performance Optimization
- Use dynamo resistance for consistent pacing
- Plan routes around optimal charging speeds
- Always carry a backup power solution (e.g., small solar panel)
Best Practices
- Maintain steady riding speeds for consistent charging
- Regular system checks and maintenance
- Keep waterproof bags for electronic protection
While a dynamo charging system requires initial investment and setup, it provides reliable, sustainable power for bike commuters and adventure cyclists alike. Remember that it works best as part of a comprehensive power solution for off-grid adventures.
6. Portable Camping Generators and Power Stations
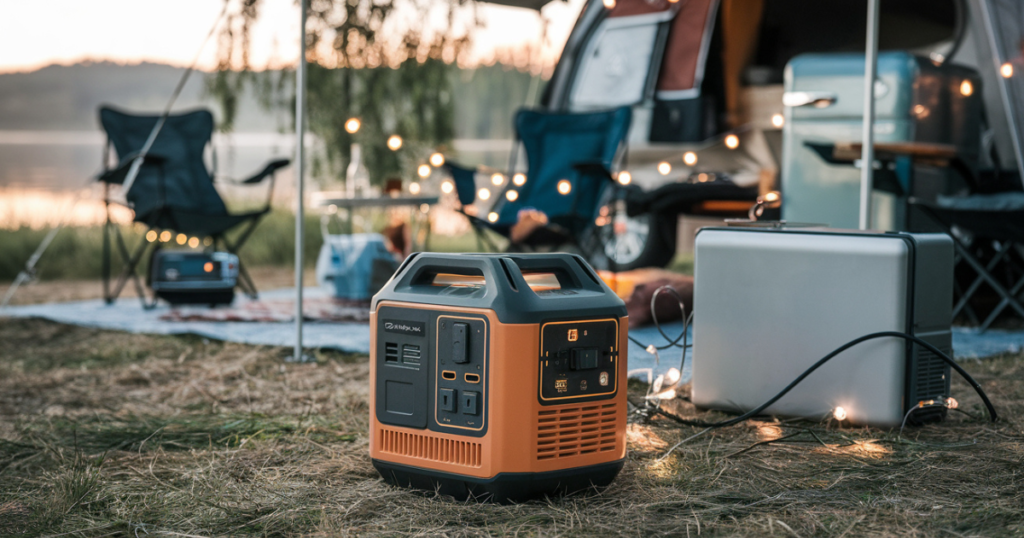
As an experienced camper who’s learned the hard way about portable power solutions, I’ll share real-world insights about camping generators and power stations. From my embarrassing first experience with a noisy generator to mastering silent power solutions, this guide covers everything you need to know.
Key Takeaways
- Modern battery power stations are revolutionizing campsite power solutions
- A 500Wh power station can power essential devices for 3+ days
- Inverter generators run most efficiently at 50% capacity
- Silent operation makes power stations ideal for quiet campgrounds
- Proper maintenance and temperature management are crucial for longevity
Understanding Your Camping Power Options
Traditional Generators vs Modern Power Stations
The camping power landscape has evolved significantly. While gas generators were once the only option, battery-powered stations like the Jackery have transformed campsite power management. Through personal experience, I’ve found that power stations can effectively replace traditional generators for most camping scenarios.
Types of Portable Power Solutions
Three main options dominate the market:
- Gas Inverter Generators (e.g., Honda EU2200i)
- Solar Generators (e.g., Goal Zero Yeti)
- Portable Power Stations
For typical camping needs like charging phones, laptops, and small devices, a 500Wh power station provides ample power. I’ve successfully powered multiple devices—including four phones, a laptop, and LED lighting—for three full days on a single charge.
Performance and Efficiency Guide
Fuel Efficiency and Runtime Analysis
Gas generators with 1-gallon tanks typically provide 8-10 hours of power at 25% load. However, here’s an expert tip: running at approximately 50% capacity actually optimizes fuel efficiency, contrary to common belief.
For power stations, maximize runtime using the “power pyramid” approach:
- Charge devices during daylight hours using solar panels
- Reserve stored power for essential nighttime needs
- Avoid power-hungry activities like movie watching that can drain reserves
Noise Level Considerations
Noise management is crucial for campsite harmony:
- Modern inverter generators: 48-60 decibels
- Power stations: Complete silence
- Follow the “conversation rule”: If you need to raise your voice over your power source, it’s too loud
Advanced Usage Tips and Safety
Efficient Multiple Device Charging
Optimize your power usage with these proven strategies:
- Use a surge protector for batch charging
- Schedule charging sessions morning and evening
- Minimize power loss from frequent device connections
Essential Safety and Maintenance Guidelines
Follow these critical safety protocols:
- Keep power sources dry and well-ventilated
- Position generators 20+ feet from sleeping areas
- Use weather protection (pop-up canopy recommended)
- Perform regular maintenance checks
Temperature Management Pro Tips
Advanced temperature control techniques:
- Ensure proper airflow for gas generators
- Use reflective thermal bags for power stations in summer
- Monitor performance in extreme conditions
Final Recommendations
Choose your power solution based on:
- Camping style and duration
- Power requirements
- Campground regulations
- Noise restrictions
- Budget considerations
Remember: It’s better to start with a smaller, adequate power solution than overinvest in unnecessary capacity.
7. Alternative Charging Methods
You know what’s funny? I discovered thermoelectric charging by accident when a fellow camper showed up with what looked like a weird pot handle sticking out of our campfire. Turns out, that “handle” was charging his phone! Since then, I’ve become somewhat obsessed with testing unusual charging methods, some more successful than others (let’s just say my first attempt at a DIY wind turbine wasn’t exactly a roaring success).
1. Thermoelectric Charging: Converting Heat to Power
These chargers are absolutely fascinating! They work using something called the Seebeck effect – basically, they generate electricity from the temperature difference between the hot campfire and cooler air. I’ve found the BioLite CampStove to be incredibly efficient – it’s actually become my go-to cooking setup.
Expert Tip: Keep your fire temperature consistent! I once let my fire get too hot and nearly melted my charging port. Now I maintain a steady flame using dry hardwoods and keep the device on the outer edge of the fire pit.
2. Wind Power Charging: Harnessing Nature’s Breath
Wind-powered charging is trickier than you might think – believe me, I’ve tried everything from portable turbines to DIY setups. The most successful option I’ve found is the portable wind turbine that collapses like a tent pole.
Important Note: You need consistent wind speeds of at least 8-10 mph to generate usable power. I remember camping in the Rockies, thinking I’d struck gold with the constant breeze, only to realize that gusty wind actually generates less power than a steady flow.
3. Water Power Chargers: Rivers of Energy
Water-powered chargers have honestly surprised me the most! These little turbines that sit in flowing water are incredibly efficient – when conditions are right. The key word is “flowing” – I learned that hard way after placing one in a calm eddy and wondering why my phone wasn’t charging.
Key Requirements:
- Minimum water flow: 2-3 feet per second
- Proper positioning in rapids or fast-moving streams
- Secure anchoring system
4. Smart Battery Pack Management
I now use what I call the “rule of thirds” – one battery pack charging, one in use, and one in reserve. This system saved me during a week-long trip when unexpected rain made solar charging impossible.
Pro Strategy: Label your battery packs with their age – older batteries go into the rotation first since they typically hold less charge.
Emergency Charging Solutions
For emergency situations, I’ve developed several reliable backup methods:
- AA battery to USB converter kit
- Car battery charging using 12V USB adapter
- Hand warmer + thermoelectric charger combination (perfect for winter camping!)
Combining Methods for Maximum Efficiency
Here’s something most people don’t think about – combining these alternative methods strategically. During one memorable trip, I used:
- Thermoelectric charger during evening cooking
- Water turbine overnight
- Solar power during daylight hours
Key Takeaways and Best Practices
The most important lesson I’ve learned about alternative charging methods is this: don’t rely on just one. Each has its sweet spot, but they all have limitations. It’s like having a diverse investment portfolio – spread your power generation across different methods based on your environment and needs.
Remember to:
- Always have multiple charging options available
- Check weather conditions before relying on specific methods
- Test your setup before critical trips
- Keep emergency charging solutions readily accessible
8. Phone Battery Conservation Techniques
Let me tell you when I learned the hard way about phone battery management. I was two days into a backcountry trip, thought I had my battery usage under control, then discovered my phone had been trying to connect to non-existent cell towers all night – talk about a battery drain! These days, I’ve got battery conservation down to a science, and I’m excited to share what I’ve learned through plenty of trial and error.
First, let’s tackle essential apps for offline use because this is where most people go wrong. I’ve learned to download offline maps through Google Maps or – my personal favorite – Maps.me before any trip. But here’s a trick I discovered: take screenshots of important trail intersections too! They use way less battery to view than opening the map app. I also keep a lightweight offline note-taking app called Simple Notes for journaling and documenting campsites. The key is to delete apps you won’t need – I once found my weather app burning through battery trying to update every 15 minutes with no signal!
Critical Battery-Draining Features to Manage
Now, for those sneaky battery-draining features – oh boy, do I have a list! The biggest culprit? Background app refresh. I watched my battery drain 20% in two hours because my social media apps were desperately trying to update in zero-signal areas.
Pre-Camping Battery Checklist:
- Turn off cellular data for non-essential apps
- Disable location services except for map apps
- Turn off automatic updates and background refresh
- Switch off Wi-Fi and Bluetooth scanning
- Enable airplane mode but manually turn on GPS when needed
Optimizing Phone Settings for Maximum Battery Life
Speaking of optimal phone settings, brightness is your biggest enemy! I learned to keep my phone on manual brightness and dim it as much as possible while still being readable. One clever trick I discovered? Using dark mode in all apps saves significant battery life on phones with OLED screens. I also set my auto-lock to 30 seconds – every little bit helps!
Emergency Mode: Your Battery’s Last Line of Defense
Let me tell you about emergency mode because this feature has saved me more than once! Most modern phones have some version of it – Ultra Power Saving Mode on Samsung or Low Power Mode on iPhone. But here’s what nobody tells you: customize it before you need it! I learned this after accidentally enabling it and losing access to my map app. Now I make sure my essential camping apps are allowed to run in emergency mode before heading out.
Temperature Management: The Hidden Battery Killer
Temperature management might be the most underrated aspect of battery conservation. I remember waking up one cold morning to find my phone at 2% battery despite being at 40% the night before – cold temperatures can devastate battery life!
Essential Temperature Management Tips:
- At night, keep your phone in your sleeping bag (but not right next to your body – sweat is the enemy!)
- During hot days, keep it in a light-colored dry bag and out of direct sunlight
- If it’s extremely cold, keep a hand warmer near (but not touching) your phone
- Never charge a very cold battery – warm it up gradually first
Advanced Battery-Saving Techniques
Quick Launch Photography:
Here’s a pro tip that took me years to figure out: when taking photos, use your phone’s quick launch feature (like double-clicking the power button) instead of waking it up fully, opening the camera app, etc. This simple change cut my photo-taking battery usage almost in half!
The Batch Processing Method:
I’ve developed what I call the “batch processing” method. Instead of checking my phone throughout the day, I schedule specific times for phone use. This not only saves battery but honestly makes me more present in nature. The trick is to put your phone in airplane mode and only turn it on during these scheduled times.
Emergency Signal Boost Hack:
One last tip that’s saved me countless times: carry a small piece of aluminium foil! If you’re in an area with very weak signal, making a small parabolic reflector with the foil can help you get enough signal to send a text without your phone draining its battery searching for service. Sounds crazy, but it works!
Final Thoughts
Remember, your phone is often your lifeline in the wilderness – treating battery conservation as a crucial camping skill rather than an afterthought could literally be a lifesaver!
9. Creating a Comprehensive Charging Strategy
Why You Need a Comprehensive Charging Strategy for Backpacking
When I first started leading extended backpacking trips at our local outdoor education center, I learned the hard way that keeping devices charged isn’t as simple as throwing a power bank in your pack. That disastrous first trip where all our GPS units died on day three taught me more about charging strategy than any guidebook ever could.
How to Calculate Your Backpacking Power Requirements
Before you even think about buying charging gear, you need to do a proper power audit. Trust me – this step saves so much headache later. I always start by listing every single device our group needs to keep running: GPS units, smartphones, emergency satellite communicators, cameras, and headlamps. Then I calculate their actual power consumption in the field.
Calculating Real-World Battery Drain for Outdoor Devices
Here’s a practical tip I discovered through trial and error: Don’t just look at the battery capacity (mAh) – track how quickly devices drain in real outdoor conditions. Your phone might last three days at home, but when you’re constantly checking GPS and taking photos in cold weather, that same battery might only last 12 hours. I use this simple formula:
Device mAh ÷ Hours of Use = Hourly Power Draw
This gives you a much more realistic picture of your actual charging needs. For example, my smartphone pulls about 200mAh per hour when using GPS apps regularly.
Essential Charging Methods for Extended Backpacking Trips
I’ve learned that relying on just one charging method is asking for trouble. On our trips now, we use a three-tier approach:
- Primary Power Banks: I bring high-capacity power banks rated at 20,000mAh or higher. Look for ones with multiple output ports and fast-charging capability.
- Solar Panels: These serve as our daily power generators. After testing dozens of models, I’ve found that 15-20W panels hit the sweet spot between portability and charging speed.
- Battery Swap System: We carry spare batteries for devices that allow it. This has saved us countless times when power banks run low.
Developing a Reliable Backup Power Strategy
Here’s something most charging guides won’t tell you: Your backup plan needs a backup plan. On every trip, I designate one power bank as the “emergency only” unit. It stays untouched unless absolutely necessary. We also carry a small hand-crank charger – it’s slow, but it’s gotten us out of some tight spots.
How Weather Impacts Your Charging Setup
The weather affects your charging setup way more than you might think. During a rainy week in the Cascades, I discovered that moisture can sneak into even “waterproof” solar panels. Now I use silica gel packets in my charging kit and always pack panels in dry bags.
Cold Weather Charging Tips
Cold weather is another beast entirely. Batteries drain faster, and solar panels become less efficient. In temperatures below freezing, I keep power banks close to my body during the day and in my sleeping bag at night. This simple trick can double their effective capacity.
Managing Group Power Needs on Extended Trips
Managing power for a group requires some serious organization. I’ve developed a rotation system that works pretty well:
- Morning: Solar panels deploy during breakfast
- Mid-day: Power banks collect solar charge
- Evening: Organized charging session for essential devices first
- Night: Secondary devices get their turn
This system prevents the chaos of everyone trying to charge simultaneously and ensures critical devices stay powered.
Pro Tips for Group Charging Management
One last piece of advice that took me years to figure out: Label everything. Each power bank, cable, and solar panel gets a number or color code. In a group setting, this prevents the inevitable “whose charger is this?” confusion and helps track charging rotations.
Final Thoughts on Backpacking Power Strategy
Remember, this strategy isn’t just about having enough power – it’s about having reliable power when and where you need it. Start with a solid assessment of your needs, build in redundancy, and always plan for the worst-case scenario. Your future self will thank you when you’re five days into a trek with fully charged devices.
10. Conclusion:
You know, looking back at all my charging mishaps and successes over the years, I can’t stress enough how much peace of mind a solid charging strategy brings to any outdoor adventure. But here’s the thing – you don’t have to implement everything at once.
Start with getting one reliable 20,000mAh power bank and really learn its capabilities. Take it on a weekend trip, see how many device charges you actually get, and note how it performs in different conditions. That’s exactly how I started, and honestly, it’s the best way to understand your true power needs without getting overwhelmed.
Here’s a quick checklist I wish someone had given me when I was starting out:
- Buy your primary power bank first and test it thoroughly
- Add a solar panel next if you’re doing trips longer than 3 days
- Invest in device-specific spare batteries third
- Finally, add backup power solutions based on your experience
Remember, there’s no such thing as a perfect charging system right out of the gate. Mine has evolved over dozens of trips, and I’m still tweaking it. The key is to start somewhere and build up your strategy based on real-world experience.
I’d love for you to take action today – even if it’s just writing down a list of all your devices and their power requirements. That simple step puts you ahead of 90% of outdoor enthusiasts I meet. Trust me, your future self will thank you when you’re deep in the backcountry with a fully charged GPS while others are scrambling with dead devices.
Don’t wait for your devices to die on the trail to start thinking about this stuff. Get out there, start testing different charging methods, and build a system that works for your specific needs. Adventure is calling – make sure you’ve got the power to answer!
If you wish to cover more ground on this topic, check out this
