Introduction:

Let me tell you, I learned the hard way why camping water storage container cleaning is absolutely crucial! It was during a backpacking trip in the Cascade Mountains that I experienced my worst camping nightmare. We were three days into a week-long trek when my buddy Mike pulled out our water container – and the smell hit us like a truck. Musty, slightly moldy, with a hint of something I can only describe as “old gym sock meets stagnant pond.”
Talk about a water emergency! We were miles from civilization, our water supply compromised, and suddenly our epic adventure looked like it might turn into a survival challenge. That day, I discovered that water container maintenance isn’t just a suggestion – it’s survival 101.
Did you know that up to 30% of camping-related illnesses are directly linked to contaminated water sources and storage containers? My personal experience turned me into a bit of a water container cleaning fanatic. What started as a painful lesson has become a mission to help other outdoor enthusiasts avoid the same mistakes.
The funny thing is, preventing this disaster is actually pretty simple. With just a few basic steps and some regular maintenance, you can ensure your water stays clean, safe, and absolutely delicious. No more mystery odors, no more questionable tastes, and definitely no more potential health risks!
Why Cleaning Camping Water Containers Matters
I’ve seen (and smelled) firsthand what happens when you neglect your water storage containers. Trust me, it’s not pretty – and it’s definitely not something you want to discover miles into a backcountry adventure. Let’s break down why keeping these containers clean is more than just a recommendation – it’s an absolute necessity.

Bacterial Breeding Grounds
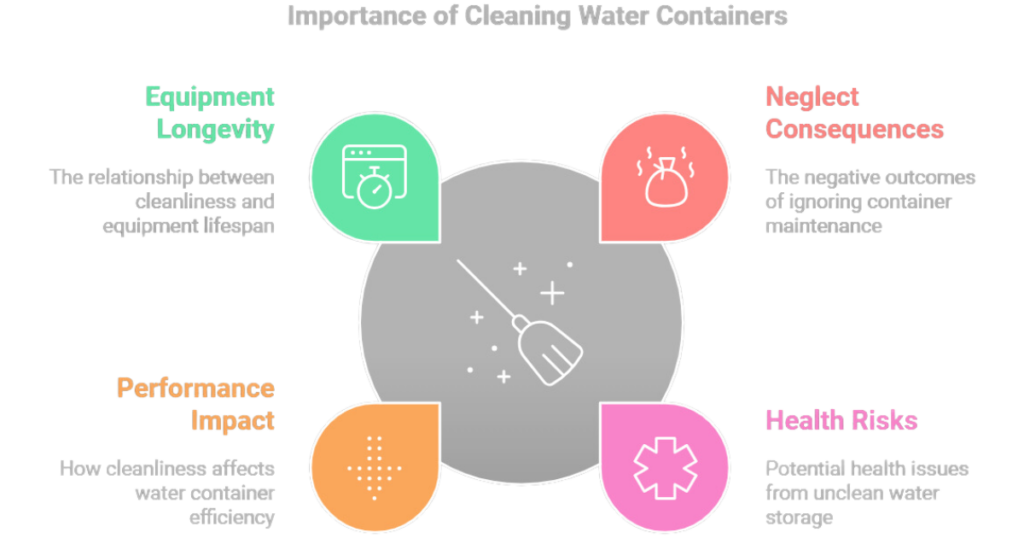
Most campers don’t realize that water containers are basically five-star hotels for bacteria. Those tiny crevices, microscopic scratches, and damp corners? They’re like little condos for microorganisms waiting to crash your camping party. A single unwashed container can host more bacteria than you’d find on a city subway handrail!
Health Risks You Can’t See
Contaminated water isn’t just gross – it’s dangerous. Bacteria like E. coli and Giardia can turn your dream wilderness expedition into a nightmare of stomach cramps, fever, and emergency bathroom runs. I’ve heard horror stories of entire hiking groups being taken out by a single contaminated water source. No stunning mountain vista is worth spending your trip huddled in a tent or making emergency medical evacuations.
Performance and Taste Impact
Clean containers aren’t just about avoiding illness. They directly impact your water’s taste and your overall outdoor experience. Ever taken a swig of water that tastes like last season’s musty camping gear? Not refreshing. Proper cleaning eliminates those weird flavors and ensures every drink feels like you’re tapping a pristine mountain spring.
Equipment Longevity
Here’s a pro tip most people overlook: regular cleaning extends the life of your water storage containers. Those $50 to $200 specialized camping water systems aren’t meant to be disposable. Proper maintenance can keep them functioning perfectly for years, saving you serious money in the long run.
Key Benefits of Regular Container Cleaning:
- Prevents dangerous bacterial growth
- Eliminates potential waterborne illnesses
- Improves water taste and quality
- Extends equipment lifespan
- Ensures reliable hydration during outdoor adventures
- Reduces risk of unexpected trip-ending health issues
- Maintains the integrity of your water storage investment
The Real-World Consequence
Remember my Cascade Mountains story? That moldy container wasn’t just gross – it nearly ended our entire expedition. We had to ration our remaining water, cut our trip short, and spend two days recovering. All because of a container I’d lazily neglected to clean after the previous trip.
Pro Tip from Experience
Don’t wait for a problem to develop. Make container cleaning a non-negotiable part of your post-camping routine. Treat your water storage like the critical piece of safety equipment it is. Five to ten minutes of cleaning can save you from days of potential misery.
When it comes to outdoor adventures, your water is your lifeline. Treat it – and the containers holding it – with the respect they deserve. Clean containers aren’t just about convenience; they’re about ensuring you can focus on the incredible memories you’re about to make, not fighting off preventable illnesses.
Stay safe, stay hydrated, and most importantly, stay clean out there!
Preparing for Container Cleaning
Let’s get real about preparing to clean your camping water containers. It’s not just about grabbing a random sponge and hoping for the best. Proper preparation is the difference between a truly sanitized container and a half-hearted wipe-down that leaves you vulnerable to potential health risks.
Gathering Your Cleaning Arsenal
First things first, you’ll need to assemble your cleaning toolkit. This isn’t a one-size-fits-all situation. Different containers require different approaches, and having the right supplies can make or break your cleaning process. Here’s what I always keep in my camping maintenance kit:
- Soft-bristled bottle brush
- Mild, unscented dish soap
- White vinegar
- Baking soda
- Microfiber cloths
- Sanitizing tablets (specifically designed for water containers)
- Rubber gloves
- Bottled water or clean tap water for rinsing
Container Material Matters
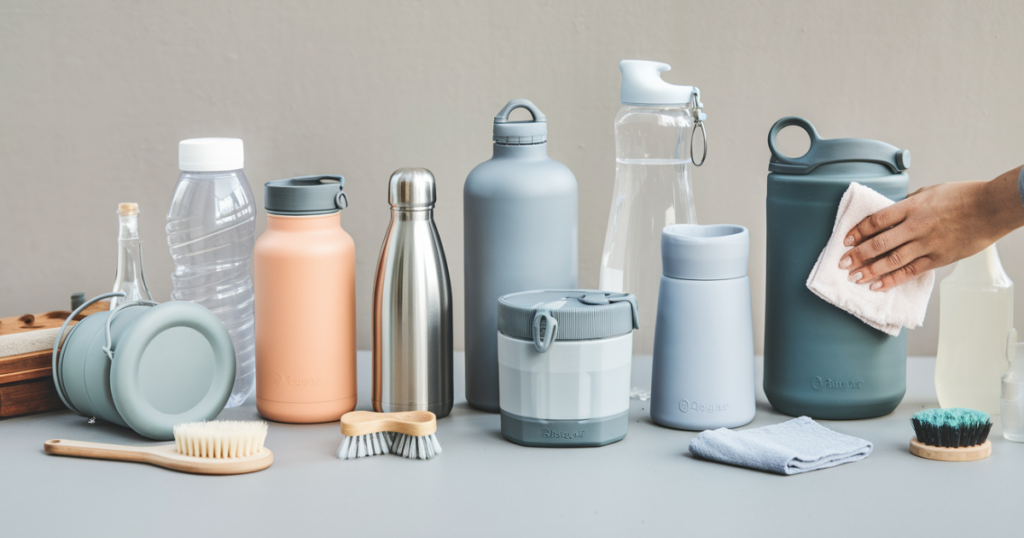
Not all water containers are created equal. The cleaning method for a rigid plastic Nalgene bottle is worlds different from cleaning a collapsible silicone container or a metal hydration pack. Each material has its own quirks:
Plastic Containers:
- Most forgiving
- Can handle mild abrasives
- Prone to scratching and odor retention
- Require gentle cleaning techniques
Metal Containers:
- More durable
- Resistant to bacterial growth
- Can handle higher temperatures
- Require careful drying to prevent rust
Collapsible Containers:
- Most challenging to clean
- Tend to trap moisture in folds
- Require extra attention to crevices
- Often need specialized cleaning tools
Pro Tip from the Field
I learned the hard way that using the wrong cleaning method can damage your container or, worse, create tiny scratches that become bacterial breeding grounds. One camping trip, I used an overly abrasive scrubber on my favorite water bottle and basically created a microscopic bacteria paradise. Learn from my mistake!
Pre-Cleaning Inspection Checklist
Before you even start cleaning, perform a thorough inspection:
- Check for visible damage or deep scratches
- Examine seals and caps for wear
- Look for any persistent odors
- Identify any mineral deposits or stubborn stains
- Ensure no cracks or potential weak points
The Sanitization Game Plan
Your cleaning approach should be strategic:
- Initial rinse with warm water
- Detailed scrubbing with appropriate cleaner
- Thorough sanitization
- Complete drying
- Proper storage
Eco-Friendly Cleaning Considerations
As outdoor enthusiasts, we’re stewards of the environment. Choose cleaning agents that:
- Are biodegradable
- Minimize chemical residue
- Won’t harm local ecosystems if accidentally released
Common Mistakes to Avoid
- Using bleach (destroys container materials)
- Skipping the drying process
- Storing containers while still damp
- Neglecting hard-to-reach areas
- Using scented soaps that can affect water taste
Time Investment
A proper cleaning might take 15-20 minutes, but it’s worth every second. Consider it an investment in your health and your future adventures. The time you spend cleaning is far less than the time you’d spend dealing with a waterborne illness in the middle of nowhere.
Final Thoughts
Preparation is your first line of defense in maintaining clean, safe water storage. Approach container cleaning with the same care and attention you’d give to checking your hiking gear or planning your route. Your health, and the success of your outdoor adventure, depends on it.
Stay prepared, stay clean, and most importantly, stay hydrated!
Step-by-Step Cleaning Process for Camping Water Containers

Let’s dive into the nitty-gritty of cleaning your camping water containers. This isn’t just about a quick rinse – it’s about creating a foolproof system that ensures your water stays crystal clear and safe from the first sip to the last drop.
Initial Rinse: The Foundation of Clean
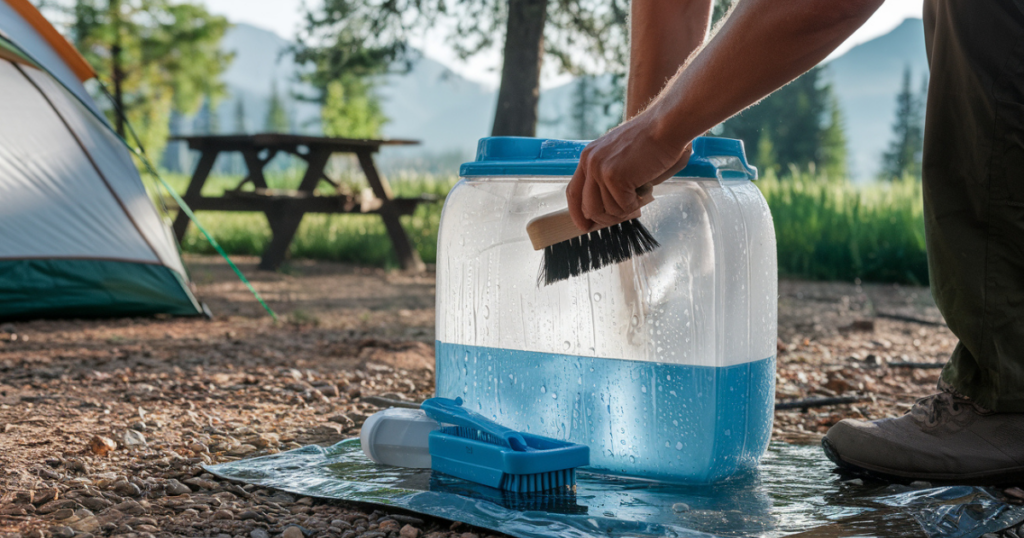
Before you break out the heavy-duty cleaning supplies, start with a simple yet crucial step. Immediately after your camping trip, rinse your container with warm water. I can’t tell you how many times I’ve made the mistake of letting a container sit for weeks, only to find a science experiment brewing inside!
What You’ll Need:
- Warm water
- Mild, unscented dish soap
- Soft-bristled bottle brush
- Clean towel or drying rack
Detailed Cleaning Process:
Step 1: Disassemble Completely
- Remove all removable parts (lids, straws, caps)
- Inspect each component for wear or damage
- Separate silicone gaskets and specialized attachments
Step 2: The Soap Solution Magic
Create a cleaning solution that’s tough on grime but gentle on your container:
- Mix warm water with a small amount of mild dish soap
- Use unscented soap to prevent taste contamination
- Avoid harsh chemicals that can damage container materials
Pro Cleaning Technique:
Fill the container about 1/4 full with the soap solution. Add a soft-bristled brush and give it a good shake. This creates a cleaning vortex that reaches those hard-to-clean corners. I learned this trick from a veteran park ranger, and it’s a game-changer!
Step 3: Scrubbing Strategy
- Use a long-handled bottle brush
- Scrub all interior surfaces thoroughly
- Pay extra attention to:
- Bottom corners
- Threads of the lid
- Any textured areas
- Hidden crevices
Tackling Stubborn Stains and Odors
Sometimes, a simple soap wash isn’t enough. Here are my go-to solutions:
Vinegar Method:
- Fill container with equal parts white vinegar and water
- Let sit for 15-20 minutes
- Rinse thoroughly
- Excellent for removing mineral deposits and neutralizing odors
Baking Soda Approach:
- Create a paste with baking soda and water
- Gently scrub interior surfaces
- Rinse completely
- Great for removing tough stains and eliminating lingering smells
Sanitization: The Critical Final Step
Killing bacteria is non-negotiable. You’ve got a few options:
- Sanitizing Tablets
- Follow package instructions carefully
- Typically require specific contact time
- Effective against a wide range of microorganisms
- Bleach Solution (Use with Caution)
- Mix 1 teaspoon of unscented bleach per quart of water
- Let sit for 2-3 minutes
- Rinse multiple times to remove all bleach residue
Drying: More Important Than You Think
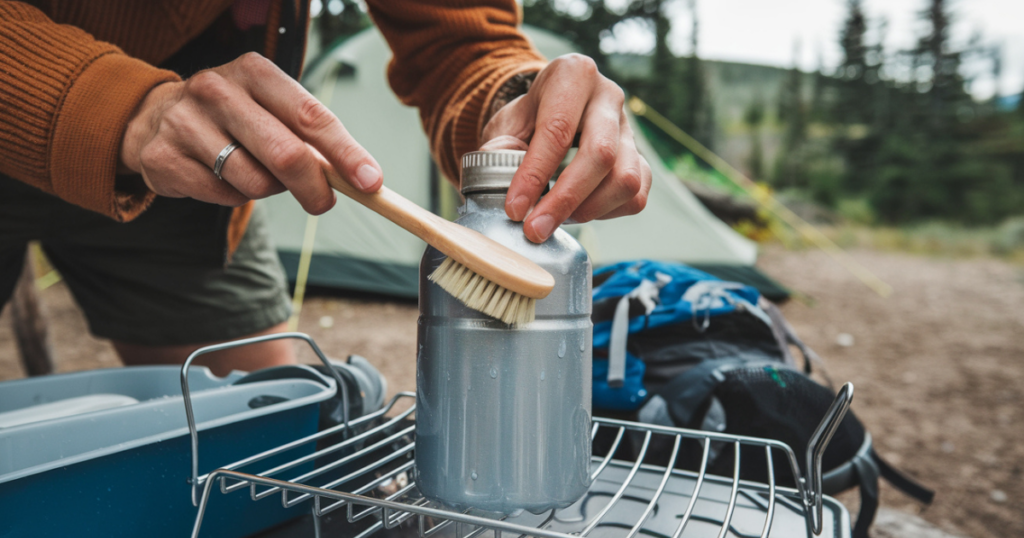
- Use a clean, lint-free towel
- Allow complete air drying
- Store with lid off to prevent moisture trap
- Never store a damp container – you’re basically inviting mold!
Special Considerations for Different Materials:
Plastic Containers:
- Avoid extremely hot water
- Use soft brushes
- Dry completely to prevent warping
Metal Containers:
- Can handle higher temperatures
- Dry immediately to prevent rust
- Use specialized metal-safe cleaning agents
Collapsible Containers:
- Most challenging to clean
- Ensure complete unfolding during cleaning
- Use thin brushes for crevices
- Dry completely before storing
Pro Tip from the Field
I once made the rookie mistake of storing a slightly damp hydration pack. Two weeks later, I opened it to find a full-blown mold ecosystem. Learn from my disaster – complete drying is non-negotiable!
Common Pitfalls to Avoid:
- Rushing the cleaning process
- Using abrasive materials
- Incomplete rinsing
- Storing before complete drying Ignoring manufacturer’s specific instructions
Final Thoughts
Cleaning your camping water container isn’t just a chore – it’s an investment in your health and future adventures. Treat this process with the same care you’d give to checking your most important gear. A clean container means safe water, and safe water means an epic outdoor experience.
Stay clean, stay safe, and keep exploring!
Common Mistakes to Avoid When Cleaning Water Containers
Let’s talk about the landmines of water container cleaning – those seemingly innocent mistakes that can turn your hydration hero into a health hazard. Trust me, I’ve made most of these errors, and each one comes with a story that’ll make you cringe.
Mistake No 1: Using Harsh Chemicals
The Bleach Blunder
I’ll never forget the time I thought dumping a ton of bleach into my water container would solve all my cleaning problems. Spoiler alert: it didn’t. Not only did I potentially damage the container’s material, but I also created a chemical cocktail that could have been more dangerous than the bacteria I was trying to eliminate.
What to Avoid:
- Excessive bleach
- Harsh household cleaners
- Alcohol-based sanitizers
- Industrial-strength chemicals
Safe Alternatives:
- Mild dish soap
- White vinegar
- Specialized water container cleaners
- Baking soda solutions
Mistake No 2: Incomplete Rinsing
The Soapy Surprise
Water that tastes like a dishwashing liquid explosion? Been there, done that. Incomplete rinsing can leave behind chemical residues that not only taste awful but can potentially cause digestive issues.
Rinsing Pro Tips:
- Rinse multiple times
- Use clean, fresh water
- Check for any soap bubbles or residue
- Taste test after final rinse
Mistake No 3: Neglecting Hard-to-Reach Areas
The Hidden Danger Zones
Threads, corners, and those tiny crevices are bacteria’s favorite vacation spots. I once found a layer of gunk in the threads of my water bottle that looked like it could qualify for its own ecosystem.
Critical Areas to Clean:
- Lid threads
- Valve mechanisms
- Bottom corners
- Silicone gaskets
- Straw attachments
Cleaning Tools:
- Soft-bristled bottle brush
- Cotton swabs
- Narrow cleaning tools
- Compressed air (for intricate mechanisms)
Mistake No 4: Storing Containers While Wet
The Mold Mansion
Moisture is mold’s best friend. I learned this the hard way after storing a “mostly dry” hydration pack and discovering a science experiment a week later. Now, I’m militant about complete drying.
Drying Best Practices:
- Use clean, lint-free towels
- Air dry completely
- Store with lid off
- Use drying rack or stand
- Ensure 100% moisture removal
Mistake No 5: Ignoring Manufacturer’s Instructions
The Warranty Killer
Each container is unique. What works for a metal bottle might destroy a silicone collapsible container. Always, always check the manufacturer’s cleaning guidelines.
What to Check:
- Recommended cleaning agents
- Temperature limitations
- Specific care instructions
- Warranty conditions
Mistake No 6: Using Abrasive Cleaning Tools
The Scratch Trap
Those super-tough scrubbers might seem like a good idea, but they’re creating microscopic scratches that become bacterial breeding grounds. I once used a metal scrubber on a plastic container and essentially created a bacteria superhighway.
Safe Cleaning Tools:
- Soft-bristled brushes
- Microfiber cloths
- Specialized container cleaning tools
- Avoid metal scrubbers
- Use gentle, non-abrasive materials
Mistake No 7: Inconsistent Maintenance
The Sporadic Cleaner
Cleaning your water container shouldn’t be a “maybe” activity. Consistency is key to preventing buildup and maintaining water quality.
Maintenance Schedule:
- Clean after every trip
- Deep clean monthly
- Sanitize between extended uses
- Inspect regularly for wear
Personal Cautionary Tale
During a multi-day hiking trip in the Sierra Nevada, I discovered the consequences of poor container maintenance. Halfway through our trek, our entire group started experiencing stomach issues. The culprit? Poorly maintained water containers that hadn’t been properly cleaned or dried.
The Financial and Health Impact
- Potential medical expenses
- Lost adventure time
- Risk of serious waterborne illnesses
- Replacement of damaged equipment
Bonus Pro Tips:
- Keep a dedicated cleaning kit
- Set reminders for container maintenance
- Invest in quality cleaning tools
- Prioritize prevention over cure
Final Takeaway
Cleaning your water container isn’t just a chore – it’s a critical step in ensuring your outdoor safety and enjoyment. These mistakes aren’t just theoretical; they’re lessons learned from real-world experiences that could have been avoided with proper care and attention.
Stay vigilant, stay clean, and most importantly, stay healthy out there!
Specialized Cleaning Techniques for Different Container Materials

Water containers come in various materials, each with its own unique cleaning challenges. What works for a stainless steel bottle might spell disaster for a collapsible silicone container. Let’s dive into the specialized cleaning techniques that’ll keep your hydration gear in top shape.
Plastic Water Containers: The Most Common Culprit
Plastic containers are the workhorses of the camping world – lightweight, affordable, and typically pretty forgiving. But they’re not indestructible.
Cleaning Challenges:
- Prone to odor retention
- Can develop micro-scratches
- Sensitive to temperature changes
- Potential for chemical leaching
Cleaning Technique:
- Use lukewarm water (avoid extreme temperatures)
- Mild, unscented dish soap
- Soft-bristled brush
- Baking soda paste for stubborn odors
- Avoid harsh scrubbers
- Never use boiling water
Pro Tip: Baking Soda Odor Elimination
Create a paste with baking soda and water. Let it sit in the container for 15-20 minutes, then rinse thoroughly. This works magic on those funky smells that seem impossible to remove.
Metal Water Storage Systems: Durability Meets Complexity
Stainless steel and aluminum containers offer durability but require a nuanced approach.
Unique Considerations:
- Resistant to bacterial growth
- Can develop rust if not properly maintained
- Potential for mineral buildup
- Temperature-sensitive coatings
Cleaning Arsenal:
- White vinegar solution
- Mild dish soap
- Soft cloth or non-abrasive sponge
- Specialized metal cleaning tablets
- Avoid chlorine-based cleaners
Rust Prevention Technique:
- Dry immediately after cleaning
- Store in a cool, dry place
- Apply a thin layer of food-grade mineral oil to prevent oxidation
Collapsible Water Containers: The Cleaning Challenge Champion
These space-saving marvels are the most difficult to clean thoroughly.
Unique Challenges:
- Multiple folding surfaces
- Tendency to trap moisture
- Complex folding mechanisms
- Difficult to reach all surfaces
Specialized Cleaning Approach:
- Completely unfold container
- Use long, thin brushes
- Compressed air for hard-to-reach areas
- Sanitizing tablets designed for flexible containers
- Ensure 100% drying between folds
Hydration Bladder Special Care
These are the most complex water storage systems, typically used in hiking backpacks.
Critical Cleaning Steps:
- Separate drinking tube
- Use specialized cleaning tablets
- Hang to dry completely
- Store with tube disconnected
- Use compressed air to ensure no moisture remains
Universal Cleaning No-Nos:
- Never use bleach on any container
- Avoid extremely hot water
- Don’t use abrasive materials
- Never store when slightly damp
- Skip manufacturer-specific instructions
Material-Specific Red Flags:
Plastic:
- Warping from heat
- Chemical leaching
- Odor retention
Metal:
- Rust development
- Coating damage
- Mineral buildup
Collapsible:
- Mold in fold creases
- Bacterial growth
- Material degradation
Advanced Sanitization Techniques:
- UV light sanitization
- Specialized cleaning tablets
- Hydrogen peroxide solution
- Vinegar and water mix
- Enzymatic cleaners
Budget-Friendly Cleaning Hack:
Mix equal parts white vinegar and water. Let sit for 15 minutes, then rinse thoroughly. This works across most container materials and costs next to nothing.
The Financial Perspective
Proper cleaning extends container life:
- Prevents premature replacement
- Maintains water quality
- Reduces health risks
- Saves money long-term
Final Thoughts
Your water container is more than just a vessel – it’s a critical piece of safety equipment. Treat it with the respect it deserves. Each material has its quirks, but with the right approach, you can keep your hydration system clean, safe, and ready for your next adventure.
Stay hydrated, stay clean, and keep exploring!
Conclusion:
Remember that fateful day in the Cascade Mountains when a moldy water container nearly derailed our entire expedition? That moment taught me more than just a lesson about container cleaning – it became a turning point in understanding the critical importance of water management in outdoor adventures.
What started as a personal nightmare has transformed into a mission to help fellow outdoor enthusiasts avoid the same mistakes. Cleaning your camping water containers isn’t just a mundane chore – it’s your first line of defense against potential health risks and trip-ending disasters.
Let’s recap the journey we’ve taken:
- We explored why clean water containers are crucial
- Learned the step-by-step cleaning process for different materials
- Discovered common mistakes to avoid
- Understood specialized cleaning techniques
But beyond the technical details, there’s a deeper truth: Your water container is more than just a piece of gear. It’s your lifeline in the wilderness. It’s the difference between an epic adventure and a medical emergency. Those 15-20 minutes of careful cleaning can save you days of potential illness and disappointment.
Don’t wait for your own moldy water container moment. Start implementing these cleaning techniques today. Make container maintenance a non-negotiable part of your post-trip routine. Your future self – hiking those beautiful trails, enjoying breathtaking views, and staying healthy – will thank you.
Stay safe, stay hydrated, and never underestimate the power of a clean water container!
FAQ:
1. How often should I clean my camping water storage container?
You should clean your camping water storage container after every trip to remove any residue, bacteria, or mold that might have formed. If you’re using the container for long-term storage, clean it every few months and before refilling it with fresh water.
2. Can I use regular dish soap to clean my water container?
Yes, you can use mild dish soap to clean your water container, but make sure it’s thoroughly rinsed to avoid any soapy taste. For deeper cleaning, use natural solutions like vinegar or baking soda, or a food-safe specialized cleaner.
3. Is it safe to use bleach to clean my water storage container?
Yes, bleach is safe for cleaning water containers when used in small amounts. Mix 1 tablespoon of bleach with 1 gallon of water, let it sit for 15 minutes, and then rinse thoroughly. Always air dry the container to remove any lingering bleach smell.
4. How do I prevent algae from growing in my water container?
To prevent algae, avoid storing your water container in direct sunlight and make sure it’s completely dry before storage. Using opaque containers can also help reduce light exposure, which algae thrive on.
5. What’s the best way to store water containers when not in use?
Store your containers dry, with the lids off, in a cool and dry location. This prevents mold and mildew from forming and ensures the container is ready for use on your next trip.
