Introduction:
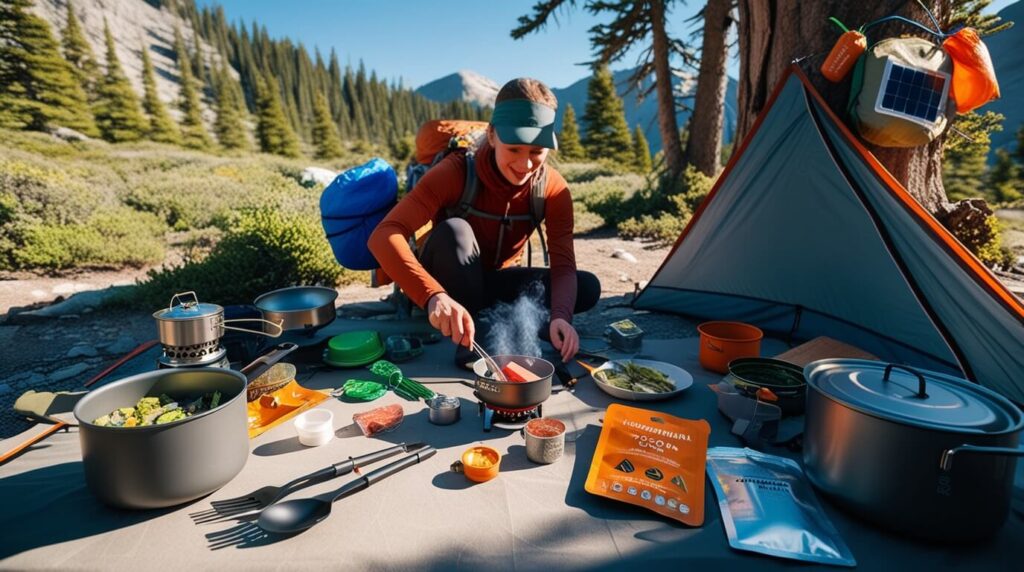
Nothing beats the satisfaction of cooking a delicious meal under the open sky! But if you’ve spent any time camping, you know that fuel efficiency isn’t just about saving money or packing light—it’s about respecting the wilderness we love exploring. I’ve learned this lesson the hard way over countless camping trips, watching precious fuel dwindle too quickly on long expeditions.
Whether you’re a weekend warrior or planning an extended backcountry adventure, mastering fuel-efficient camp cooking techniques can dramatically enhance your outdoor experience.
According to recent outdoor recreation surveys, inefficient cooking methods can waste up to 60% more fuel than necessary—a statistic that shocked me when I first began researching this topic!
Essential Fuel-Efficient Camp Cooking Equipment
I’ll never forget my first multi-day backpacking trip through the Cascades. I’d packed enough fuel for what I thought was a week of cooking, only to run completely dry by day four! Talk about a rookie mistake. Since then, I’ve become somewhat obsessed with fuel efficiency in my camp kitchen—both to lighten my load and to avoid that sinking feeling when you realize you’re down to cold-soaking oatmeal for the next three days.

After years of trial and error (and trust me, there was plenty of error), I’ve figured out what equipment actually makes a difference when it comes to saving fuel. It’s not just about buying the fanciest stove—it’s about creating an entire cooking system that maximizes every ounce of fuel you carry.
Choosing the Right Stove for Fuel Efficiency
Integrated Canister Stoves
Let’s start with stoves. The market in 2025 has evolved dramatically from when I first started camping. Integrated canister stoves like the JetBoil and MSR Reactor systems remain top performers for pure efficiency, with some newer models achieving a 90% heat transfer rate.
That’s incredible compared to the roughly 40% efficiency of the cheap stove I started with! The FluxRing or similar heat exchanger technology makes a massive difference by capturing heat that would otherwise escape around the sides of your pot.
Cold Weather Challenges
But here’s something they don’t tell you in the marketing—canister stoves struggle in cold weather and at high elevations. I learned this the hard way on a February trip when my fuel output dropped to a pitiful trickle.
If you’re camping in cold conditions, you might actually save fuel with a liquid fuel stove like the MSR WhisperLite, which performs consistently in all temperatures. Just remember to keep your canisters warm by sleeping with them in your bag!
Alcohol Stoves for Ultralight Trips
For ultralight trips, alcohol stoves are still hard to beat for weight, though they’re slower. I’ve found the Trail Designs Caldera Cone system to be astonishingly efficient because it combines a windscreen and pot stand in one integrated unit.
The Importance of Windscreens
Speaking of windscreens—never skip using one! On a breezy day, a good windscreen can reduce fuel consumption by up to 30%. I once did a side-by-side test with identical stoves, and the difference was shocking.
Cookware: A Key Player in Efficiency
Material Matters
Your cookware matters just as much as your stove. Titanium might be ultralight, but aluminum actually conducts heat more efficiently. Some of the newer aluminum pots with heat-exchanger fins on the bottom can bring water to a boil using about half the fuel of a standard pot. The extra 2 ounces of pot weight saves me several ounces in fuel on longer trips—a trade-off worth making.
Insulated Cooking
One game-changer I discovered a few years back was insulated cooking. After bringing water to a boil, I’ll place my pot in an insulated cozy (you can DIY one with reflective bubble wrap) and let pasta or rice cook through residual heat. No more simmering for 10 minutes! This technique alone cut my fuel usage by nearly 40% on my last trip.
Useful Add-Ons to Boost Efficiency
Heat Reflectors
For those really committed to efficiency, consider a heat reflector placed under your stove. This simple piece of aluminum foil or a more durable manufactured reflector bounces heat back up that would otherwise be lost to the ground. It’s especially useful when cooking on snow, where heat loss happens rapidly.
Pot Lids
And don’t overlook pot lids! A proper-fitting lid can reduce boil times by 30%. I can’t believe I used to cook without one, watching precious heat escape into the mountain air.
Radiation-Efficient Cookware
The newest development I’m excited about is radiation-efficient cookware that actually maintains its temperature longer through special coatings. These pots aren’t cheap, but for long expeditions, they pay for themselves in fuel savings.
Remember—the most fuel-efficient setup combines the right stove, appropriate cookware, and smart accessories like windscreens and insulators. It’s the system as a whole that creates efficiency, not just one magical piece of gear.
And nothing beats the peace of mind knowing you’ve got more than enough fuel to enjoy hot meals throughout your entire adventure.
Mastering One-Pot Cooking Techniques
I used to be that camper who packed half their kitchen for a weekend trip. No joke—multiple pots, a frying pan, and enough utensils to host a wilderness dinner party! My pack was ridiculously heavy, and I was burning through fuel like it was unlimited.
Then about five years ago, my stove broke halfway through a 7-day trip in the Rockies, forcing me to ration my remaining fuel with military precision.
That experience completely transformed how I approach camp cooking. One-pot meals became my salvation, and honestly, I’ve never looked back.
Why One-Pot Cooking Works
The beauty of one-pot cooking isn’t just about saving fuel, though it absolutely does that. It’s about simplifying your entire camp kitchen setup while creating meals that are actually more flavorful because everything cooks together. Win-win, right?
Practical Strategies for One-Pot Meals
Understand Cooking Times and Layering
Let’s talk practical strategies. The key to successful one-pot cooking is understanding cooking times and building your meal in layers. I’ve ruined countless meals by throwing everything in simultaneously, ending up with mushy vegetables and undercooked rice. Not exactly gourmet trail food!
Here’s what works instead: Start with ingredients that need the longest cooking time, then add each component in sequence. For instance, when making my go-to trail curry, I’ll first sauté some dehydrated onions in a tiny bit of olive oil (carried in a mini bottle), add spices to bloom their flavors, then add the longest-cooking ingredient—typically rice.
Once that’s partially cooked, in go the quicker-cooking elements like freeze-dried vegetables and pre-cooked proteins.
Pre-Soaking for Maximum Efficiency
Pre-soaking is absolutely crucial for fuel efficiency. I cannot stress this enough! Soaking rice, quinoa, or dehydrated beans in cold water for just 20 minutes while you set up camp can cut cooking time—and fuel usage—nearly in half.
I keep a small sealable container just for this purpose. Sometimes I even start soaking ingredients in the morning inside my pack if I know I want them for dinner.
Managing Heat to Save Fuel
Simmering Smartly
Temperature management is another game-changer. Most campers make the mistake of cooking everything on high heat, which wastes incredible amounts of fuel. Once you’ve hit a boil, immediately reduce to the lowest flame possible that maintains a simmer. With a good insulated pot cozy, you can even turn off the flame entirely for the final few minutes of cooking, letting residual heat finish the job.
The “Steep-Finish” Method
My absolute favorite fuel-saving technique is what I call the “steep-finish.” After bringing your one-pot meal to a boil and cooking it about 70% of the way, simply turn off your stove, cover tightly, wrap in an insulated cozy or clothing, and let it steep for 10–15 minutes.
This works amazingly well for rice dishes, pastas, and even some stews. I’ve measured the temperature loss, and a good insulated setup only drops about 10–15 degrees over 15 minutes—plenty hot enough to finish cooking without using a single BTU more fuel.
Flavor Boosters That Pack Light
Umami-rich ingredients are your best friends for one-pot wilderness cooking. A tiny packet of miso paste, some dried mushrooms, or a bouillon cube can transform basic ingredients into something that tastes like it took hours to prepare. These flavor bombs add minimal weight but maximum impact.
Portion Control and Heat Efficiency
One mistake I see folks make is trying to cook too much food at once. When your pot is too full, heat distribution becomes inefficient, cooking times increase, and you burn through fuel. I’ve found that cooking slightly smaller portions more efficiently, then filling out meals with no-cook items like nuts, cheese, or tortillas, is much more fuel-efficient.
Trail Favorite: Backcountry Coconut Curry Rice
Let me share a specific recipe that’s become my trail signature: “Backcountry Coconut Curry Rice.”
Start by soaking instant rice for 15 minutes. In your pot, sauté a spoonful of curry powder with a tiny bit of oil for 30 seconds—this blooms the spices and makes a massive flavor difference. Add the drained rice, a packet of coconut powder (game-changer!), some dehydrated vegetables, and just enough water to cover.
Bring to a boil, stir once, then immediately reduce to lowest heat for 5 minutes. Turn off your stove, cover, and let sit in a cozy for 10 minutes. Finish with a sprinkle of cashews and a squeeze of lime (yes, I pack a lime for day one dinner—small luxuries matter!).
The best compliment I ever received was when a hiking partner accused me of packing in pre-made meals because she couldn’t believe something so delicious came from a single pot on a tiny backpacking stove. Little did she know it actually used less fuel than her freeze-dried meal!
What one-pot wilderness meals have you mastered? I’m always looking to expand my backcountry cookbook with efficient new recipes!
Alternative Heat Sources for Zero-Fuel Cooking
I still remember the stunned looks on my hiking buddies’ faces when I pulled out a fully cooked meal at our lunch break without ever lighting a stove. “What sorcery is this?” one of them asked. I just smiled and pointed to the black tube that had been strapped to the outside of my pack all morning—my portable solar cooker. That moment converted at least two of them to the zero-fuel cooking lifestyle!
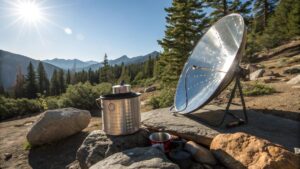
After years of meticulously rationing white gas and canister fuel, discovering alternative heat sources completely revolutionized my approach to wilderness cooking. Not only did it lighten my pack by eliminating fuel weight, but it also connected me more deeply to my environment. There’s something primitively satisfying about harnessing the sun or natural heat to prepare a meal.
Solar Cooking: Harnessing the Sun
Learning the Basics
Let’s start with what I consider the gateway to fuel-free cooking: solar cookers. My first attempt with a DIY solar funnel (made from cardboard and aluminum foil) was an epic failure—lukewarm soup after three hours in “partial sun” that I stubbornly insisted was “sunny enough.” Lesson learned! Proper solar cooking requires understanding some basic principles.
You need direct sunlight, proper alignment toward the sun, and appropriate cookware—typically dark-colored vessels that absorb heat rather than reflect it.
Modern Solar Cookers in Action
The commercially available tube-style solar cookers now reach temperatures of 350°F in full sun, which is hot enough to actually bake bread! I’ve successfully made everything from rice to stews using only solar energy. The trick is timing—starting your meal prep around 10am usually ensures enough cooking time before the late afternoon sun weakens. And always have a backup plan, because clouds happen to the best of us.
Thermal Cooking: Retained Heat, No Flame
The Haybox Method (Modernized)
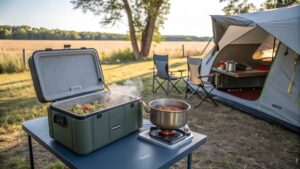 On the opposite end of the spectrum is thermal cooking, which uses retained heat rather than continuous external heat. My favorite thermal method is the classic “haybox” approach, modernized with today’s insulators. Here’s how I do it: bring your one-pot meal to a full boil for 2–3 minutes, then immediately seal it in an insulated container.
The retained heat continues cooking your food for hours without additional fuel. I’ve used everything from purpose-built thermal cookers to DIY setups using sleeping bags or jackets wrapped around my cookpot.
I once made a delicious lentil stew this way during a winter hike—started it boiling at breakfast, packed it in an insulated pouch, and by lunchtime, it was perfectly cooked and still hot enough to warm my hands! The secret is starting with boiling-hot food and using sufficient insulation to minimize heat loss.
Primitive Methods: Cooking with Natural Heat
Hot Rock Cooking
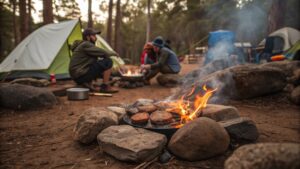 For those comfortable with more primitive skills, cooking with natural heat sources can be both rewarding and practical. Hot rock cooking is an ancient technique I’ve experimented with while practicing minimal-impact camping.
Heat several fist-sized rocks in your campfire (avoiding porous or wet rocks which can explode—learned that one the hard way!), then carefully transfer them to a pot containing pre-soaked ingredients. The rocks release their stored heat slowly, cooking your food without maintaining a flame.
Earth Oven Magic
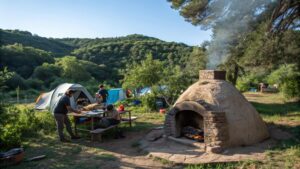 Earth ovens take this concept further—dig a pit, heat rocks inside it, add food wrapped in leaves or foil, then cover with soil. This works amazingly well for roots, tubers, and slow-cooking meats if you’re not concerned about cooking time. I tried this once on a beach camping trip, cooking sweet potatoes to perfection over about four hours while we explored tide pools.
Hybrid Approach: Minimal Fuel Meets Heat Retention
One of my favorite hybrid approaches combines minimal fuel with heat retention. I call it the “pre-heat parboil“—use just enough fuel to bring food to temperature, then immediately wrap your pot in multiple layers of insulation (sleeping bag, puffy jacket, etc.) and let it finish cooking over an hour or two. This works particularly well for dense foods like beans or whole grains that benefit from slow cooking.
Uncommon but Useful: Natural Hot Water Sources
Hot water from natural sources occasionally presents unique opportunities, though they’re rare. During a trip through Yellowstone’s backcountry, I experimented with placing sealed food packages in hot spring runoff channels (being extremely careful not to contaminate the water).
The steady 180°F water temperature slowly cooked vacuum-sealed meals over about 45 minutes. This is obviously site-specific and requires stringent adherence to leave-no-trace principles—never place anything directly in hot springs!
Parabolic Reflectors: Tiny Tools, Big Results
My most recent obsession is with pocket-sized parabolic reflectors that concentrate sunlight with surprising efficiency. These ultralight options weigh under 3 ounces but can bring a cup of water to boil in about 20 minutes on a clear day. The learning curve is steep—you need to reposition them constantly as the sun moves—but the fuel savings are worth the effort for longer trips.
The Realities of Zero-Fuel Cooking
Let’s be real though—every alternative cooking method requires specific conditions and usually takes longer than traditional stoves. I’ve had my share of half-cooked meals and hangry hiking partners when conditions weren’t ideal! The key is flexibility and having simple backup options ready. I always pack some ready-to-eat items that don’t require cooking when experimenting with alternative heat sources.
Advanced Techniques for Serious Backcountry Chefs
When I first started backpacking, I thought camp cooking meant either ramen bombs or expensive freeze-dried meals. Boy, was I wrong! After years of experimentation (and some spectacular failures my hiking buddies still tease me about), I’ve discovered that backcountry cooking can be both fuel-efficient and gourmet.
These advanced techniques aren’t for the casual weekend warrior—they require some investment and practice—but they’ll revolutionize your wilderness culinary experience.
Pressure Cooking in the Backcountry
Let me tell you about my complete game-changer: pressure cooking in the backcountry. I was skeptical at first—who wants to carry the extra weight? But after a fellow hiker showed me how her ultralight 1.5L pressure cooker could cook beans from scratch in 15 minutes using roughly 60% less fuel than conventional cooking, I was sold. I invested in a backpacking-specific pressure cooker, and it’s paid for itself many times over in fuel savings.
How It Works
The science behind pressure cooking is fascinating—by increasing the pressure, you raise the boiling point of water, which dramatically accelerates cooking. Black beans that would normally take 60+ minutes to cook are done in under 20! The fuel savings are enormous, especially for longer trips or when cooking for groups.
The trick is finding one light enough to justify carrying—my titanium model weighs 12 ounces, which I easily make up for in fuel savings on trips longer than 4 days.
Mastering Cold-Soaking
Cold-soaking is another technique that serious backcountry chefs have mastered, and it requires zero fuel. I was resistant to this method for years—who wants cold food after a long day of hiking? But I’ve since become a convert for certain meals.
The key is choosing the right ingredients and enhancing flavors creatively. Couscous, instant rice, dried mashed potatoes, and most ramen will fully hydrate in cold water given enough time (usually 1–2 hours).
My Go-To Cold Soak Recipe
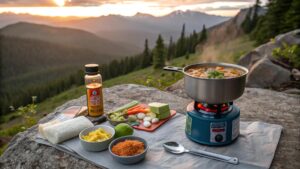
My go-to cold soak lunch is what I call “Mediterranean Couscous”—I add couscous, dehydrated hummus powder, olive oil, sun-dried tomatoes, and a little seasoning to a leakproof container with cold water in the morning.
By lunchtime, I have a delicious, no-cook meal that saved both fuel and time. The secret to palatable cold-soaked meals is abundant seasoning and added fats—cold food needs more flavor enhancement than hot food.
Cooking Over Fire Efficiently
For those who prefer cooking over fire, mastering efficient fire management will save enormous amounts of time and energy. Most backpackers make the rookie mistake of cooking over flames—a guaranteed way to scorch your dinner and waste energy.
Instead, build a small, concentrated fire and let it burn down to hot coals before cooking. This provides more consistent heat and requires far less wood.
The Dakota Fire Hole Method
The Dakota fire hole technique changed my fire cooking game completely. By digging two connected holes—one for the fire and another as an air intake—you create a highly efficient, nearly smokeless cooking fire that uses about 30% of the wood of a traditional campfire.
It’s essentially an underground rocket stove! The concentrated heat column is perfect for cooking, though it does require suitable ground conditions and proper restoration afterward.
Adjusting for High Altitude Cooking
Altitude presents unique challenges that demand adaptive techniques. At 10,000 feet, water boils at around 194°F instead of 212°F, significantly increasing cooking times and fuel consumption. I learned this the hard way on my first high-altitude trip when my carefully rationed fuel ran out two days early!
Adapting Your Approach
For high-elevation cooking, I now use a combination of approaches: slightly increasing water temperature using a pressure cooker when possible, extending pre-soaking times to 2–3 times normal, and choosing ingredients that cook fully at lower temperatures.
Group Cooking with the Stacking Method
For serious fuel efficiency when cooking for groups, consider the “stacking method.” This involves using a tall pot with a steamer basket and multiple levels. The bottom layer might contain a stew or soup, while the upper sections steam vegetables or dumplings simultaneously using the same heat source.
I’ve successfully cooked a complete meal for four people using about the same fuel I’d normally use for a single pot! The key is thoughtful layering based on cooking times and managing condensation between layers.
Thermos Cooking for Fuel-Free Simmering
Thermos cooking is one of my favorite techniques for long days on the trail. Before breaking camp in the morning, I bring ingredients to a boil, then transfer them to a quality vacuum insulated container. By lunchtime or dinner, the food has continued cooking using only the initial heat input.
This works beautifully for ingredients that benefit from slow cooking like oats, quinoa, and soups. The efficiency is incredible—essentially free cooking using heat you’ve already generated.
Ultralight Options: Alcohol Burners + Windscreens
For those dedicated to ultralight philosophy who still want hot food, consider alcohol burners with double-wall titanium pots. When properly tuned, this combination offers the lightest possible cooking system while still providing adequate heat.
Maximizing Efficiency
The trick is creating a perfect wind screen custom-fitted to your pot. Through meticulous testing (I’m talking spreadsheets and stopwatches), I’ve found that a well-designed windscreen can improve alcohol stove efficiency by up to 40%! The fuel savings more than compensate for the extra ounce of windscreen weight.
Evaluating Biolite Stoves
The biolite stoves that generate electricity from cooking heat sound miraculous on paper, but my real-world testing showed mixed results for fuel efficiency. While they do generate usable power for charging small devices, they require more fuel than traditional stoves to maintain the necessary heat. I reserve these for trips where power generation is a priority over absolute fuel efficiency.
Timing is Everything: Use a Kitchen Timer
Don’t overlook the humble kitchen timer as a fuel-saving tool! Most backpackers significantly overcook their food out of caution, wasting precious fuel. I time every cooking session precisely and have saved remarkable amounts of fuel simply by not cooking one minute longer than necessary.
It sounds trivial, but over a 10-day trip, those minutes add up to an entire meal’s worth of fuel.
Measuring True Efficiency: Calories Per Fuel Unit
For the scientifically-minded backcountry chef, consider measuring your fuel efficiency in calories-per-fuel-unit. I track how many calories each meal provides versus how much fuel it requires to prepare.
The most efficient meals I’ve developed deliver over 200 calories per gram of canister fuel consumed! This approach helps identify truly efficient recipes versus those that merely seem efficient.
What advanced backcountry cooking techniques have you mastered? I’m always excited to learn new fuel-saving methods from fellow wilderness chefs!
Environmental Impact and Leave No Trace Cooking
I’ll never forget the moment that completely changed my perspective on wilderness cooking. I was hiking in a popular national park and stumbled upon a pristine alpine lake—except it wasn’t so pristine. The shoreline was dotted with charred fire rings, discarded fuel canisters, and even food waste. It hit me like a punch to the gut: my personal cooking choices in the backcountry have real environmental consequences.
Since that day, I’ve become borderline obsessive about minimizing my environmental impact while cooking in wild places. And here’s what I’ve learned: fuel-efficient cooking isn’t just about saving weight or money—it’s fundamentally an environmental practice.
The Carbon Footprint of Cooking Fuels
Let’s start with the elephant in the room: the carbon footprint of different cooking fuels. After diving deep into research (yes, I’m the kind of person who reads environmental impact studies for fun), I discovered that not all camping fuels are created equal when it comes to emissions.
Isobutane canister stoves produce roughly 12% fewer carbon emissions than white gas stoves per boiled liter of water. However, the manufacturing and disposal impacts of those metal canisters largely negate this advantage unless you’re meticulous about recycling them properly.
Responsible Fuel Canister Disposal
Speaking of those fuel canisters—they present a real disposal challenge! For years, I’d just toss empty canisters in the trash, thinking they were empty enough. Big mistake! I now know that properly emptying a canister involves using every last bit of fuel, then puncturing it once empty (in a well-ventilated area) to show it’s depressurized before recycling.
Many outdoor retailers now offer recycling programs specifically for fuel canisters, which I make use of religiously.
Biofuels and Alcohol Stoves
Alcohol stoves present an interesting environmental alternative, especially when using denatured alcohol derived from renewable sources rather than petroleum-based fuels. While they’re slightly less efficient in pure heat output, the fuel itself has a lower environmental impact across its lifecycle.
I’ve switched to bioalcohol fuels for shorter trips precisely for this reason. The emissions difference over a weekend might be tiny, but hey—if everyone made that small change, it would add up!
The Pros and Cons of Wood-Burning Stoves
Wood-burning stoves occupy a complicated position in the environmental impact spectrum. On one hand, they eliminate the need for packaged fuels entirely. On the other hand, they consume local biomass that plays important ecological roles in forest systems.
I restrict my use of wood stoves to areas where fallen wood is genuinely abundant and where fire regulations permit. In alpine or desert environments where woody material regenerates slowly, I never use wood-burning options.
Choosing Efficient Stoves for Fragile Ecosystems
When camping above the treeline or in fragile ecosystems, I’ve found that integrated canister stoves with heat exchangers offer the best environmental compromise. Their extreme fuel efficiency means I carry and ultimately dispose of fewer canisters.
My current setup uses 30% less fuel than my old traditional canister stove, which means one less canister to recycle on longer expeditions.
Conserving Water Through Smart Meal Design
Water usage in camp cooking is an environmental factor most hikers completely overlook. The “one-pot method” isn’t just fuel-efficient—it dramatically reduces water consumption compared to cooking multiple items separately.
On trips in arid environments where water is precious, I plan meals specifically to minimize cooking water. Instant mashed potatoes require far less water than pasta, for instance, which can make a real difference when every drop counts.
Low-Waste Meal Planning
The biggest environmental revelation in my backcountry cooking journey was realizing how meal planning affects impact. Pre-cooking and dehydrating meals at home not only saves fuel in the field but also allows me to properly dispose of food scraps and packaging in my home compost and recycling systems rather than packing them out from the wilderness.
Those individual seasoning packets from commercial backpacking meals create a surprising amount of non-recyclable waste!
Leave No Trace Dishwashing
For cleaning up after cooking, I’ve developed a system that uses minimal water while leaving no trace. I eat every last bit of food (not difficult after a day of hiking!), then clean my pot with just a tiny bit of water and a scraper tool.
This “wash water” is strained through a small piece of fine mesh (to catch any food particles) before being dispersed widely, at least 200 feet from water sources. The collected food particles go into my waste bag to pack out. It’s a far cry from my early days of dumping dirty dishwater directly into streams (cringe).
Responsible Fire Use in the Backcountry
Let’s talk about fire cooking, which I’ve largely abandoned except in established fire rings at developed campgrounds. The truth is that even small cooking fires create lasting impacts, from charred rocks to sterilized soil underneath.
In high-use wilderness areas, the cumulative impact of thousands of individual fire sites is devastating to the local ecology. My personal policy now is simple: if I’m in a pristine area with no established fire ring, I don’t make a fire, period. My stove provides all the cooking heat I need without scarring the landscape.
Pack Out Everything—Even the Little Things
For waste management, I’ve embraced what I call the “complete carry” system—I pack out everything, including things many hikers don’t think about. Used tea bags, apple cores, citrus peels—it all goes back home with me.
While technically biodegradable, these items decompose extremely slowly in many environments and can disrupt wildlife feeding patterns. I keep a dedicated ziplock bag lined with a compostable bag specifically for food waste.
Precision Portions to Reduce Waste
One environmental practice I’ve adopted that raises eyebrows among hiking partners is pre-measuring exactly the right amount of food for each meal. This precision means I never have food waste to pack out or dispose of. I’ve spent enough time fine-tuning my portions that I know exactly how much couscous I’ll eat after a 15-mile day!
Carbon Offsetting for Conscious Campers
Carbon offsetting has become part of my overall outdoor ethics. I actually calculate the approximate emissions from my stove fuel usage on longer trips and purchase small carbon offsets to counterbalance them. It’s a tiny amount—usually less than the cost of a coffee—but it helps me remain conscious of my environmental impact even in small ways.
Teaching by Example
Teaching these practices has become important to me as well. Rather than lecture fellow campers about their habits (nobody likes that person!), I quietly demonstrate low-impact cooking techniques and share my food when appropriate. Several hiking friends have adopted my methods after tasting the results and seeing how simple the cleanup can be.
Efficiency and Environmentalism Go Hand-in-Hand
The satisfying thing about environmentally-conscious camp cooking is that it aligns perfectly with the fuel efficiency techniques we’ve discussed throughout this guide. The most fuel-efficient approaches are almost always the most environmentally friendly as well. By mastering these skills, you’re not just saving fuel and weight—you’re helping preserve the wilderness experiences we all cherish.
What environmental cooking practices have you incorporated into your backcountry routine? I’m always looking for ways to further reduce my impact while enjoying amazing meals in beautiful places!
My Extra Go-To Fuel-Efficient Recipes
Efficiency doesn’t mean sacrificing flavor! Here are three of my favorite trail recipes optimized for minimal fuel use:
One-Pot Mediterranean Couscous (Cooking Time: 5 minutes)
Ingredients:
- 1 cup couscous
- 1¼ cups water
- 2 tablespoons olive oil (carried in a small bottle)
- ¼ cup sun-dried tomatoes (rehydrate while hiking)
- ¼ cup crumbled feta cheese (works fine for 2-3 days without refrigeration)
- 2 tablespoons pine nuts
- 1 teaspoon dried herbs (basil, oregano, thyme mix)
- Salt and pepper to taste
Method:
- Bring water to a boil with a pinch of salt
- Add couscous, stir once, turn off heat and cover
- Let sit in the covered pot for 5 minutes
- Fluff with fork, add remaining ingredients, stir and enjoy
This meal requires minimal active cooking time but delivers complex flavors. The couscous absorbs hot water quickly without sustained heat input, exemplifying efficient cooking principles.
No-Cook Overnight Oats (Prep the night before)
Ingredients:
- ½ cup rolled oats
- 2 tablespoons powdered milk
- 1 tablespoon chia seeds
- 1 tablespoon maple sugar
- 2 tablespoons dried cranberries
- 2 tablespoons chopped nuts
- ⅔ cup cold water
Method:
- Combine all ingredients in a sealed container before bed
- In the morning, no cooking required—just eat directly
This breakfast eliminates fuel use entirely while providing sustained energy for morning hiking. For cold mornings, I sometimes use a small amount of hot water to warm it slightly.
Five-Minute Backcountry Pad Thai (Cooking Time: 4-5 minutes)
Ingredients:
- 1 package rice noodles (the thinnest variety)
- 2 tablespoons powdered peanut butter
- 1 tablespoon soy sauce packet
- 1 teaspoon chili flakes
- 1 packet True Lime or lemon juice
- 1 tablespoon olive oil
- 1 package pre-cooked chicken (optional)
Method:
- Boil 2 cups water
- Remove from heat, add rice noodles, cover and let sit 3-4 minutes
- Drain most water (leave about 2 tablespoons)
- Add remaining ingredients, stir vigorously
- Cover and let flavors meld for 1 minute
The thin rice noodles require minimal actual cooking time, and the sauce comes together without additional heat input. It’s a gourmet-tasting meal with extremely efficient fuel use.
Conclusion
Fuel-efficient camp cooking isn’t just about extending your resources—it’s about enhancing your entire outdoor experience. By implementing the equipment recommendations, techniques, and recipes we’ve explored, you’ll not only save weight and money but also reduce your environmental impact while enjoying delicious meals.
The wilderness provides us with incredible experiences; the least we can do is cook efficiently while we’re there! Ready to revolutionize your camp kitchen? Start with just one of these techniques on your next trip and build from there.
Got a fuel-saving hack? Share it in the comments section below. I’d love to hear what’s worked for you out on the trail!
Additional Resources
- Minimalist Camp Kitchen Setup: This will help you create a more efficient outdoor cooking system.
- How to Make Dehydrated Camping Meals: Learn how to pack food that is lightweight, doesn’t spoil and tastes good.
- The Ultimate Guide to Long-Term Camping Food Storage: Learn proven methods, essential gear, and expert strategies to keep your food fresh, safe, and accessible.
- The Ultimate Guide to Dutch Oven Cooking While Camping: Learn about off-grid camp cooking and recipes.
- Easy One-Pot Off-Grid Camping Meals for Outdoor Adventures: Learn my absolute favorite one-pot wonders that will fuel your wilderness adventures.
- Fireless Cooking Methods: Learn essential fireless cooking methods for remote camping
- Wilderness Cooking Techniques: Learn the best cooking techniques in the wilderness that will give you the best outdoor meal experience.
- 10 Campfire Recipes That Won’t Bomb: Check out this curated list of campfire recipes that keep you going off-grid during camping
- Ultimate Guide to Wilderness Survival Skills: Talks comprehensively about survival skills in the wild or off-grid.
- How to Stay Safe While Camping Off-Grid: Offers safety and survival tips in the wilderness

