Introduction:
Did you know that 48% of campers report feeling safer with proper tent lighting? Whether you’re a weekend warrior or a seasoned backpacker, exploring the best camping tent lighting ideas can truly transform your camping experience. I’ll never forget my first camping trip when all I had was a dying flashlight – trust me, you don’t want to make the same mistake!
And while you’re upgrading your tent lighting, don’t forget about other essential camp lighting options. Check out this guide “17 Best Lighting Ideas for Camping Adventures“ to enhance your camp lighting experience. Together, these tips will ensure your nights outdoors are as enjoyable as your days.
Essential Tent Lighting Options
When it comes to lighting up your tent, I’ve learned through countless camping trips that having the right mix of lighting options is crucial. Let’s dive into the most practical solutions I’ve tested over the years.
Solar-Powered String Lights
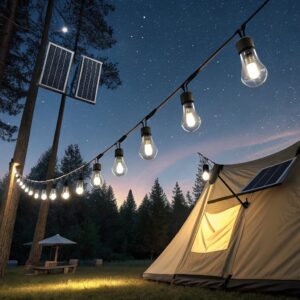 Solar-powered string lights have become my go-to choice for ambient tent lighting. After testing dozens of models, I’ve found that a 20-foot string with 60 LEDs provides ideal coverage for a 4-person tent. Brightech Ambience Pro fits the description and is reliable based on my research. Most quality solar string lights need about 6-8 hours of direct sunlight to fully charge, giving you 8-12 hours of illumination. Pro tip: I always hang them in an S-pattern across the tent ceiling using removable adhesive hooks – this creates the most even light distribution.
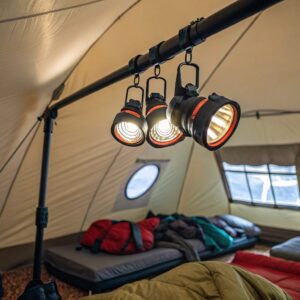
Rechargeable LED Lanterns
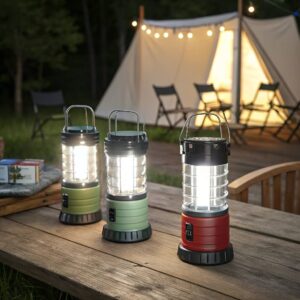 Rechargeable LED lanterns are absolute workhorses in any camping setup. The sweet spot for brightness is between 300-600 lumens, which illuminates a standard tent without being harsh on the eyes.
- I learned the hard way that you want a lantern with at least 3 brightness settings and 40+ hours of runtime on low.
- The BioLite 325 has been particularly reliable, weighing just 10 ounces while providing ample light.
Battery-Operated Lights
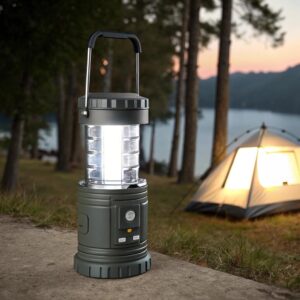 For battery-operated lights, I’ve had the best results with lithium batteries in cold weather – they last about 3 times longer than alkaline batteries below 40°F.
- A good battery-powered lantern typically needs 3-4 D cells, lasting 80-100 hours on low setting.
- The extra weight is worth it for extended trips where solar charging isn’t reliable.
Headlamps for Inside the Tent
 Headlamps aren’t just for hiking and this is what many campers overlook.
- I keep a 350-lumen headlamp with a red light mode handy inside the tent.
- It’s perfect for reading or finding items without disturbing others, and the red light preserves your night vision.
- The Black Diamond Spot 350 has served me well, running 200 hours on low and featuring an IPX8 waterproof rating.
The Lighting Trinity
Through trial and error, I’ve found that combining a central lantern with string lights and a headlamp creates the perfect lighting trinity. The lantern provides task lighting, string lights offer ambient illumination, and the headlamp handles specific needs like midnight bathroom trips or gear searches.
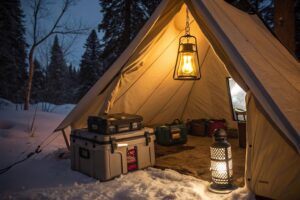
Seasonal Considerations for Lighting
Remember that lighting needs change with seasons :
- Summer: Solar options work great, due to long daylight hours.
- Winter: Shorter days mean backup battery power is essential.
I always pack a small backup battery bank that can recharge USB-powered lights, just in case. It’s saved me more than once during unexpected cloudy spells!
Creative DIY Tent Lighting Ideas
I’ve discovered some ingenious DIY lighting solutions that won’t break the bank. Let me share the most effective ones I’ve tested
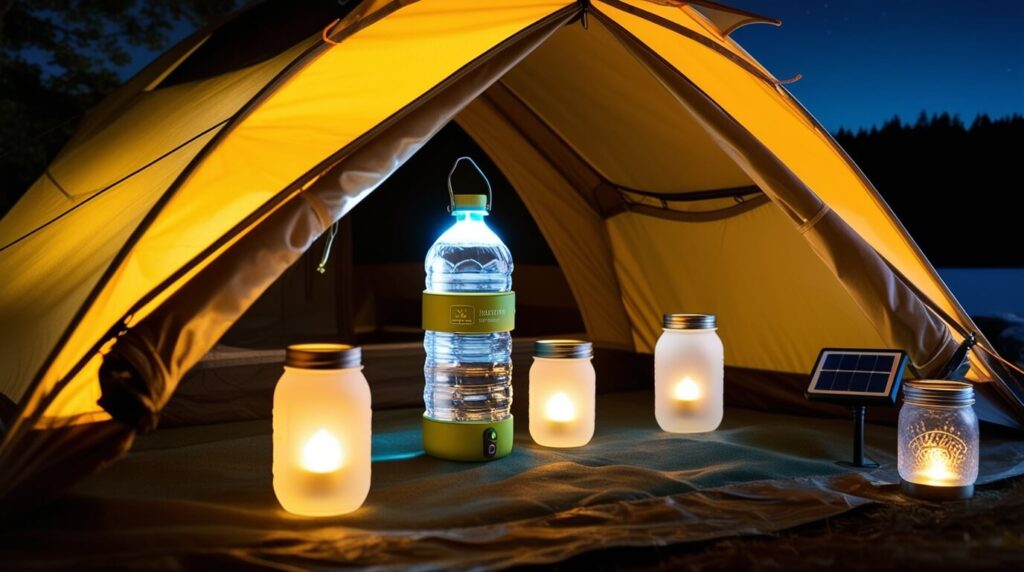
The Water Bottle Trick
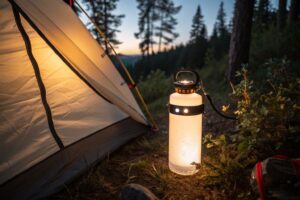 The water bottle trick is a game-changer for diffused lighting. By strapping a headlamp around a clear 1-liter water bottle (facing inward), you create an impressive lantern that illuminates the entire tent. The water diffuses the light perfectly, eliminating harsh spots.
Tip: Just make sure to use a clean bottle without labels.
Battery-Operated Tea Lights
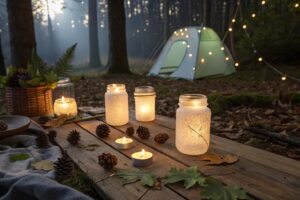 Battery-operated tea lights have become my secret weapon for ambient lighting. I place 4-5 of them in frosted mason jars, creating a warm, cozy glow that lasts up to 80 hours.
Safety Note: They’re completely safe – no fire risk like real candles.
Emergency Blanket Reflectors
For maximizing light output, I’ve found that strategically placing emergency blankets behind lights can double their effectiveness.
- I attach small pieces of reflective material behind light sources using removable adhesive strips.
- This simple hack effectively doubles your light output without requiring additional power.
DIY Lantern Holders
DIY lantern holders are surprisingly practical.
- Using lightweight aluminum wire (about 2mm thick), I create hooks that hang from the tent’s ceiling loops.
- These holders can support most lanterns while allowing for quick adjustment.
- The wire weighs practically nothing and can be shaped to hold any light source securely.
White Plastic Shower Curtains as Light Diffusers
One of my favorite tricks involves using white plastic shower curtains as light diffusers.
- Cut into small squares, they create perfect diffusion panels for harsh LED lights.
- Attach them using mini binder clips, which don’t damage the tent material.
Combining DIY Lighting Solutions
Remember that successful DIY lighting isn’t just about brightness – it’s about creating layers of light.
- I typically combine 2-3 of these solutions to create the perfect ambiance while maintaining practicality.
- Key Tip: Test your DIY setup at home first to avoid any surprises in the wilderness.
Safety and Energy Efficiency Tips
Safety should always be your priority with tent lighting. After witnessing a close call when someone’s lantern melted their tent fabric, I became meticulous about proper light placement.
Proper Light Placement
- Always keep lights at least 6 inches from tent walls.
- Never leave them unattended while on.
Battery Management
Battery management makes or breaks extended camping trips.
- Organize batteries by type and keep them in waterproof containers.
- Follow the rule of thirds: one-third of batteries in use, one-third as backup, and one-third for emergencies.
- USB-rechargeable lights get charged during daylight hours when solar panels are most effective.
Emergency Lighting Redundancy
Emergency lighting needs redundancy.
- Keep a mini LED light attached to my tent zipper
- I store another mini LED light in my sleeping bag pocket.
- These 2-gram lights run for 24 hours on a single battery and have saved me countless times during unexpected gear failures.
Power-Saving Techniques
Here’s a power-saving technique that took me years to perfect: use reflective gear strategically.
- White or light-colored gear placed near light sources amplifies illumination.
- My light-colored sleeping bag and pad effectively bounce light around the tent, requiring less power output from my lanterns.
Cold Weather Battery Tips
Temperature significantly impacts battery life. In cold weather (below 32°F),
- I keep spare batteries in my sleeping bag in cold conditions (below 32°F), to maintain their charge.
- Lithium batteries perform better in cold conditions, lasting up to 3x longer than alkalines.
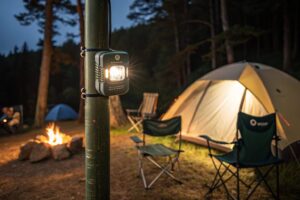
Motion Sensors for Efficiency
The most efficient setup combines motion sensors with low-power lighting. I use a small motion-activated light near the tent entrance, which only activates when needed. This saves battery life while providing crucial lighting for nighttime tent exits.
Remember: the most efficient light is the one you don’t need to use. Aligning your sleep schedule with natural daylight saves significant battery power over a camping trip.
Advanced Lighting Setups
Smart lighting has revolutionized tent camping. After testing various systems, I’ve found that Bluetooth-enabled string lights with companion apps offer incredible control. My current setup includes lights that can be dimmed, color-changed, and scheduled – all from my phone. Just make sure to download the app before heading out, as most campgrounds have limited connectivity
Bluetooth-Enabled Lighting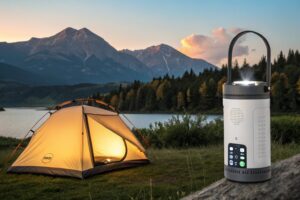
- Dim, change colors, and schedule lights via a smartphone app.
- Ensure the app is downloaded in advance due to limited campground connectivity.
 Motion-Activated Lighting
For larger tents, motion-activated strips along the entrance pathway have proven invaluable.
- These lights consume minimal power, typically running 2-3 weeks on a single set of batteries.
- Position sensors at ankle height to avoid false triggers from wind-blown debris.
Portable Power Integration
Integrating with portable power stations has been a game-changer for extended trips.
- A 200W power station can run LED strips for weeks while also charging other devices.
- I’ve found that connecting lights through a basic power strip with an on/off switch helps manage energy consumption more effectively.
Weather Resistance
Weather resistance is crucial for advanced setups.
- I use IP65-rated lights that can withstand sudden downpours and heavy condensation.
- For connections, I use silicone-sealed junction boxes and waterproof connectors rated for outdoor use.
- The extra investment in weather protection pays off during unexpected storms.
Arduino-Controlled LED Systems
One advanced technique I’ve tested involves using Arduino-controlled LED strips with motion and light sensors. While this requires some technical knowledge, it creates an incredibly efficient system that automatically adjusts brightness based on ambient light levels. The entire setup draws less than 2W when running.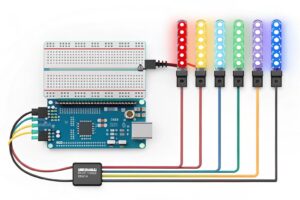
Remember that advanced doesn’t always mean better. The most reliable setups are often the simplest ones with quality components. Focus on weatherproofing and power efficiency rather than fancy features that might fail when you need them most.
Conclusion:
Effective tent lighting enhances both safety and comfort during your camping adventures. By combining different lighting solutions and following proper safety protocols, you’ll create the perfect ambiance for your outdoor home away from home. Ready to light up your next camping trip? I’d love to hear your favorite tent lighting hacks or any creative ideas you’ve tried. Drop your thoughts in the comments below—let’s swap stories and inspire each other for the next adventure! Don’t forget to also utilize the FAQ section below.
FAQ
Q1: How many lumens do I need to light a camping tent?
For a typical 4-person tent, you’ll want 200-600 lumens total. A main lantern of 300-400 lumens plus some ambient lighting provides ideal illumination. Larger tents may require up to 800 lumens, while smaller tents can be well-lit with just 150-200 lumens.
Q2: Are battery-powered or solar lights better for tent camping?
Both have their place. Solar lights are excellent for multi-day trips in sunny conditions and are more environmentally friendly. However, battery-powered lights are more reliable in all weather conditions and don’t depend on sunlight. For best results, use a combination of both to ensure backup lighting options.
Q3: How can I hang lights in my tent without damaging it?
Use removable adhesive hooks, lightweight aluminum wire hooks that attach to tent loops, or magnetic clips (for tents with metal poles). Never use pins, nails, or permanent adhesives. Command hooks with light-duty strips work well and remove cleanly from most tent materials.
Q4: What’s the most energy-efficient way to light a tent?
LED lights are the most energy-efficient option. Use a combination of a central LED lantern on low setting (which uses minimal power) with LED string lights for ambient lighting. Adding reflective surfaces or light-colored gear can amplify the light without requiring additional power consumption.
Q5: What should I use for tent lighting in winter or rainy conditions?
For challenging weather, rely on waterproof LED lanterns with an IPX7 rating or higher. Use lithium batteries, as they perform better in cold conditions. Have a backup power bank and waterproof battery storage. Avoid solar-dependent lights as primary sources during winter months when daylight is limited.
Affiliate Disclaimer
“This post contains affiliate links. If you purchase a product through these links, we may earn a small commission at no additional cost to you.