Introduction:
There’s something magical about cooking outdoors. The sizzle of ingredients, the wafting aromas mingling with fresh air, and the satisfaction of creating a delicious meal miles from the nearest kitchen. I’ve been camping for years, but it wasn’t until I discovered Dutch oven cooking that my outdoor culinary game truly transformed.
My first camping trip with a Dutch oven was a revelation. I still remember the looks on my friends’ faces when I pulled a perfectly baked peach cobbler from what appeared to be just a heavy pot sitting in the coals. That moment sparked a passion that’s led me through countless campsite meals and enough trial-and-error to fill this blog several times over.
Today, I want to share everything I’ve learned about Dutch oven cooking while camping—from basics to advanced techniques—so you can elevate your outdoor cooking experience too.
What Makes Dutch Ovens Perfect for Camping
Before diving into techniques, let’s talk about what makes Dutch ovens such wonderful camping companions. These thick-walled cooking pots with tight-fitting lids have been around for hundreds of years, and their design hasn’t changed much for a reason: they work.
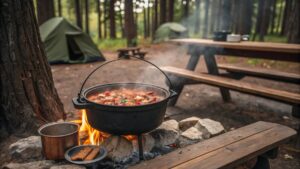
The traditional cast-iron Dutch oven excels at camping because:
- Heat retention: The heavy cast iron holds heat exceptionally well, creating an oven-like environment perfect for baking and slow cooking
- Versatility: You can use it to bake, boil, fry, braise, simmer, or roast—essentially replacing all your kitchen pots and pans with one tool
- Durability: A good cast iron Dutch oven will last generations with proper care
- Heat source flexibility: Works beautifully with wood coals, charcoal briquettes, campfires, or even camp stoves
When I first started researching camp-friendly Dutch ovens, I was surprised to learn about the differences between kitchen models and camp models. Unlike their kitchen counterparts, camping Dutch ovens typically feature:
- Legs to elevate the pot above coals
- A flanged lid to hold coals on top
- A bail handle for easy lifting and hanging
These features make them perfectly adapted for outdoor cooking, though many campers (myself included) also use legless, traditional Dutch ovens with success.
Choosing Your Camping Dutch Oven
My camping cooking journey began with a hand-me-down Lodge Dutch oven from my grandfather, but if you’re in the market for your first one, here’s what to consider:
Material Matters
Cast iron is the traditional choice, but they also come in aluminum:
| Feature | Cast Iron | Aluminum |
|---|---|---|
| Weight | Heavy (10-20+ lbs) | Light (3-6 lbs) |
| Heat Retention | Exceptional | Good |
| Heat Distribution | Very even, once heated | Even, heats quickly |
| Durability | Extremely durable, can last generations | Durable but can dent |
| Pre-seasoning Needs | Requires seasoning | None needed |
| Cooking Performance | Superior for low/slow and baking | Better for fast cooking |
| Price | Generally more expensive | More affordable |
| Maintenance | Higher maintenance | Lower maintenance |
I’ve used both types, and while I prefer cast iron for most camping dishes, I appreciate the lightweight aluminum version for backpacking trips where every ounce matters.
Size Considerations
Dutch ovens are typically sized by diameter and capacity (quarts). After trying several sizes at various campouts, I’ve found that:
- An 8″ (2 quart) Dutch oven works well for 1-2 people
- A 10″ (4 quart) Dutch oven is perfect for 2-4 people
- A 12″ (6 quart) Dutch oven serves 4-6 people
- A 14″ (8 quart) Dutch oven can feed 8-10 hungry campers
For my family of four, I’ve found the 12″ to be our sweet spot—large enough for hearty meals but not so massive that it’s impossible to transport or heat properly.
Essential Accessories for Dutch Oven Cooking
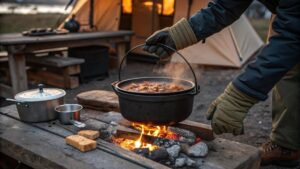
When I packed for my first Dutch oven camping trip, I brought just the pot itself. Big mistake. After struggling to move a 350°F cast iron pot with inadequate tools, I quickly realized why certain accessories are considered essential:
- Lid lifter: Absolutely crucial for safely checking your food and removing the lid when it’s covered with hot coals
- Heavy-duty gloves: Heat-resistant gloves provide protection when handling hot cookware
- Long tongs: For arranging coals above and below your Dutch oven
- Chimney starter: Makes lighting charcoal briquettes much easier
- Trivet: Gives you a safe place to set the hot Dutch oven when serving
- Wooden or silicone utensils: Metal utensils can damage your Dutch oven’s seasoning
I’ve collected these tools over time, and they’ve made cooking with my Dutch oven infinitely more comfortable and safe. While not all are strictly necessary, I wouldn’t want to be without my lid lifter or heavy-duty gloves.
Preparing Your Dutch Oven for Camp Cooking
If you’ve just purchased a new Dutch oven, it likely comes pre-seasoned. However, I’ve found that adding an extra layer of seasoning before a camping trip provides additional protection and enhances non-stick properties.
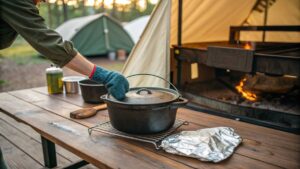
For years, I used the traditional method of coating my Dutch oven with a thin layer of vegetable oil and baking it in my home oven at 450°F for an hour. Recently, I’ve switched to flaxseed oil, which polymerizes better and creates a more durable finish.
If your Dutch oven is well-used or hasn’t been properly stored, you might need to restore it before your trip:
- Scrub away any rust with steel wool
- Wash with warm water (no soap) and dry thoroughly
- Apply a thin layer of oil to all surfaces
- Place upside down in your home oven with aluminum foil underneath to catch drips
- Bake at 450°F for one hour
- Let cool in the oven
- Repeat steps 3-6 for a stronger seasoning
I learned the hard way that proper storage between camping trips is just as important as initial seasoning. I now keep a paper towel inside my Dutch oven to absorb moisture and prevent rust.
Setting Up Your Camp Kitchen for Dutch Oven Success
Location and setup are crucial for successful Dutch oven cooking. On my first few camping trips, I made the mistake of trying to cook too close to my tent (fire hazard) and on uneven ground (spilled stew disaster).
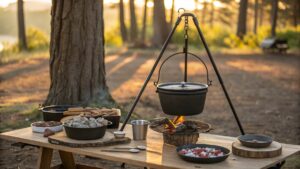
Here’s what I’ve found works best:
- Choose a flat, cleared area away from tents and overhanging branches
- If your campsite has a designated fire ring, use it
- If not, create a safe cooking area with stones or bricks
- Keep a bucket of water nearby for safety
- Set up a sturdy table for food prep near (but not too near) your cooking area
For the cooking surface itself, I’ve used several different setups: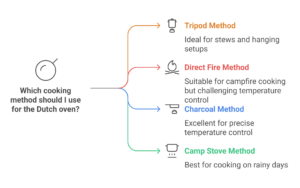
- Tripod method: Hanging the Dutch oven from a tripod over coals (great for stews)
- Direct fire method: Placing the Dutch oven directly in the campfire (works, but hard to control temperature)
- Charcoal method: Arranging briquettes below and on top of the Dutch oven (my preferred method for temperature control)
- Camp stove method: Using a strong camp stove with the Dutch oven (good for rainy days)
After experimenting with all these methods, I’ve found that charcoal briquettes provide the most consistent heat and best control.
Mastering Temperature Control
Temperature control is where Dutch oven cooking goes from good to great. On my early camping trips, I used the “that looks about right” method of estimating temperature, resulting in some burned bottoms and undercooked middles.
Now I use a formula that hasn’t failed me yet:
For a rough approximation of 350°F in your Dutch oven, use the diameter of your oven in inches, multiplied by two. This gives you the total number of charcoal briquettes needed.
For example:
- A 12″ Dutch oven would need 24 total briquettes
- Place ⅓ of the briquettes underneath (8) and ⅔ on top (16)
This formula works because heat rises, so more heat is needed on top for even cooking. I’ve refined my approach over time with this temperature chart:
| Cooking Method | Temperature | Briquette Formula | Example for 12″ Oven |
|---|---|---|---|
| Baking | 350°F | Diameter × 2 | 24 briquettes (8 bottom, 16 top) |
| Roasting | 400°F | (Diameter × 2) + 2 | 26 briquettes (9 bottom, 17 top) |
| Simmering/Stewing | 250°F | (Diameter × 2) – 4 | 20 briquettes (7 bottom, 13 top) |
| Frying/Boiling | 425°F+ | (Diameter × 2) + 4 | 28 briquettes (19 bottom, 9 top) |
Notice how the briquette placement changes for frying—more heat on the bottom where it’s needed. This heat management technique revolutionized my camp cooking.
For even heating, I arrange the coals in a circle under the Dutch oven rather than a pile, and I place the top coals in a ring around the edge of the lid with a few in the center.
Essential Dutch Oven Camping Recipes
I’ve tried dozens of recipes over the years, but these four have become my camping staples—each representing a different cooking technique and showcasing the Dutch oven’s versatility.
Mountain Man Breakfast
This hearty breakfast became an instant hit on our family camping trips. It uses the Dutch oven as a skillet first, then as an oven.
Ingredients:
- 1 pound breakfast sausage
- 1 large onion, diced
- 2 pounds frozen hash browns, thawed
- 12 eggs, beaten
- 2 cups shredded cheddar cheese
- Salt and pepper to taste
Method:
- Heat 12″ Dutch oven using 9 coals underneath and none on top
- Brown sausage and onions
- Add hash browns and cook until crispy edges form
- Pour beaten eggs over mixture
- Top with cheese
- Move some coals on top (9 underneath, 15 on top)
- Bake 15-20 minutes until eggs are set and cheese is bubbly
The first time I made this, I was amazed at how perfectly it cooked. The bottom was crispy, the eggs were fluffy, and everyone devoured it.
Campfire Chili
This recipe showcases the Dutch oven’s ability to simmer for hours, developing complex flavors.
Ingredients:
- 2 pounds ground beef
- 2 onions, diced
- 4 garlic cloves, minced
- 2 bell peppers, diced
- 2 cans (14.5 oz each) diced tomatoes
- 1 can (6 oz) tomato paste
- 2 cans (15 oz each) kidney beans, drained
- 2 tablespoons chili powder
- 1 tablespoon cumin
- 1 teaspoon oregano
- Salt and pepper to taste
Method:
- Heat 12″ Dutch oven using 15 coals underneath and none on top
- Brown ground beef and onions
- Add garlic and peppers, cook 2 minutes
- Add remaining ingredients and stir well
- Adjust coals for simmering (7 underneath, 13 on top)
- Simmer 2-3 hours, stirring occasionally and refreshing coals as needed
This chili develops an incredible smoky flavor from the open-fire cooking that you just can’t replicate on a stove.
Dutch Oven Sourdough Bread
This recipe demonstrates the incredible baking capabilities of a Dutch oven. After many failed attempts at camp baking, this foolproof method has become my go-to.
Ingredients:
- 3 cups all-purpose flour
- 1¾ teaspoons salt
- ½ teaspoon active dry yeast
- 1½ cups water
Method:
- Mix ingredients at home before your trip
- Place in a covered container to rise (8-24 hours)
- At camp, heat 10″ Dutch oven with 7 coals underneath and 14 on top
- Turn dough onto floured surface, fold a few times, shape into ball
- Place dough in Dutch oven on parchment paper
- Cover and bake 30 minutes
- Remove lid and bake 15-20 minutes more until golden
- Remove and cool on rack
The first time I pulled perfect crusty bread from a Dutch oven at a campsite, I felt like a wizard. My camping companions couldn’t believe it wasn’t from a bakery.
Peach Cobbler
No Dutch oven camping article would be complete without a dessert recipe! This simple cobbler became my signature camp dessert.
Ingredients:
- 2 cans (29 oz each) sliced peaches in light syrup
- 1 box yellow cake mix
- ½ cup butter, sliced
- 1 teaspoon cinnamon
- ½ cup brown sugar
Method:
- Pour peaches with juice into 12″ Dutch oven
- Sprinkle dry cake mix evenly over peaches
- Arrange butter slices over cake mix
- Sprinkle with cinnamon and brown sugar
- Cover and bake using 8 coals underneath and 16 on top
- Bake 45-60 minutes until top is golden and filling is bubbly
When I serve this bubbling cobbler with a scoop of vanilla ice cream (stored in my cooler), it makes everyone forget they’re camping. It’s become so popular that it’s now requested before every trip.
Advanced Dutch Oven Techniques
Once you master the basics, these advanced techniques will take your camp cooking to new heights.
Stacking Dutch Ovens
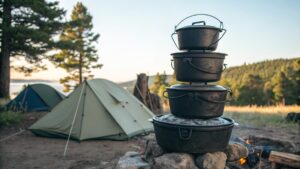 One of my favorite discoveries was stackable cooking. By positioning multiple Dutch ovens on top of each other, you can:
- Cook an entire meal using one set of coals
- Use the bottom Dutch oven for items needing higher heat
- Use the top Dutch oven(s) for items needing less heat
I’ve successfully stacked three Dutch ovens—meat in the bottom, vegetables in the middle, and cobbler on top. The key is rotating each oven occasionally (with proper tools!) for even cooking.
Using a Dutch Oven Dome
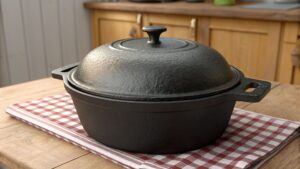 After seeing a fellow camper use a Dutch oven dome, I purchased one for windy campsite cooking. This dome-shaped accessory:
- Protects your coals from the wind
- Creates a more oven-like environment
- Improves fuel efficiency
- Reduces cooking time
On a particularly windy mountain camping trip, my dome-covered Dutch oven produced perfect results while my friend’s uncovered one struggled with inconsistent temperatures.
The Flip Method
For recipes like upside-down cakes, I use the “flip method,” which requires practice but delivers impressive results:
- Prepare your Dutch oven with ingredients that should end up on top (like fruit)
- Add the batter on top of those ingredients
- Cook until nearly done
- Using heat-resistant gloves, carefully flip the entire sealed Dutch oven upside down
- Continue cooking for 5-10 minutes
- Open to reveal your perfectly positioned dessert
The first time I attempted this, it was terrifying—flipping a hot Dutch oven seemed like a recipe for disaster. Now it’s one of my favorite showstopper techniques.
Cleaning and Maintaining Your Dutch Oven at Camp
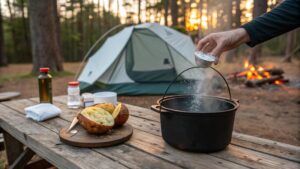
Proper cleaning at the campsite preserves your Dutch oven’s seasoning and prepares it for the next meal. My cleaning routine has evolved over many camping trips to this efficient process:
- Scrape out food residue with a wooden or plastic scraper
- Add hot water (never cold, which can crack hot cast iron)
- Bring water to a gentle boil to loosen stubborn bits
- Empty and wipe clean with paper towels
- For stuck-on food, use coarse salt as an abrasive with a little water
- Dry thoroughly over low heat
- While still warm, apply a thin layer of oil with a paper towel
- Store with the lid ajar to prevent moisture buildup
I learned to avoid these cleaning mistakes through trial and error:
- Using soap (strips seasoning)
- Abrasive scrubbers (damage seasoning)
- Soaking (causes rust)
- Air drying (causes rust)
One trick I discovered from a seasoned outdoorsman was to clean with a handful of coarse salt and a potato half. The salt acts as an abrasive while the potato provides just enough moisture, and it’s completely biodegradable!
Troubleshooting Common Dutch Oven Problems
Even experienced Dutch oven cooks encounter problems. Here are solutions to issues I’ve faced:
Food Sticking to the Dutch Oven
When I first started, everything stuck to my Dutch oven. I discovered these solutions:
- Ensure proper seasoning before cooking
- Preheat the Dutch oven before adding food
- Use enough oil or fat
- Cook at appropriate temperatures (too hot causes sticking)
Uneven Cooking
After some frustrating half-raw/half-burnt meals, I learned to:
- Rotate the Dutch oven and lid 90 degrees in opposite directions every 15-20 minutes
- Maintain even coal distribution
- Allow proper preheating time
- Use the correct number of coals for your oven size
Ash on Food
Nothing ruins a meal like ash! To prevent it:
- Make sure the lid is seated properly
- Brush ash off the lid before lifting
- Don’t place coals in the center of the lid where they might fall in
- Consider using a lid stand when checking food
Rust Development
After returning from one trip to find my beloved Dutch oven covered in rust, I now:
- Dry thoroughly after cleaning
- Apply a light coat of oil after each use
- Store with paper towels inside to absorb moisture
- Never store with the lid sealed tight
Dutch Oven Cooking Across Seasons
My camping doesn’t stop when the weather changes, and neither does my Dutch oven cooking! I’ve learned that seasonal adjustments are necessary:
Summer Dutch Oven Cooking
In hot weather, I’ve found:
- You’ll need fewer coals to maintain temperature
- Cooking goes faster, so check food more frequently
- Position your cooking area in shade when possible
- Consider cooking during cooler morning or evening hours
Winter Dutch Oven Cooking
Cold-weather cooking requires:
- Up to 25% more coals to maintain temperature
- A windbreak for your cooking area
- Preheating your Dutch oven longer
- Insulating the ground under your Dutch oven (a layer of rocks works well)
- Keeping extra charcoal dry and ready
During a snow camping trip last February, I placed my Dutch oven on a layer of rocks rather than directly on snow, which made a remarkable difference in heat retention and efficiency.
The Environmental Impact of Dutch Oven Cooking
As an outdoor enthusiast, I’m mindful of my environmental footprint. Leave No Trace principles are especially important when Dutch oven cooking:
- Use established fire rings where available
- Pack out all food scraps and charcoal ash
- Minimize soap use (even biodegradable soap)
- Dispose of washwater at least 200 feet from water sources
- Use local firewood to prevent transporting invasive species
- Consider propane camp stoves for cooking in fire-restricted areas
I’ve started using natural lump charcoal instead of briquettes when possible, as it has fewer additives and burns cleaner.
Building Community Around the Dutch Oven
Some of my most meaningful camping experiences have centered around Dutch oven cooking. There’s something about gathering around a bubbling pot that brings people together.
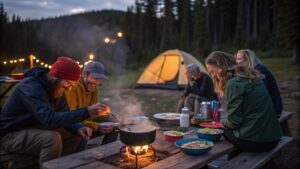
I’ve organized Dutch oven cook-offs on group camping trips, where each family prepares one dish. We all share our creations, exchange recipes, and vote on favorites (the bragging rights are highly coveted).
For beginners, I recommend Dutch oven cooking as a group activity—having extra hands makes temperature management and food preparation much easier while creating wonderful shared memories.
Conclusion:
After years of cooking with my Dutch oven in the great outdoors, I’m more passionate about it than ever. There’s something profoundly satisfying about creating restaurant-quality meals miles from civilization.
Dutch oven cooking connects us to generations of outdoor cooking traditions while allowing for creativity and experimentation. The sensory experience—the crackling coals, the aromas wafting through camp, the anticipation as you lift the lid—enhances the entire camping experience.
If you’re new to Dutch oven cooking, start with a simple recipe like the peach cobbler. Once you taste the results and see the impressed looks on your fellow campers’ faces, I suspect you’ll be hooked too.
What began as a curious experiment for me has become a cornerstone of my outdoor experience. My trusty Dutch oven has traveled thousands of miles, cooked hundreds of meals, and helped create countless memories around campfires across the country.
So pack your Dutch oven on your next camping trip. I promise the extra weight is worth it—your taste buds and camping companions will thank you.
What’s your favorite Dutch oven camping recipe? Share in the comment section below!
Additional Resources
- Fireless Cooking Methods: Learn essential fireless cooking methods for remote camping
- Wilderness Cooking Techniques: Learn the best cooking techniques in the wilderness that will give you the best outdoor meal experience.
- How to Read Weather Patterns in the Wild: Learn about weather patterns and how to survive in the wilderness
- 10 Campfire Recipes That Won’t Bomb: Check out this curated list of campfire recipes that keep you going off-grid during camping
- Ultimate Guide to Wilderness Survival Skills: Talks comprehensively about survival skills in the wild or off-grid.
- How to Stay Safe While Camping Off-Grid: Offers safety and survival tips in the wilderness
-
Mental Survival Techniques: Discusses mental techniques for staying calm and focused during hikes.
Frequently Asked Questions
1. What size Dutch oven should I buy for my first camping trip?
For first-time Dutch oven campers, I recommend starting with a 10″ (4-quart) model. It’s versatile enough to cook meals for 2-4 people without being too heavy or difficult to manage. If you regularly camp with a larger group, you might consider a 12″ (6-quart) version instead. Remember that larger Dutch ovens require more charcoal to heat properly and are significantly heavier to transport.
2. Can I use my kitchen enameled Dutch oven for camping?
While you technically can use a kitchen enameled Dutch oven at a campsite, I don’t recommend it. Enameled Dutch ovens aren’t designed for direct fire cooking – the enamel can crack when exposed to extreme temperature changes or direct flames. Additionally, they lack the legs and flanged lid that make camping models so effective with coal placement. If you’re just getting started, invest in a proper camp Dutch oven with legs and a flanged lid designed specifically for outdoor cooking.
3. How do I prevent my food from burning on the bottom?
This is one of the most common issues I faced when starting out! To prevent burning, make sure you’re using the correct coal distribution (fewer coals on bottom than top for most recipes), rotate your Dutch oven and lid every 15-20 minutes for even cooking, and consider using a trivet inside your Dutch oven to elevate food slightly off the bottom. For recipes with sugary ingredients that are prone to burning, line the bottom with parchment paper.
4. Do I really need to season a pre-seasoned Dutch oven?
Most Dutch ovens come pre-seasoned these days, but I’ve found that adding an additional layer of seasoning before your trip improves performance and food release. While not absolutely necessary, this extra step provides insurance against sticking and protects your investment. Re-seasoning once or twice a year keeps your Dutch oven in prime condition, especially if you use it frequently or cook acidic foods.
5. What’s the best way to transport a Dutch oven to a campsite?
I’ve learned to wrap my Dutch oven in an old towel or place it in a dedicated Dutch oven bag for transport. This protects both the Dutch oven and your other camping gear. Store the lid separately to prevent scratching, and place a paper towel between them to absorb moisture. For organization, I keep all my Dutch oven accessories (lid lifter, gloves, etc.) in a designated bag. If weight is a concern for remote campsites, consider an aluminum Dutch oven, which offers similar functionality at about one-third the weight.


Awesome https://rb.gy/4gq2o4
Good https://is.gd/N1ikS2