Introduction:
Remote camping offers an unparalleled connection with nature, but fire restrictions and environmental concerns often limit traditional cooking options. In 2025, innovative fireless cooking methods have revolutionized how outdoor enthusiasts prepare meals in the backcountry. According to a recent Outdoor Industry Association survey, over 65% of backcountry campers now use at least one fireless cooking method during their trips! Whether you’re camping in fire-restricted areas or simply looking to minimize your environmental impact, these flame-free cooking techniques will ensure you enjoy hot, delicious meals wherever your adventures take you.
Solar Cooking: Harnessing the Sun’s Power
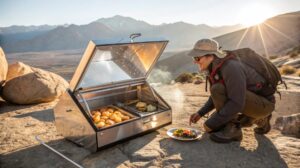
When I first discovered solar cooking during a remote camping trip in the Mojave Desert, I was honestly skeptical. Could this simple-looking reflective contraption really cook my food? Let me tell you – I became a true believer after pulling out perfectly baked potatoes just three hours later!
Solar cooking has completely transformed how I approach remote camping in areas with fire restrictions. My GoSun Sport solar oven has become one of my most treasured pieces of gear, despite the odd looks I get from traditional campers with their fuel canisters and fire starters.
How Solar Cooking Works
The genius of solar cooking lies in its simplicity.
- Most portable solar ovens use reflective panels to concentrate sunlight onto a cooking tube or chamber.
- On a clear, sunny day, these devices can reach temperatures of 300-400°F—more than enough to cook pretty much anything you’d want at camp.
- I’ve successfully made everything from breakfast frittatas to berry cobblers using nothing but sunshine!
Limitations and Planning Around the Sun
Of course, there are limitations you need to plan around:
- Cloudy days are obviously problematic.
- You need to adjust your schedule around the sun rather than your hunger.
- Early afternoon is prime solar cooking time, so I typically start dinner preparations around 2 PM if I want to eat by 5 or 6.
Challenges of Solar Cooking in Winter
Winter camping presents another challenge for solar cooking:
- With fewer daylight hours and a lower sun angle, efficiency drops significantly.
- I’ve found that pre-cooking and freezing meals before winter trips is a better strategy than relying solely on solar methods during those months.
Best Foods for Solar Cooking
The type of food you’re preparing also matters enormously:
- Dense foods like beans or large cuts of meat take forever.
- Sliced vegetables, fish fillets, and quick-cooking grains work beautifully.
- My personal favorite solar meal is a Mediterranean veggie packet with zucchini, cherry tomatoes, olives, and a sprinkle of feta cheese—it’s ready in about 45 minutes and tastes incredible.
Weight Considerations for Backpackers
Weight consideration is obviously important for backpackers:
- While some solar cookers are quite bulky, newer ultralight models weigh under a pound and collapse down to the size of a laptop.
- For extended trips, where you’d otherwise carry several fuel canisters, the weight trade-off becomes very favorable.
The Unexpected Benefits of Solar Cooking
One unexpected benefit I’ve discovered is the way solar cooking forces you to slow down and sync with natural rhythms.
- There’s something deeply satisfying about placing your meal in the sunlight, going for a swim or short hike, and returning to find lunch ready without any additional effort on your part.
Have you ever tried cooking with nothing but sunlight? If you camp in sunny regions, especially those with fire restrictions, I can’t recommend it enough!
Chemical Heat Sources: Self-Heating Meals and Flameless Ration Heaters
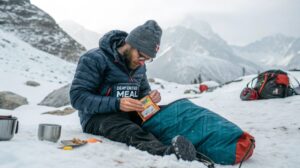
I still remember the first time I used a chemical heat source while camping in the Rockies during an unexpected spring snowstorm. I was cold, tired, and desperately craving something warm when I remembered the self-heating meal pack at the bottom of my bag. Like some kind of wilderness magic, I had a hot beef stew 15 minutes later without a single flame!
Chemical heating has honestly saved my bacon more times than I can count. When you’re in fire-restricted areas or facing weather that makes solar cooking impossible, these flameless options become absolute lifesavers. They’re not perfect, but they’re reliable in ways other methods simply aren’t.
How Chemical Heat Sources Work
Most commercial self-heating meals work through an exothermic reaction—typically using calcium oxide or magnesium with water.
- You just add water to the heating element (usually in a separate compartment from the food).
- Wait about 10-12 minutes, and boom!
- Piping hot food without any flame or electricity.
Advantages of Self-Heating Meals
The convenience factor here is off the charts:
- No setup required—just add water and wait.
- No monitoring necessary— It works entirely on its own.
- Functions in any weather condition—I’ve used them in pouring rain, howling wind, and even snowfall.
Drawbacks and Food Quality Concerns
Of course, they’re not perfect:
- Cost: They’re not exactly cheap.
- Taste: Let’s be honest—nobody’s winning culinary awards with these meals.
- Quality is improving—new 2025 options taste substantially better than the cardboard-flavored versions from a few years ago.
Eco-Friendly and DIY Alternatives
For those worried about waste (which should be all of us!), there are now recyclable and even biodegradable self-heating packages available.
- They cost a bit more, but the reduced environmental impact is worth it.
- Helps preserve the pristine wilderness these products help protect.
DIY chemical heating is another option I’ve experimented with:
- Using food-grade iron powder oxidation reactions can create safe, controlled heat.
- Components are lightweight and can be assembled in camp.
- Downside: Takes practice—my first attempt barely warmed up my oatmeal
Safety Considerations
Safety is a major factor when using chemical heat sources:
- Keep them away from sleeping bags, tent materials, and your skin.
- A leaky heater once left a small burn on my pack’s hip belt—not dangerous, but definitely annoying.
Would I recommend relying exclusively on chemical heating for a week-long trip? Probably not, given the waste and cost. But as a backup system or for shorter adventures where weight and reliability matter more than gourmet results, they’re absolutely worth including in your kit.
Thermal Cooking: Retain Heat for Hours
The humble thermal cooker (Thermos’ Shuttle Chef) changed my entire approach to camping meals after a guide showed me his setup during a rainy weeklong trek through Olympic National Park. I was blown away watching him pull out perfectly cooked chicken curry at the end of a long hiking day – a meal he’d started that morning before we even hit the trail!
How Thermal Cooking Works
Thermal cooking operates on a beautifully simple principle:
- Heat your food to boiling briefly.
- Seal it in a heavily insulated container.
- The food continues cooking without using additional energy.
Think of it as a non-electric slow cooker that works through superior insulation rather than plugging into a wall.
Learning Curve and Best Practices
My first thermal cooker was admittedly an impulse buy – I grabbed it on sale without really understanding how to use it properly.
- First attempt = disaster!
- I didn’t get the initial temperature high enough.
- Instead of delicious beef stew, I ended up with lukewarm meat soup that was dangerously undercooked.
Lesson painfully learned.
After some practice, I’ve mastered the technique and now consider my thermal cooker essential gear for any trip longer than a weekend.
- The key is getting everything thoroughly boiling for the right amount of time before transferring to the thermal unit.
- Different foods need different initial cooking times – I keep a small notebook with my tested recipes.
Efficiency and Performance
The efficiency of modern thermal cookers is seriously impressive.
- My current model can keep food above 160°F for up to 8 hours if properly preheated.
- This means I can start dinner in the morning, pack it away, and have a hot meal waiting at camp without using any additional fuel.
- For someone who hates stopping to cook when there are miles to cover, this is game-changing.
Best Foods for Thermal Cooking
Stews, chilis, curries, and grain dishes work spectacularly well with this method. Anything that benefits from slow cooking will shine in a thermal cooker. I’ve even made overnight oatmeal by setting it up before bed – nothing beats waking up to breakfast already made when you’re trying to break camp early!
Weight vs. Fuel Savings
The weight consideration is interesting:
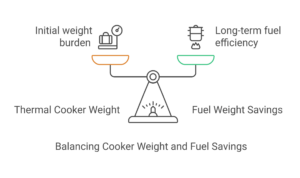
- A good thermal cooker isn’t lightweight (mine is about 2.5 pounds).
- But you save substantially on fuel weight for longer trips.
- For weekend warriors, it might be overkill.
- For extended backcountry adventures, the math works out favorably, especially for group cooking.
Unexpected Benefits
One unexpected benefit?
- Doubles as food storage—keeps leftovers hot for lunch the next day.
- Unlike solar cooking, thermal cooking works regardless of weather or time of day.
- I’ve enjoyed hot meals during torrential downpours, while everyone else ate cold protein bars!
Have you tried thermal cooking yet? Once you experience the joy of arriving at camp with dinner already hot and ready, it’s hard to go back to traditional methods!
Battery-Powered Cooking Devices: High-Tech Solutions
I used to be firmly in the “traditional camping only” camp until a brutal winter expedition in the North Cascades changed my mind forever. When temperatures dropped to -15°F and my stove fuel wouldn’t properly vaporize, I watched in envy as my tech-savvy friend pulled out a sleek battery-powered cooking system and enjoyed a hot meal while I shivered with my granola bars.
Evolution of Battery-Powered Cooking
Battery-powered cooking has come an astounding distance in just the past few years.
- Early devices were heavy and inefficient power hogs.
- Modern 2025 models? Practically a revolution in backcountry cooking technology!
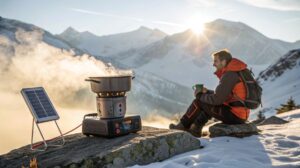
My current go-to is an induction heating system that weighs just under a pound and can boil water in about 3 minutes – comparable to the best liquid fuel stoves without the hassle or fire risk.
Battery Life & Power Management
The obvious question everyone asks: battery life.
- A single charge on my unit can boil about 12-15 liters of water.
- That translates to roughly 3-4 days of cooking for one person.
- Not enough for extended trips, but solar charging panels solve that issue.
I’ve successfully used a foldable 15W solar panel to recharge my cooking system during a 10-day trip through Utah’s canyon country.
- Setup tip: Lay out the solar panel while hiking or during breaks.
- Provided enough power for cooking each evening.
- The system uses the sun’s power without needing direct sunlight for cooking.
Cost vs. Long-Term Savings
The cost factor can’t be ignored.
- Quality electric cooking systems aren’t cheap.
- I saved for months before investing in mine.
- But when I calculated the ongoing cost of fuel canisters I’d no longer need to buy (or carry out as waste), the long-term math made sense.
- Break-even point: After about 30 days of backcountry use, my system paid for itself.
Precision Cooking & Temperature Control
Temperature regulation is another game-changing advantage. Unlike struggling to simmer on a traditional backpacking stove (we’ve all scorched our dinner at least once!), electric systems offer precise temperature control. I can maintain an exact 180°F for things like delicate sauces or perfect dehydrated meal rehydration.
Potential Downsides & Backup Strategies
The biggest downside? Failure risk.
- Today’s battery-powered cooking systems are remarkably reliable.
- But electronics can still fail, especially in wet or extremely cold conditions.
My backup strategy:
- Always carry an ultralight chemical heating option (e.g., flameless ration heater).
- It’s added weight, but the peace of mind is worth it when you’re miles from nowhere.
Would I recommend electric cooking for everyone? Absolutely not. Traditional methods have their place, especially for weekend warriors or ultralight enthusiasts counting every ounce. But for those who camp frequently in fire-restricted areas or desire more cooking control, the technology has finally reached a point where it’s a viable primary option rather than just a novelty.
Cold Soaking and Rehydration Techniques
My introduction to cold soaking came from necessity rather than choice. Halfway through the John Muir Trail, my stove developed a clog I couldn’t fix with my limited tools. Facing either cold food or turning back, I reluctantly tried the cold soaking method a Pacific Crest Trail thru-hiker had mentioned days earlier. By the end of the trip, I was a complete convert!
What is Cold Soaking?
Cold soaking is essentially the ultimate minimalist cooking technique because it requires no heat source whatsoever.
- Simply add cold water to quick-cooking dehydrated foods and let time do all the work.
- Remarkably effective for certain foods and absurdly simple – the kind of technique that makes you wonder why you didn’t try it sooner.
Choosing the Right Container
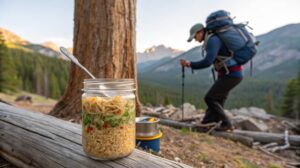
My cold-soaking container of choice isn’t anything fancy – just a repurposed peanut butter jar with a secure lid.
- Some ultralight hikers use specialized containers with wider mouths or measurement markings.
- Honestly, any leakproof container works perfectly fine.
- I’ve even used a zip-top bag in a pinch, though it’s not my preferred method.
Best Foods for Cold Soaking
The food selection makes all the difference between an enjoyable meal and a disappointing one.
Best foods for cold soaking:
- Instant ramen
- Couscous
- Instant mashed potatoes
- Instant rice
Avoid foods that won’t hydrate properly:
- Regular rice
- Pasta
- Anything that requires prolonged heat to break down.
Timing & Preparation Tips
Timing is critical for successful cold soaking.
- General guideline: 30 minutes to 2 hours, depending on the food.
- For lunch: Start soaking in the morning before breaking camp.
- For dinner: Begin rehydration when you start looking for a campsite.
This ensures food is ready when you’re settled in camp.
How Cold Soaking Changes Trail Routine
One unexpected benefit of cold soaking is how it’s changed my trail routine.
- Instead of stopping 30+ minutes to:
- Set up cooking gear
- Boil water
- Prepare food
- Eat & clean up
I can simply pull out my already-soaked meal and:
- Eat while resting briefly.
- Even eat while walking if necessary.
For high-mileage days, this time savings is significant!
Limitations of Cold Soaking
The biggest drawback is obviously temperature – sometimes you just crave something hot, especially in cold weather.
- I’m not hardcore enough to exclusively cold soak during winter trips.
- But from late spring through early fall, it’s become my primary method.
The simplicity and reliability are unbeatable.
Pro Tips for Better Cold-Soaked Meals
My favorite cold-soaking trick involves adding flavor packets or olive oil at the last minute rather than during the initial soak. This prevents the flavors from becoming too diluted or the oils from coating the container. A tiny bottle of hot sauce is also a game-changer for adding variety to otherwise simple meals.
Have you tried cold soaking yet? If you’re looking to simplify your camp kitchen, reduce pack weight, or navigate fire restrictions with minimal hassle, it might just revolutionize your backcountry cooking experience like it did mine.
Just be prepared for the occasional strange look from traditional campers as you eat directly from your peanut butter jar!
Portable Fermentation and Pickling
I never thought I’d become the guy fermenting food in the wilderness, but here we are! It started as a desperate experiment during a three-week trip along the Continental Divide when I ran out of interesting flavors and couldn’t bear another bland meal. The quick-pickled vegetables I prepared changed everything about my approach to extended backcountry nutrition.
Understanding the Basics of Fermentation
Portable fermentation sounds complicated, but it’s surprisingly accessible once you understand the basics.
- The simplest method uses small, airtight containers with an airlock system.
- My first attempt was admittedly crude – a plastic container with a homemade airlock using aquarium tubing.
- Even that produced decently tangy sauerkraut after three days on the trail.
How Temperature Affects Fermentation in the Backcountry
Temperature fluctuations in the backcountry actually work in your favor with fermentation.
- Cool nights slow bacterial activity.
- Warmer days speed it up.
- This natural rhythm creates interesting flavors.
- I’ve had surprisingly consistent results, even with daytime and nighttime temperatures varying by 40 degrees!
Ensuring Safety When Fermenting in the Wilderness
Safety is paramount with any food preparation in the wilderness.
- I always start with extremely clean containers.
- I use slightly more salt than traditional recipes call for. Salt prevents harmful bacteria while allowing beneficial lactobacillus to thrive.
- I always trust my nose – if something smells off, I throw it out!
Quick-Pickling: A Faster Alternative
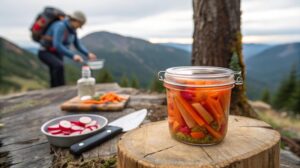
Quick-pickling is even easier than fermentation and delivers flavor benefits in just 24 hours.
Thinly sliced vegetables in a simple brine of:
- salt
- vinegar
- water
They transform into zesty trail treats that revitalize bland backpacking meals.
I regularly quick-pickle:
- radishes
- carrots
- cabbage
Starting on day one of a trip ensures flavorful additions throughout the week.
Minimalist Wilderness Fermentation Kit
My wilderness fermentation kit is surprisingly minimal:
- Two small airtight containers with silicone gaskets
- A tiny bottle of starter culture (optional)
- Salt
- Whatever vegetables I plan to ferment
The entire setup weighs less than 8 ounces and fits easily into my bear canister.
Nutritional Benefits of Fermented Foods on the Trail
The nutritional benefits can’t be overstated, especially on longer trips.
- Fermented foods provide probiotics that help maintain digestive health.
- When eating a limited trail diet, this is critical!
- Since incorporating fermented foods, I’ve noticed:
- Better energy levels
- Fewer digestive issues
Unexpected Trail Fermentation Discoveries
One unexpected discovery was how well certain dried fruits ferment on the trail.
Rehydrated dried apples with:
- A touch of honey
- Cinnamon
- A pinch of my sourdough starter
After about 36 hours they create a delicious, fizzy treat.
It’s become my favorite trail dessert and offers a welcome break from the usual chocolate and nuts routine.
Have you ever considered bringing fermentation into your camping cuisine? It’s definitely not for weekend warriors or those counting every ounce, but for extended trips where food fatigue becomes real, it’s a game-changing technique that connects you to traditional food preservation methods our ancestors relied on!
Body Heat and Passive Cooking Methods
The coldest night of my life was spent at 14,000 feet during an unexpected early-season storm in the Sierra Nevada. With my stove malfunctioning and temperatures plummeting, I discovered the surprising effectiveness of body heat cooking when I tucked a bag of dehydrated beans in my base layer. By morning, I had a perfectly rehydrated breakfast that likely prevented dangerous hypothermia!
How Body Heat Cooking Works
Body heat cooking sounds primitive, but it’s actually an elegant solution for ultralight backpacking and emergency situations.
- Your body generates roughly 100 watts of heat energy.
- This is enough to slowly warm food to approximately 98°F over several hours.
- While this isn’t hot enough to safely cook raw foods, it’s perfect for rehydrating pre-cooked, dehydrated meals.
Step-by-Step Guide to Using Body Heat for Cooking
The technique couldn’t be simpler:
- Place sealed food in a waterproof container.
- Add an appropriate amount of water.
- Store it against your body – typically in an inside pocket close to your core.
- The pocket inside a puffy jacket works perfectly.
- Some hardcore ultralighters even sleep with their food between layers of clothing!
Advantages of Body Heat Cooking in Extreme Conditions
This method shows its true value in extreme conditions.
- When traditional stoves fail due to:
- fuel issues
- High wind
- Equipment malfunction
- Body heat provides a reliable alternative that requires zero extra gear.
- I now intentionally plan at least one “no-cook” meal using this method on every trip as an emergency backup.
Sleep System Integration: Cooking While You Rest
Taking this concept even further, you can integrate passive cooking into your sleep system:
- Place properly sealed rehydrating food in the foot of your sleeping bag.
- This utilizes waste heat that would otherwise dissipate.
- I’ve successfully rehydrated oatmeal overnight, waking up to a ready-to-eat breakfast.
- A true luxury on cold mornings when every minute in a warm sleeping bag counts!
Best Foods for Passive Cooking Methods
The food selection matters enormously when using passive heating methods.
Great options for body heat cooking:
- Instant rice
- Couscous
- Dried bean flakes
- Powdered hummus
Foods to avoid:
- Regular dried beans (too dense)
- Thick pasta (remains crunchy)
I maintain a specific list of “passive-friendly” foods in my trip planning documents to avoid disappointment.
The Science Behind Passive Cooking
Surprisingly, certain cooking chemistry actually happens at body temperature. Acids in foods like tomatoes or citrus juices can “cook” proteins through denaturation even at lower temperatures. I’ve created ceviche-inspired tuna dishes using lemon powder and foil-packed tuna that taste remarkably fresh after a few hours of passive preparation.
Food Safety Considerations
One legitimate concern is food safety. I’m careful to only use this method with foods that are pre-cooked and dehydrated, or those specifically designed to be prepared with cold water. Raw or potentially hazardous foods have no place in passive cooking systems due to the risk of bacterial growth in the temperature danger zone.
What’s your take on these ultralight, zero-equipment cooking methods? Have you ever been in a situation where traditional cooking wasn’t possible? These techniques might seem like “survival tricks,” but they’ve become regular parts of my backcountry cooking strategy even when everything goes according to plan!
Rock Cooking: Using Sun-Heated Stones
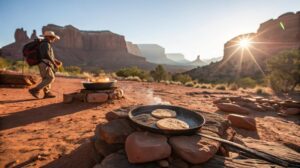
The first time I tried cooking with sun-heated rocks was purely accidental. While hiking in the Utah desert, I picked up a flat, dark basalt stone to use as a makeshift seat and nearly burned my hand! That unexpected discovery led me down a fascinating rabbit hole of one of humanity’s oldest cooking techniques – one that perfectly suits modern fire-restriction challenges.
How Rock Cooking Works
Rock cooking harnesses basic thermal principles:
- Dark-colored stones absorb solar radiation efficiently.
- They store considerable heat energy and then transfer it to food.
- The best stones for this method are flat, dense, and roughly 2-3 inches thick.
Best stone types for cooking:
- Basalt
- Slate
- Certain sandstones
I always thoroughly research local geology before my trips to ensure safe stone selection.
Safety Considerations When Choosing Cooking Stones
Safety cannot be overstated when selecting cooking stones.
DO NOT use:
- Rocks from water sources or those with visible moisture (they can explode when heated!).
- Porous rocks (they often harbor bacteria and are unsafe for cooking).
I learned this important lesson from a seasoned wilderness guide after nearly making a dangerous mistake.
Heating and Preparing the Stones
The cooking process requires patience but minimal effort:
- Place suitable rocks in direct sunlight early in the day.
- Position them for maximum sun exposure and rotate occasionally for even heating.
- By mid-afternoon, well-placed stones can exceed 200°F – hot enough for various cooking applications.
Cooking Applications: From Flatbreads to Slow-Cooked Meals
Making Flatbread on Heated Stones
- After 4-5 hours of solar heating, a flat basalt stone develops enough heat to cook simple dough.
- The result is remarkably similar to traditional desert-region cooking methods.
- There’s something profoundly satisfying about connecting with ancient food preparation techniques.
Creating a Simple Solar Oven
- Arranging heated stones in a shallow pit enhances heat retention.
- Covering with additional sun-warmed rocks creates a rudimentary solar oven.
- Using an emergency space blanket helps reflect heat and prevent dissipation.
- I’ve successfully slow-cooked stews and even baked small loaves of bread using this simple insulation method.
Managing Temperature and Heat Retention
The biggest challenge with rock cooking is temperature control:
- Unlike adjustable stoves, heated stones gradually cool over time.
- Rotation strategy: Always have backup rocks heating while using others for cooking.
- Moving food between hotter and cooler stones allows surprising cooking precision with practice.
Cultural Significance and Indigenous Knowledge
This method connects deeply with Indigenous wisdom:
- Many Native American traditions include sophisticated rock cooking techniques.
- These provided nourishment in fuel-scarce regions.
- I’ve studied these approaches with enormous respect, adapting them to modern materials while appreciating their ingenious simplicity.
Have you ever tried incorporating local elements into your outdoor cooking? Rock cooking might seem primitive at first glance, but it represents a remarkable overlap between ancient knowledge and modern sustainability concerns. Plus, there’s nothing quite like the satisfaction of preparing a meal using nothing but sunshine and stone!
Enzymatic “Cooking” Without Heat
My introduction to enzymatic cooking came from an unlikely source – a raw food chef I met while backpacking through California’s Lost Coast. She explained how certain foods could be “cooked” without heat through natural enzymatic processes. Skeptical but curious, I tried her technique for breaking down proteins in tough vegetables using pineapple enzymes. The results were mind-blowing!
How Enzymatic Cooking Works
Enzymatic preparation isn’t cooking in the traditional sense – it’s using biological catalysts (enzymes) to break down proteins, starches, and other food components in ways that mimic thermal cooking. These reactions:
- Physically transform food texture
- Release flavors
- Require no heat source whatsoever
Citrus Juice Marinades: A Simple Enzymatic Method
The most accessible enzymatic technique for campers involves citrus juice marinades:
- The acidic environment denatures proteins, similar to low-temperature cooking.
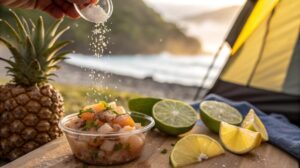
- My go-to trail ceviche uses lime juice powder mixed with water and shelf-stable tuna or salmon packets.
- After just 30 minutes, the proteins transform remarkably, creating a “cooked” texture and a bright flavor profile
Powerful Plant-Based Enzymes
Certain fruits contain enzymes that naturally break down proteins:
- Papaya (Papain) and Pineapple (Bromelase) are particularly effective.
- I bring small amounts of powdered versions – they weigh almost nothing but deliver significant culinary impact.
- A pinch mixed with water creates an effective marinade for jerky or tough dried meats, making them tender and more palatable within a couple of hours.
Commercial Enzymatic Products for Outdoor Cooking
Modern freeze-dried enzyme preparations:
- Remain stable in all weather conditions
- Activate precisely when needed
- Expand no-cook meal options significantly
They occupy a tiny corner of my food bag, yet they revolutionize my backcountry diet.
Nutritional Benefits of Enzymatic Cooking
Unlike heat cooking, which destroys certain vitamins and beneficial compounds, enzymatic methods:
- Preserve more nutrients
- Boost energy levels
- Aid faster recovery
I’ve personally noticed these benefits on longer trips, especially when fresh produce is unavailable.
Optimizing Temperature for Enzymatic Cooking
Temperature still matters, just differently than in traditional cooking.
- Enzymatic reactions occur fastest between 105-115°F.
- Passive solar warming methods can help:
- I place enzyme-marinating foods in black containers.
- Positioning them in filtered sunlight accelerates the process without overheating and killing the enzymes.
Food Safety Considerations
Without heat to kill pathogens, ingredient selection, and handling are critical!
- I am extremely careful about which foods I prepare enzymatically.
- I avoid anything with a meaningful contamination risk.
- Commercial enzymatic options offer greater safety assurance.
Have you explored the fascinating world of “cooking” without heat? Whether you’re navigating fire restrictions, minimizing environmental impact, or simply exploring ancient food traditions, enzymatic preparation offers a scientifically fascinating and practically valuable addition to your remote camping culinary toolkit. The techniques might seem unusual at first, but they connect us to traditional wisdom predating fire itself!
Conclusion:
Embracing fireless cooking methods for remote camping not only helps you comply with increasingly common fire restrictions but also reduces your environmental impact while still enjoying delicious meals. By mastering several of these techniques, you’ll be prepared for any situation, whether dealing with unexpected weather changes or exploring areas where fires are prohibited. As outdoor recreation continues to grow in popularity, responsible camping practices like fireless cooking become essential skills for every outdoor enthusiast. Which of these methods will you try on your next remote camping adventure, or got a fireless hack I missed? Slide into the comments—I’m always foraging for new ideas!
Additional Resources
- Leave No Trace: Offers comprehensive ecosystem knowledge and how avoiding fire protects the environments
- Ultimate Guide to Wilderness Survival Skills: Talks comprehensively about survival skills in the wild or off-grid.
- How to Stay Safe While Camping Off-Grid: Offers safety and survival tips in the wilderness
-
Wilderness Survival Guide: Offers practical advice on wilderness survival, highlighting the role of mental attitude.
-
Mental Survival Techniques: Discusses mental techniques for staying calm and focused during hikes.
Frequently Asked Questions
1. What’s the fastest fireless cooking method for when I’m really hungry after a long day hiking?
Cold soaking is actually your quickest option when you’re famished! The key is planning ahead. Start rehydrating quick-cooking items like instant mashed potatoes or couscous about 30-45 minutes before you plan to eat. If you forgot to plan ahead, instant mashed potatoes are your best friend – they’ll be ready in just 5-10 minutes with cold water.
For even faster results, use body heat to speed up the process by keeping your food container in an inside pocket close to your torso. I always keep a “hangry emergency kit” with pre-mixed seasonings and instant potatoes for those days when I’m too exhausted to wait.
2. How do I know if my food has reached a safe temperature when using alternative cooking methods?
Without a thermometer, you’ll need to rely on visual cues and common sense. For most fireless methods (except solar cooking on perfect days), you should stick to foods that are safe to eat without reaching the full 165°F that kills bacteria. Pre-cooked and dehydrated foods that simply need rehydration are your safest bet.
As a general rule: if you can comfortably hold your metal spoon in the food for more than a few seconds, it’s likely below 140°F. This means it’s safe for pre-cooked items but potentially risky for raw ingredients. When in doubt, opt for foods that are safe to eat cold or at lower temperatures, and always ensure your water is properly purified before using it for rehydration.
3. Which foods absolutely won’t work with fireless cooking methods?
Through years of trial and error (and some truly disappointing meals), I’ve found several foods that just don’t cooperate with fireless methods. Raw dried beans are the worst offenders – they require sustained boiling to become edible and remove lectins. Regular rice (not instant) needs higher temperatures than most fireless methods can provide.
Thick pasta shapes like penne or rotini need more heat than something like thin vermicelli. Raw meats are obviously a no-go from a safety perspective. Also, avoid ingredients that rely on the Maillard reaction (browning) for flavor development, such as pancake batters or anything you’d typically fry. Stick with pre-cooked, dehydrated, or quick-cooking ingredients specifically designed to rehydrate at lower temperatures.
4. What’s the best fireless cooking method during winter camping when temperatures are below freezing?
Winter camping presents unique challenges for fireless cooking! Based on my experiences in sub-zero temperatures, thermos cooking is undoubtedly your best option. Pre-heat your thermos with boiling water (prepared before your trip), then empty and quickly fill with your meal ingredients and more boiling water.
A quality thermos can maintain cooking temperatures for 6-8 hours even in freezing conditions. For additional insulation, wrap the thermos in your sleeping bag or down jacket. Chemical heat methods like hand warmers become much more effective in winter as well – the contrast between their heat and the cold environment creates a greater temperature difference that speeds up cooking.
Body heat methods still work surprisingly well in winter since your body maintains its temperature regardless of outside conditions – just be sure to use proper insulation to trap that heat effectively.
5. How do I calculate how much extra water I need to carry for fireless cooking methods?
Water management is crucial with fireless cooking! Unlike traditional methods where you might use water efficiently through boiling, many fireless techniques require additional water for proper rehydration. As a general rule, I calculate my water needs using this formula: normal drinking water + (1.5 × cooking water listed on package instructions).
Cold soaking typically requires about 25-30% more water than the package directions for hot preparation. For a typical 3-day trip with 3 cold-soaked meals per day, I add approximately 1.5-2 extra liters to my total water carrying capacity.
On water-scarce routes, I prioritize foods with lower water requirements – for example, couscous uses less water than rice, and tortillas with peanut butter require none. Remember to factor in cleaning needs too – without hot water, you might need extra for proper sanitization.

