Introduction:
Ever found yourself in the wilderness with no shelter and nightfall approaching? It’s a scenario no one plans for, but knowing how to build an emergency shelter in the wilderness can save your life. I remember my first attempt at building a lean-to during an impromptu camping trip—let’s just say I learned the hard way that choosing the right location is everything! As someone who’s experienced the rush of improvising shelter in the wild, I can promise you it’s a skill worth mastering. Mastering this skill is crucial for braving unexpected challenges. Let’s dive into practical tips and techniques for creating a safe haven in the wild. (Fun fact: hypothermia can set in within minutes if you’re unprepared!)
Why Emergency Shelters Are Essential in Wilderness Survival
 Building an emergency shelter isn’t just about comfort—it’s about survival. When you’re exposed to the raw elements of the wilderness, a well-constructed shelter can mean the difference between life and death. Imagine being caught in a sudden downpour or enduring freezing winds without protection. The risks of hypothermia, dehydration, and even heatstroke increase exponentially without a safe space to rest and recover.
Beyond physical safety, having a shelter provides a crucial psychological advantage. It gives you a sense of control in a chaotic situation, helping to reduce panic and conserve energy for other survival tasks. From shielding you from predators and pesky insects to providing a safe place to rest, an emergency shelter is your first line of defense in the wild.
Key Factors to Consider When Choosing a Shelter Location
Location:
Choosing the right location for your emergency shelter can make or break your survival experience. One of the most important factors is proximity to resources. You’ll need access to water, firewood, and natural materials like branches and leaves for building and insulation. However, balance is key—don’t set up too close to a water source, as these areas often attract wildlife and may be prone to flooding.
Safety:
Safety from natural hazards is another critical consideration. Avoid areas under dead or weak branches, which can fall without warning, and steer clear of low-lying spots that might collect water during a storm. Look for slightly elevated ground to keep you dry and reduce exposure to damp conditions.
Natural barriers:
Natural barriers like large rocks or dense clusters of trees can provide extra protection from wind and rain, while also helping to camouflage your shelter. Lastly, ensure your shelter is easy to spot for potential rescuers if you’re in a survival situation. A combination of practicality and safety will go a long way in ensuring your chosen location serves you well.
Types of Emergency Shelters and How to Build Them
When it comes to emergency shelters, adaptability is key. Each type of shelter has its strengths, depending on the materials you have on hand and the environment you’re in. Let’s break down the most effective types and how to construct them.
 A-Frame Shelter
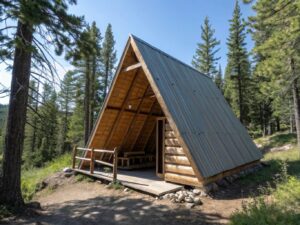
The A-frame shelter is a go-to design for cold weather and windy conditions. Its angled structure
directs wind and rain away from you while providing excellent insulation.
-
Materials Needed:
Sturdy branches for the frame, a tarp or survival blanket (if available), and natural debris like leaves or moss for added insulation. -
How to Build:
- Find a strong horizontal branch to serve as the ridgepole and secure it between two sturdy supports (e.g., trees or rocks).
- Lean additional branches against the ridgepole on both sides to create the “A” shape.
- Cover the frame with a tarp or pile natural debris over it to keep out wind and moisture.
 Lean-To Shelter
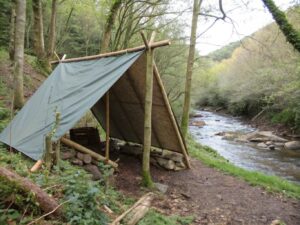
If you need something quick and simple, the lean-to is a solid choice. It’s great for rain protection and uses minimal materials.
-
Materials Needed:
A long branch or log for the main support, smaller branches, and foliage or a tarp. -
How to Build:
- Prop the main branch at an angle against a tree trunk or large rock.
- Lay smaller branches horizontally along the angled support.
- Cover with leaves, grass, or a tarp to create a weatherproof barrier.
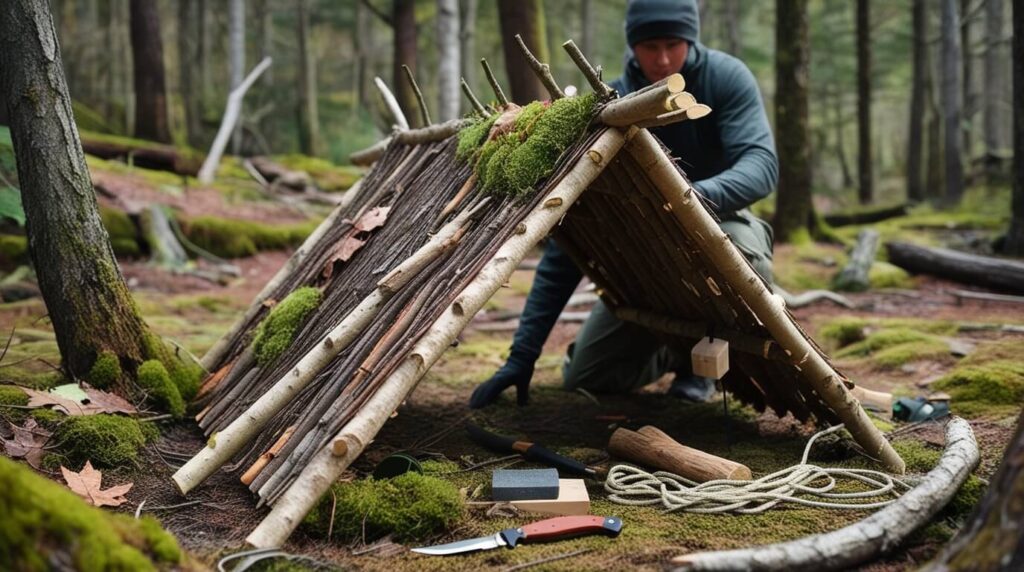
 Debris Hut
The debris hut is an excellent option for keeping warm during cold nights. Its thick insulation traps heat, mimicking a cozy cocoon.
- Materials Needed: A long, sturdy branch for the main ridge, lots of smaller branches, and a significant amount of leaves and moss.
- How to Build:
- Place the main branch at an angle, supported by a tree or rock.
- Stack smaller branches against the ridge to form the frame.
- Pile on a thick layer of leaves, moss, or grass for insulation, making sure to leave an opening large enough to crawl inside.
 Snow Cave
If you find yourself in a snowy environment, a snow cave could save your life by insulating you from the frigid cold.
- Materials Needed: A shovel or digging tool and compacted snow.
- How to Build:
- Locate a snowdrift deep enough to carve into.
- Dig an entrance tunnel that slopes upward into the main chamber to trap warm air.
- Shape the interior into a dome and smooth out surfaces to prevent dripping.
 Tarp Shelter
The tarp shelter is the easiest and quickest option, making it invaluable for emergency situations.
- Materials Needed: A tarp, emergency blanket, or poncho and supports like trees or poles.
- How to Build:
- Tie two corners of the tarp to trees or poles to create a roof-like structure.
- Secure the other corners to the ground with stakes or rocks for stability.
- Adjust the angle based on weather conditions for optimal protection.
Each of these shelters is designed to maximize protection while requiring minimal effort and materials. With a bit of practice, you’ll be ready to adapt to any situation the wilderness throws at you!
Materials You’ll Need and How to Source Them
Building an emergency shelter requires resourcefulness and an eye for useful materials. Here’s what you’ll need and how to gather them efficiently in the wilderness.
 Natural Materials
The wilderness offers a wealth of resources to construct a sturdy and protective shelter.
- Sticks, Branches, and Logs
- Look for fallen branches of various sizes. Choose thicker branches for the frame and smaller ones for layering.
- Avoid rotting or brittle wood, as it won’t provide the necessary support.
- Leaves, Grass, or Moss
- These materials act as natural insulation, keeping your shelter warm and blocking wind.
- Gather dry leaves and grass to pile on your structure. Moss can be found on rocks or tree trunks and works as an excellent filler for gaps.
- Rocks
- Use rocks to anchor your shelter and stabilize the structure, especially in windy conditions.
- Flat, heavy rocks are ideal for weighing down tarps or reinforcing walls.
 Tools to Bring or Improvise
While the wilderness provides most of what you’ll need, a few tools can make the process faster and more efficient.
- Survival Knife
- A good knife is indispensable for cutting branches, sharpening stakes, or trimming excess material. If you don’t have one, look for sharp stones to improvise cutting tools.
- Rope or Paracord
- Rope helps secure branches, create a framework, or tie materials together. In its absence, vines or strips of bark can serve as makeshift rope.
- Sharp Stones
- If you lack modern tools, find jagged stones to cut or shape wood. Use them to strip bark, trim branches, or smooth surfaces.
Tips for Sourcing Materials
- Stay Close to Your Shelter Location: Avoid exhausting yourself by venturing far to gather resources.
- Be Mindful of the Environment: Only take what you need, and avoid harming live trees or plants unnecessarily.
- Evaluate the Durability of Materials: Check that wood is dry and sturdy, leaves are not damp, and rocks are stable for anchoring.
Having the right materials and knowing how to source them effectively is half the battle when building a wilderness shelter. With these essentials in hand, you’ll be well-equipped to create a safe and reliable refuge.
Common Mistakes to Avoid When Building an Emergency Shelter
Even the most experienced survivalists can make mistakes when constructing an emergency shelter. Avoid these common pitfalls to ensure your shelter is both effective and safe.
1. Overlooking Weather Conditions
One of the biggest mistakes is not tailoring your shelter design to the weather. For example:
- Building a lean-to in freezing temperatures might leave you exposed to cold winds.
- Failing to waterproof a structure can lead to discomfort and hypothermia during rainstorms.
Solution: Always assess the weather first. Prioritize designs like debris huts for cold weather or tarp shelters for heavy rain.
2. Spending Too Much Time or Energy on Elaborate Structures
While it’s tempting to create a perfect shelter, overcommitting to complex designs can drain your energy. This is especially dangerous when daylight is limited.
Solution: Focus on practicality. A simple lean-to or A-frame can be constructed quickly and will serve your needs just as well as a more elaborate structure.
3. Failing to Insulate the Ground
Many people forget that the ground can sap heat from your body faster than the air. Sleeping directly on bare earth can lead to hypothermia, even with a well-built shelter.
Solution: Use natural insulation like leaves, pine needles, or moss to create a thick bedding layer. This helps retain body heat and keeps you off the cold ground.
4. Choosing Unsafe Locations
An ill-chosen location can lead to significant risks, including:
- Building under dead branches that might fall.
- Settling near animal paths, dens, or water sources, which can attract wildlife.
- Constructing in low-lying areas prone to flooding during rain.
Solution: Look for elevated ground, free from debris, with natural barriers like rocks or trees for added protection. Always scout the area thoroughly before setting up.
By keeping these common mistakes in mind, you can build a shelter that not only protects you but also conserves your energy and keeps you safe from the elements. Survival is about making smart, efficient choices, and avoiding these errors is a critical step in that process.
Essential Survival Tools Display:
- A flat lay of a survival knife, paracord, and sharp stones on a forest floor with leaves, branches, and vines nearby.
- Include a piece of bark or vine tied like rope to show improvisation.
Tips for Staying Safe and Comfortable Inside Your Shelter
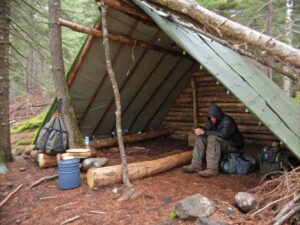 Once your emergency shelter is up, the next challenge is making it a safe and livable space. These tips will help you stay warm, secure, and comfortable while minimizing risks.
1. How to Insulate Your Shelter Effectively
Insulation is crucial for retaining heat and blocking the cold air from seeping in.
- Layer Up: Add extra debris like leaves, grass, or moss to the walls and roof of your shelter. The thicker the layer, the better it will trap warmth.
- Seal Gaps: Use smaller branches or mud to fill in any gaps in your shelter’s structure, particularly around the entrance. This will help prevent drafts.
- Ground Cover: Insulate the ground with a thick layer of leaves, pine needles, or dry grass to create a barrier between you and the cold earth.
2. Techniques to Maintain Warmth Without Fire
While fire is ideal, it’s not always possible in every survival scenario. Here’s how you can stay warm using alternative methods:
- Use Body Heat: Snuggle up inside the shelter and use your own body heat to warm the space. For added warmth, huddle with a partner if you’re not alone.
- Wear Layers: Even if your clothes are damp, layering can help trap heat. Use any spare clothing or materials to wrap around your body.
- Windproof Your Shelter: Position your shelter’s entrance away from prevailing winds. Use rocks, logs, or branches to create a windbreak.
- Conserve Energy: Avoid unnecessary movement that burns calories, which are critical for generating body heat.
3. Managing Food and Water Inside the Shelter
While keeping sustenance close is convenient, improper handling can invite trouble.
- Store Food Securely: If possible, keep food in sealed containers or wrapped tightly in layers of fabric. Avoid leaving scraps or smells that could attract animals.
- Hang Food: Suspend your food outside the shelter, at least 10 feet off the ground and away from the shelter entrance, to minimize risk from wildlife.
- Keep Water Clean: Store your water in a covered container to avoid contamination. If snow is your water source, melt it and keep it covered to conserve heat.
- Limit Food Preparation: Avoid cooking inside your shelter, as the smells can linger and attract predators.
By insulating effectively, conserving warmth, and handling food and water responsibly, you can turn your shelter into a safe and comfortable refuge. With these strategies, you’ll be well-equipped to endure whatever nature throws your way.
Conclusion:
Building an emergency shelter in the wilderness can be daunting, but it’s also incredibly empowering. I’ll never forget the first time I found myself in an unexpected overnight stay in the woods. With daylight fading fast and temperatures dropping, I cobbled together a lean-to with trembling hands, using what little knowledge I had at the time. It wasn’t pretty, but it kept me safe and taught me a valuable lesson: adaptability and resourcefulness can make all the difference.
If there’s one thing I’ve learned, it’s that preparation is key. Practicing these techniques before you need them can save you precious time and energy when it matters most. Whether you’re camping, hiking, or facing an unplanned survival situation, take a deep breath, assess your surroundings, and trust in your ability to make it work.
Remember, every stick you gather, every leaf you pile, and every decision you make is a step toward safety. With these tips in your mental toolkit, you’re ready to face the wilderness with confidence. Now, go ahead and embrace your inner survivor—you’ve got this!
FAQ
- How can I build an emergency shelter without a tarp?
- If you find yourself without a tarp, you can still build an effective shelter using natural materials like sticks, leaves, and moss. Create a simple A-frame or lean-to by leaning branches against sturdy trees or rocks. Insulate with layers of leaves and grass to protect from cold winds and retain warmth.
- What is the best type of shelter for a cold weather survival situation?
- A debris hut or A-frame shelter is ideal for cold weather. These structures allow you to create thick insulation by layering leaves, moss, and branches. The A-frame directs wind away from your shelter, while the debris hut traps heat effectively due to its thick covering.
- How do I prevent attracting animals to my shelter?
- To avoid attracting wildlife, store food securely in sealed containers and keep it far from your sleeping area. Hang your food high off the ground and away from your shelter entrance. Clean up any food scraps immediately and avoid cooking inside the shelter to prevent smells from lingering.
- What should I do if my shelter starts to collapse?
- If your shelter is collapsing, first check the structure for any weak points. Reinforce with more branches and leaves. Use rocks to stabilize the structure. If the collapse is severe, it might be best to start over, finding a better location and using a different design.
- How can I maintain warmth inside the shelter without using a fire?
- When fire isn’t an option, use body heat by snuggling up with a partner or by covering yourself with multiple layers of clothing or natural materials. Insulate your shelter well with leaves, grass, or moss to trap warmth. Position the shelter entrance away from wind to prevent drafts and conserve body heat.

