Introduction:
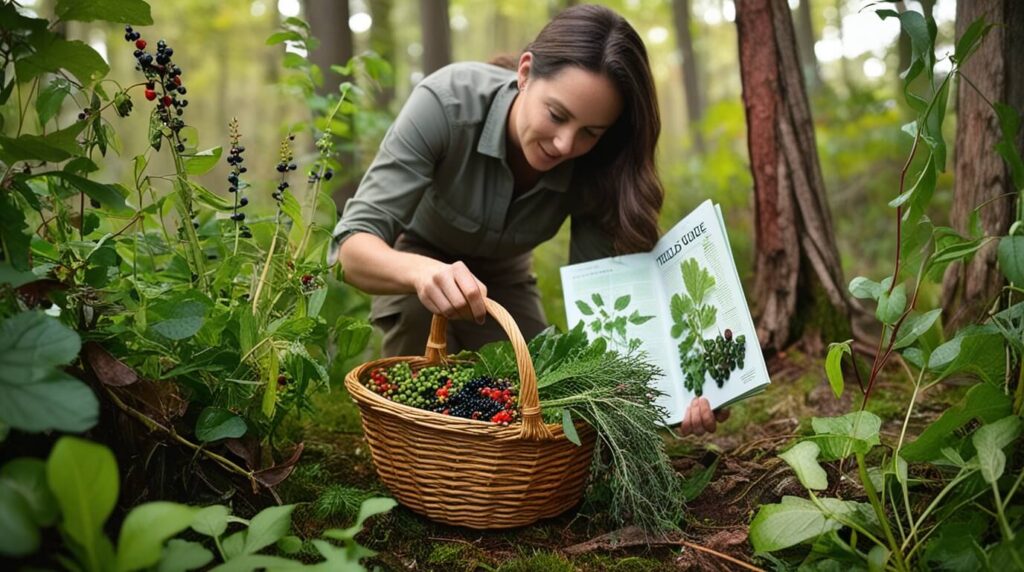
Imagine this: you’re hiking through a lush forest when you spot what looks like wild berries. Are they safe to eat? According to the North American Mycological Association, plant misidentification leads to thousands of poison control calls annually! Understanding how to identify edible plants in the wild is crucial for safe foraging. I’ve spent over a decade studying wild edibles, and I’m here to share the essential knowledge you need to forage safely. From universal edibility tests to seasonal gathering tips, this guide will help you confidently identify nature’s bounty.
Understanding the Universal Edibility Test
Let me tell you about the time I almost learned the universal edibility test the hard way! I was out hiking in the Cascades when I came across what looked like wild mint. The leaves had that familiar shape, and I was so tempted to just pop one in my mouth. Thank goodness my old foraging mentor’s voice echoed in my head: “Never skip the steps, no matter how confident you are!”
Here’s the thing about the universal edibility test – it’s not foolproof, but it’s way better than playing botanical roulette with your health. I’ve taught this method to hundreds of students, and it’s saved more than a few from some nasty stomach aches (or worse).
Importance of Patience
First things first: the test takes time. I mean really takes time – we’re talking about 24 hours to do it properly. I know, I know, that sounds like forever when you’re excited about a potential find! But trust me, one bad experience with plant toxins will make that 24-hour wait feel like nothing.
Let me break down the process I use, step by step:
Step 1: The Skin Test
Take a piece of the plant and rub it on the inside of your wrist or elbow. Wait 15 minutes. If you get any redness, itching, or burning – game over. Move on to another plant.
- Lesson Learned: I once had a student skip this step and ended up with a rash that looked like they’d hugged a poison ivy bush!
Step 2: Lip Sensitivity Test
If the skin test is clear, hold a small piece against your lip for 3 minutes.
- What to Watch For: You’re checking for any tingling, burning, or numbness. Your lips are way more sensitive than your hands, which makes them perfect for this test.
- Personal Insight: I’ve felt plants fail this test that felt totally fine on my skin.
Step 3: Tongue Testing
Next up (assuming no reaction), place a tiny piece on your tongue for 15 minutes.
- Cautionary Note: Don’t swallow! Just let it sit there. You’re looking for any bitter, burning, or soapy tastes.
- Hidden Danger: Some plants are masters of deception – they might taste fine at first but develop a nasty flavor after a few minutes.
Seasonal and Preparation Variations
One crucial thing I’ve learned: some plants are toxic only in certain seasons or when prepared incorrectly.
- Example: Take elderberries – the berries are edible when ripe and cooked, but the leaves, bark, and unripe berries contain cyanide-producing compounds. Yikes!
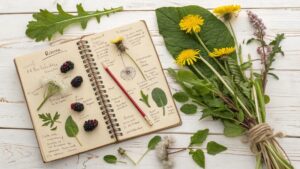
Keeping a Foraging Journal
Here’s a pro tip that took me years to figure out: keep a detailed journal of every plant you test.
- What to Record: Write down the date, location, plant description, and any reactions.
- Why It Matters: This practice has saved me from retesting plants I’d already ruled out (or helped me remember safe ones I’d found before).
The Mushroom Exception
And please, don’t even think about testing mushrooms this way!
- Special Caution: The universal edibility test doesn’t work for fungi – they play by their own rules entirely.
- Lesson Learned: I learned that from a mycologist after enthusiastically telling him about my plant testing methods. The look of horror on his face told me everything I needed to know!
Remember, this test isn’t a guarantee – it’s just one tool in your foraging toolkit. Some plants can still cause delayed reactions or be toxic in larger quantities. When in doubt, my golden rule is simple: if you’re not 100% sure, let it be. The forest will still be there tomorrow with plenty more plants to discover!
Essential Tools for Wild Plant Identification
You know what’s funny? When I first started identifying wild plants, I thought all I needed was a good field guide and my eyes. Boy, was I wrong! After a particularly confusing afternoon trying to tell the difference between two similar-looking plants using just a beaten-up guidebook, I realized I needed to up my game.
Let me share what’s in my plant ID kit now – and trust me, every single item has earned its place through trial and error. The best part is, you don’t need to spend a fortune to get started!
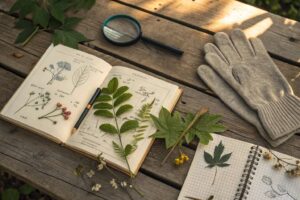
Field Guides
First up: your field guides. I always carry at least two different ones, and here’s why. Each guide has its own way of organizing plants and its own set of photos or illustrations.
- Why Two Guides?: Sometimes one guide will have that crucial detail you need that another missed.
- Preferred Combination: My go-to combination is one photographic guide and one with detailed illustrations. Those hand-drawn pictures often show important features more clearly than photos!
Magnify Your Observations
Here’s something that revolutionized my foraging game: a good quality hand lens or loupe (10x magnification is perfect). I remember the first time I used one to look at a plant’s leaf structure – it was like discovering a whole new world! Those tiny hairs or leaf patterns that you can barely see with your naked eye? They’re often the key to proper identification.
Smartphone Apps
Speaking of tools, let’s talk about your smartphone.
- Benefits: Apps like iNaturalist have saved my bacon more times than I can count.
- Limitations: Never rely solely on apps for identification. They’re great for narrowing things down but not perfect.
- Cautionary Tale: I once saw an app confidently identify a potentially dangerous plant as something edible. Yikes!
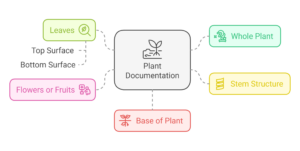
Documenting Plants
Documentation is crucial, and this is where your phone’s camera really shines. I’ve developed a system I call the “FBI approach” (Flower, Base, Inside). Take photos of:
- The whole plant in its habitat
- Close-ups of the leaves (top and bottom)
- The stem structure
- Any flowers or fruits
- The base of the plant where it meets the soil
Handling Plants Safely
One tool that often gets overlooked: a good pair of nitrile gloves.
- Why Gloves Matter: You don’t want to be handling unknown plants with bare hands, especially if you’re doing the universal edibility test later.
- Lesson Learned: I discovered this the hard way after a run-in with what I thought was wild carrot!
Collecting Samples
For collecting samples (when appropriate and legal), I carry small paper bags and a small trowel. Plastic bags can make plants sweat and decompose quickly, while paper allows them to breathe. And please, if you’re digging up roots, make sure you have permission and only take what you need.
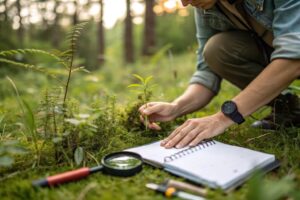
The Power of a Notebook
The most underrated tool in my kit? A simple notebook and pencil. Not a pen – pencils work in any weather and don’t smear when wet. I use mine to sketch important details, note the location and record growing conditions. These notes have become invaluable over time, creating a personal reference guide specific to my local area.
Organizing Your Kit
One last thing I’ve learned: organize your tools in a way that makes sense for you. I use a small belt pouch for frequently accessed items (like my loupe and gloves) and keep everything else in a lightweight backpack. Nothing worse than fumbling around for your camera while trying to hold onto a sample!
Remember, these tools are just that – tools. They’re meant to support your learning, not replace good old-fashioned observation skills. The best tool you have is still your brain and your patience. Take your time, double-check everything, and never stop learning!
Key Plant Identification Features
You wouldn’t believe how many times I’ve seen eager foragers get mixed up because they were only looking at one part of a plant! I made this mistake myself when I first started – I’d see a leaf shape that looked familiar and get all excited, completely ignoring other crucial features that would have told me it was actually a different species entirely.
Listen, identifying plants is kind of like being a nature detective. You can’t just look at one clue and solve the case! After years of teaching plant ID workshops, I’ve developed what I call the “SLOPES” method: Structure, Location, Odor, Pattern, Environment, and Season. Let me break this down for you.
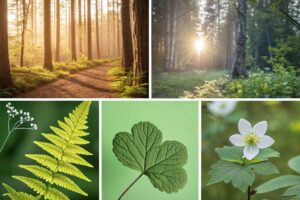
Structure: Leaf and Stem Clues
Leaf Arrangement
When I’m examining a new plant, I always look at the leaf arrangement first. Are they opposite each other on the stem, or do they alternate? This one detail alone can rule out entire families of plants!
- Case Study: I remember once confidently identifying a plant based on its leaf shape, only to realize later that the arrangement was completely wrong for the species I thought it was.
Leaf Patterns
Then there’s the leaf patterns themselves – and wow, nature gets creative here! You’ve got simple leaves, compound leaves, leaves with smooth edges (entire margins), and those with teeth (serrated margins). One trick I learned from a botanist is to take a leaf and hold it up to the light. The way the veins pattern out is like a plant’s fingerprint!
Stem Characteristics
The stem tells its own story too. Is it woody or herbaceous? Square or round? Here’s something cool I discovered: plants in the mint family usually have square stems! Plus, they’ve got opposite leaves. Finding both these features is like hitting the ID jackpot – you’ve probably got a mint family member on your hands.
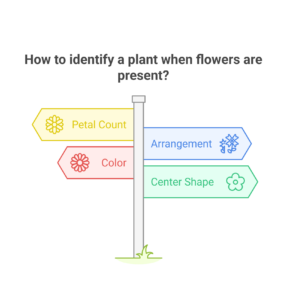
Flowers
Now, flowers are often what people focus on first, but they’re actually not always the most reliable identifier. Why? Because they’re not always present! That said, when you do have flowers to work with, they’re incredibly helpful. I always look at:
- Number of petals
- Flower arrangement (single or in clusters?)
- Color (including spots or stripes)
- Shape of the center
Root Systems
Root systems can be super informative too, though I’m careful about uprooting plants. Sometimes you can learn a lot just by looking at what’s visible above ground. Is it growing from a bulb? Does it have runners? These details can be crucial for proper identification.
Seasonal Changes
Plants are masters of disguise throughout the year!
- Tracking Seasonal Shifts: That lovely spring ephemeral might be completely gone by summer, while some plants are only safely identifiable in certain seasons.
- Personal Experience: I once tracked the same patch of plants for a full year, taking photos every week. The changes were amazing – and sometimes barely recognizable as the same plant!
Companion Plants and Habitat
Plant Communities
Plants often grow in communities. Learning which plants typically grow together has saved me from misidentification countless times. When I see certain companion plants, it helps confirm my ID hunches.
Growing Conditions
Habitat is a critical clue:
- A plant growing in a wet, shady area is probably not the same as a similar-looking one in full sun, even if they appear identical at first glance.
Lesson Learned: I confused two look-alikes that thrived in completely different environments!
Observation
The most important thing I’ve learned? Take your time. Observe. Build a relationship with the plants in your area.
- Key Insight: No single feature tells the whole story. It’s the combination of characteristics that leads to positive identification.
- Golden Rule: When in doubt, there’s no shame in walking away.
Some of my best learning experiences came from plants I couldn’t identify right away but kept revisiting to study!
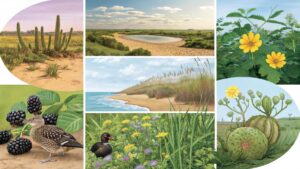
Common Edible Plants by Region
Let me tell you something I wish someone had told me when I first started foraging – Mother Nature likes to keep things local! I spent way too much time in my early days looking for plants that weren’t even native to my area. These days, I teach my students to start with what’s actually growing in their backyard.
Forest Ecosystems
The forest ecosystem is like an all-you-can-eat buffet once you know what to look for. One of my favorite memories is discovering my first patch of wild ramps (Allium tricoccum) in early spring. That garlicky smell was unmistakable! In deciduous forests across eastern North America, you’ll often find:
- Morel mushrooms popping up in spring (remember what I said about mushroom identification though!)
- Ramps and wild leeks in shady, moist areas
- Blackberries and raspberries along forest edges
- Chickweed carpeting the forest floor
- Wood sorrel with its delicate clover-like leaves
Meadows and Fields
Meadows and fields are absolute treasure troves. I’ll never forget leading a workshop where we found over 15 edible species in just one small field! In these open areas, you’re likely to spot:
- Dandelions (the entire plant is edible!)
- Common plantain (not the banana-like fruit, but the leafy ground plant)
- Red clover blossoms
- Wild strawberries
- Lamb’s quarters (one of my favorite wild greens)
Wetlands
Wetland areas require extra caution – this is where some of the most dangerous look-alikes hang out. But they also host some incredible edibles. I always tell my students to be extra careful here, as misidentification can be serious. Some reliable wetland edibles include:
- Cattails (multiple edible parts throughout the year)
- Watercress (watch for clean water sources)
- Duck potato/Wapato
- Wild rice in certain regions
- Pickleweed in saltwater marshes
Desert Regions
Desert regions might look barren at first glance, but they’re full of surprises! I spent some time in the Southwest and was amazed by the diversity. You’ll find:
- Prickly pear cactus (both fruits and pads)
- Mesquite pods
- Desert chia
- Agave (though preparation is crucial)
- Mormon tea
Coastal Regions
Coastal regions offer their own unique bounty. One summer, I spent two weeks learning about coastal foraging from a local expert, and it completely changed my perspective. Some common coastal edibles include:
- Sea lettuce
- Various types of seaweed
- Beach peas
- Sea rocket
- Coastal salsify
Timing and Regional Variations
Seasonal Awareness
Successful foraging isn’t just about identifying plants – it’s about understanding their seasons and cycles. Each region has its own calendar of when certain plants are at their prime. I keep a detailed journal of when and where I find different species throughout the year.
Start Small and Expand
- Begin with 3-4 common, easy-to-identify plants in your area.
- Watch how they change through the seasons.
- Learn their preferred habitats before gradually expanding your knowledge.
Local Knowledge Matters
Remember that regional variations can be significant. A plant that’s perfectly safe in one area might have a dangerous look-alike in another region. This is why local knowledge is so valuable. I always recommend connecting with local foraging groups or experienced foragers in your area – they’ll know the specific varieties and look-alikes to watch out for in your region.
Weeds as Nutritional Powerhouses
And here’s something I can’t stress enough: just because a plant is common doesn’t mean it’s not valuable! Some of our most nutritious wild edibles are plants that people consider “weeds.” Dandelions, for instance, are more nutritious than most of the greens you’ll find in a grocery store!
Dangerous Look-alikes to Avoid
Let me share something that still gives me chills. Early in my foraging journey, I almost mistook Water Hemlock for Water Parsnip. The plants look incredibly similar, but one is edible and the other is deadly poisonous. That near-miss taught me a lesson I’ll never forget – knowing your toxic look-alikes is just as important as knowing your edibles!

The Perils of the Carrot Family
The carrot family (Apiaceae) is probably the trickiest group I’ve encountered. It includes some fantastic edibles like Queen Anne’s Lace (wild carrot), but also some of North America’s most poisonous plants. Water Hemlock, Poison Hemlock, and Fool’s Parsley all belong to this family. Here’s what I always check for:
- Purple spots or blotches on the stem (often indicates a toxic variety)
- The distinct carrot-like smell in the root (though never dig up suspicious plants!)
- The shape of the leaf brackets where they meet the stem
- The pattern of the flower umbels (those umbrella-like clusters)
Common Look-alike: Virginia Creeper vs. Wild Grape
Another dangerous pairing I’ve come across is Virginia Creeper versus wild grape vines. While Virginia Creeper isn’t deadly, eating its berries can make you seriously ill. The key difference? Virginia Creeper has five leaflets, while grape vines have individual leaves with serrated edges. I actually create identification cards for my students showing these differences side by side.
Lily-of-the-Valley vs. Wild Ramps
Here’s a scary one: Lily-of-the-Valley versus Wild Ramps. Both emerge as green shoots in spring, but one makes a delicious wild garlic, while the other could stop your heart! The foolproof way to tell them apart? Ramps always have that distinct garlic/onion smell. If there’s no smell, walk away!
The Triple Check Rule
I’ve developed what I call the “Triple Check Rule” after some close calls:
- Check the main identifying features
- Check for the presence of toxic look-alike characteristics
- Check a reliable field guide (not just a phone app!)
Seasonal Changes and the Importance of Growth Stages
Sometimes, seasonal changes can make identification even trickier. I remember watching a patch of plants through spring and being shocked at how different they looked as they matured. This is why it’s crucial to know your plants in all their growth stages.
The “Avoid List”: A Personal Safety Resource
One thing that really helped me was creating an “Avoid List” – a collection of photos and notes about the most dangerous plants in my area. I studied these even more carefully than the edible ones. Because let’s face it – it’s better to pass up an edible plant than risk eating a poisonous one!
Emergency Response for Suspected Poisoning
If you suspect poisoning:
- Call Poison Control immediately (save their number in your phone!)
- Try to preserve a sample of the plant for identification
- Take photos if possible
- Note the time of consumption and symptoms
Regional Variations Matter
A plant that’s safe in one area might have a toxic look-alike in another region. I always connect with local experts when foraging in a new area.
Trust Your Instincts
The most important lesson I’ve learned? When in doubt, don’t risk it. No wild edible is worth the gamble. I’ve walked away from plenty of plants that I was 90% sure about – because 90% isn’t good enough when it comes to toxic look-alikes.
Trust your instincts too. If something feels off about a plant – maybe the leaf pattern isn’t quite right, or the stem color seems different – listen to that little voice of doubt. Mother Nature has given us good instincts; we just need to learn to trust them!
Sustainable Harvesting Practices
Let me tell you about a moment that completely changed how I approach foraging. I was excited to find a patch of wild leeks and started harvesting enthusiastically. An elderly forager who happened to be passing by gently stopped me and taught me something I’ll never forget: “When you harvest, you’re not just taking from the land – you’re becoming part of its story.”
The Rule of Thirds
The first rule of sustainable foraging is the “Rule of Thirds.” I live by this principle religiously:
- Leave 1/3 for wildlife
- Leave 1/3 for plant regeneration
- Take only 1/3 for yourself
Harvesting Techniques
But here’s something that took me years to fully understand – it’s not just about how much you take, but how you take it. I learned this the hard way after eagerly harvesting some nettles by pulling them up roots and all. A local botanist later explained that cutting just the top leaves would’ve allowed the plant to regrow multiple times in one season!
Here’s my personal harvesting checklist that I’ve developed over years of trial and error:
- Check local regulations (some areas require permits)
- Identify multiple harvesting locations to avoid over-harvesting
- Bring proper tools (sharp scissors, trowel, paper bags)
- Take photos before harvesting to document the site
- Harvest from robust populations only
Seed Scattering
One practice I’m particularly passionate about is seed scattering. While harvesting berries, I always make sure to drop some ripe ones back onto suitable ground. It’s like paying rent to nature! I’ve actually gone back to spots years later and found new plants growing where I scattered seeds.
Legal Considerations
Legal considerations are super important too. Different areas have different rules about foraging on public lands. I keep a small notebook with local regulations for each area I forage in.
Some key things to check:
- Whether permits are required
- Seasonal restrictions
- Quantity limits
- Protected species lists
- Private property boundaries
Honorable Harvest
Here’s something crucial that changed my approach: learning from indigenous knowledge. Many Native American tribes have sophisticated sustainable harvesting practices that have been refined over generations. They taught me about the concept of “honorable harvest” – taking only what you need and giving back in return.
Observing the Plant Community
I’ve developed a personal ritual when harvesting: before taking anything, I spend a few minutes observing the plant community. Are there signs of other foragers (human or animal)? How abundant is the plant? Are there young plants growing nearby? This pause helps me make better decisions about whether and how much to harvest.
Giving Back to the Ecosystem
Speaking of giving back, here are some ways I try to contribute to the ecosystem:
- Remove invasive species while foraging
- Pack out any trash I find
- Report illegal dumping or harmful activities
- Share sustainable practices with other foragers
- Monitor plant populations over time
Protecting Abundant Patches
One of my biggest mistakes when starting out was getting excited about a find and over-harvesting. Now I know that abundant patches are actually the most important ones to protect – they’re the mother colonies that help spread the species!
Remember, sustainable foraging isn’t just about this season – it’s about ensuring these plants will be there for years to come. Every time you harvest, you’re making a choice that affects future generations of both plants and foragers. That’s a responsibility I take very seriously, and I hope you will too!
Storage and Preparation Basics
Let me share a hard lesson I learned early in my foraging journey. After spending a whole morning gathering a beautiful batch of wild greens, I stored them in plastic bags in the fridge. By the next day, they were a wilted, slimy mess! That experience taught me that proper storage is just as important as proper identification.
The First Hour Rule
You know what’s funny? Each wild edible seems to have its own personality when it comes to storage. Some are divas that need immediate attention, while others are surprisingly hardy. After years of trial and error, I’ve developed what I call my “First Hour Rule” – whatever you plan to do with your foraged finds, the first hour after harvesting is crucial.
Here’s my post-harvest routine that’s saved countless plants from spoiling:
- Clean everything gently (but don’t soak!)
- Remove any damaged parts
- Pat dry (moisture is often the enemy)
- Sort by preservation method
- Process the delicate items first
Drying Techniques
Let’s talk about drying, which is probably the oldest preservation method around. I learned this awesome trick from an herbalist: for leafy plants, hang them upside down in paper bags with holes punched in the sides. The bag catches any pieces that fall off, and the holes prevent mold. Just don’t make my rookie mistake of drying them in direct sunlight – it can degrade both flavor and medicinal properties!
Fresh Storage Methods
Fresh storage is trickier than you might think. Different plants need different conditions:
- Root vegetables: Cool, dark, slightly humid conditions
- Leafy greens: Refrigerated with just a touch of moisture
- Berries: Cool and dry, used within days
- Mushrooms: Paper bags in the fridge (never plastic!)
- Flowers: Used as quickly as possible
Freezing and Vacuum Sealing
One game-changing tool I’ve discovered is the vacuum sealer. If you’re planning to freeze your finds, removing air is crucial.
But here’s a pro tip: freeze the items on a tray first, then vacuum seal. This prevents crushing delicate plants and berries.
Let me tell you about my favorite simple recipe for preserving wild greens. I call it the “Wild Green Cube” method:
- Blanch your greens briefly
- Blend with a tiny bit of water
- Pour into ice cube trays
- Freeze, then transfer to storage bags
These concentrated cubes are perfect for dropping into soups or smoothies all year round!
Matching Containers to Storage Needs
Temperature and timing are everything. I use different containers depending on how long I want to store things:
- Glass jars for dried items
- Mesh bags for roots and tubers
- Mason jars for ferment
- Freezer-safe containers for frozen items
Fermentation
Speaking of fermentation – that’s been a game-changer for preserving certain wild edibles. Those dandelion buds that seem to all come at once? They make amazing wild capers when fermented! Just be sure to keep everything super clean and follow proper fermentation protocols.
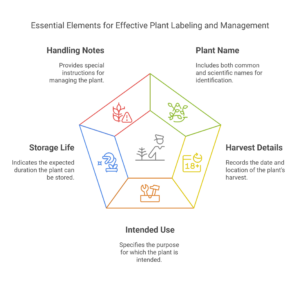
Labeling for Long-Term Success
Here’s something that took me way too long to learn: labeling is crucial! Now I always include:
- Plant name (both common and scientific)
- Harvest date and location
- Intended use
- Expected storage life
- Special handling notes
Start Small and Scale Up
The biggest mistake I see new foragers make? Trying to preserve too much at once. Start small, perfect your methods, then scale up. Nothing’s more discouraging than watching your hard work go to waste because you couldn’t process it all in time.
Remember, our ancestors preserved wild foods without any modern technology. Sometimes the simplest methods are still the best. But that doesn’t mean we can’t take advantage of modern tools when they make sense. The key is matching the preservation method to both the plant and your intended use.
And please, always save some of your preserved goods for midwinter. There’s nothing quite like opening a jar of wild berry jam on a snowy day to remind you that spring will come again!
Conclusion:
Foraging can be a deeply rewarding way to connect with nature, but safety always comes first. Start with easily identifiable plants, and take your time building knowledge—there’s no rush to become an expert overnight! Remember, the best foragers are lifelong learners. If you’re ready to take your skills to the next level, why not join a local foraging group or sign up for an expert-led workshop? Have you tried foraging before, or do you have a favorite plant you love to harvest? Share your experiences or tips in the comments below—I’d love to hear your story!
Frequently Asked Questions
Q: How can I be absolutely sure a plant is safe to eat?
A: There is no absolute guarantee of safety, even with experienced identification. Always follow these steps: 1) Get confirmation from multiple reliable guidebooks, 2) Check for toxic look-alikes, 3) Use the Universal Edibility Test, 4) Start with a small amount even if you’re confident. Never consume a plant unless you’re 100% certain of its identification.
Q: What are the most dangerous toxic plants I need to watch out for?
A: The most dangerous common plants in North America include Water Hemlock, Poison Hemlock, Death Capping mushrooms, Foxglove, and Poison Ivy/Oak/Sumac. These plants can cause severe illness or death. Learn to identify these dangerous plants first, before learning edible ones, as this knowledge is crucial for safe foraging.
Q: Do I need special permits or permission to forage for wild plants?
A: Yes, in many cases. Always check local regulations before foraging. National parks typically prohibit foraging, state parks often require permits, and private property requires owner permission. Some areas have specific seasonal restrictions or limits on how much you can harvest. Contact your local parks department or forest service for specific requirements.
Q: What basic equipment do I need to start identifying wild plants?
A: Essential equipment includes: 1) At least two reliable field guides specific to your region, 2) A 10x magnifying lens for examining plant details, 3) A good quality camera for documentation, 4) Gloves for handling plants safely, 5) Paper bags for collecting samples, and 6) A notebook for recording observations. A smartphone with plant identification apps can be helpful but should never be your only identification tool.
Q: How long does it take to become proficient at identifying wild edible plants?
A: Becoming proficient takes time and patience – typically at least a year of regular practice to confidently identify common edibles in your area. Start by learning 3-4 easy-to-identify plants with no toxic look-alikes, such as dandelions or blackberries. Gradually expand your knowledge while practicing sustainable harvesting. Taking guided walks with experienced foragers can significantly speed up the learning process.