Introduction:
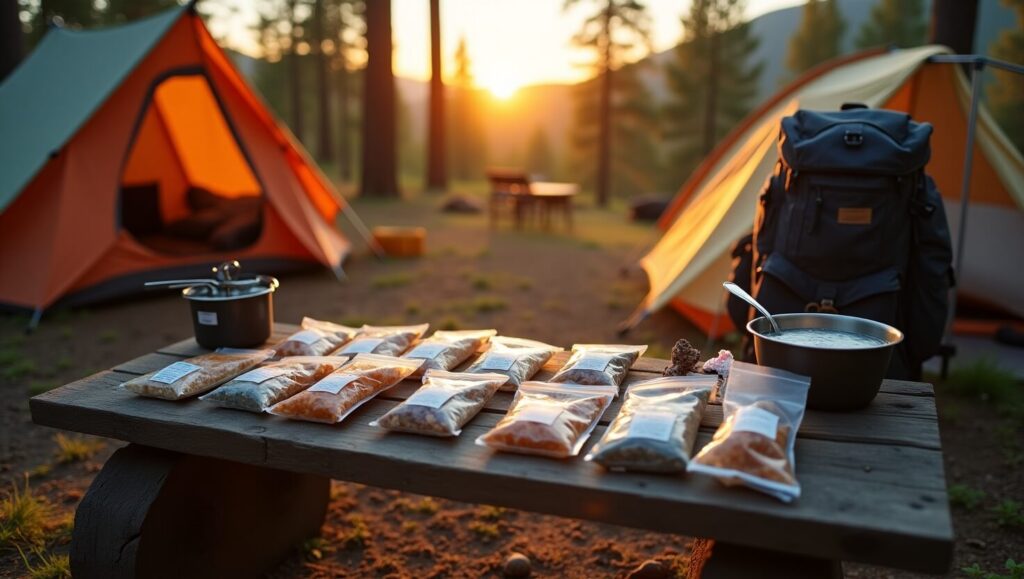
There’s something magical about sitting down after a long day of hiking, watching the sunset paint the sky in brilliant colors, and enjoying a hot, satisfying meal. But if you’re like me, you’ve probably struggled with the eternal backpacker’s dilemma: how to pack food that’s lightweight, doesn’t spoil, and actually tastes good.
After years of suffering through bland freeze-dried meals and heavy canned foods on the trail, I finally discovered the game-changing world of DIY dehydrated camping meals. Learning how to make dehydrated camping meals not only revolutionized my backpacking experience, but it’s also become a hobby I genuinely enjoy during the off-season.
Why I Switched to Making My Own Dehydrated Meals
My journey into dehydrated meal prep began after a particularly grueling 5-day trek through the Adirondacks. My pack was ridiculously heavy from all the canned goods and pre-packaged meals, and by the end of the trip, I was eating cold ravioli straight from the can because I was too exhausted to cook. Not exactly the wilderness culinary experience I had envisioned!
When I got home, I started researching alternatives and fell down the rabbit hole of food dehydration. The benefits of dehydrated food for backcountry adventures are incredible:
- Dramatic weight reduction: Removing water can reduce food weight by up to 70%
- Extended shelf life: Properly dehydrated foods can last for months or even years
- Preserved nutrients: Unlike some preservation methods, dehydration retains much of the original nutritional value
- Cost-effective: Making your own meals costs a fraction of commercial freeze-dried options
- Customizable: I can control ingredients, portion sizes, and flavors
After my first batch of homemade dehydrated chili mac, there was no going back. The commercial meals I’d been buying for $10-15 each suddenly seemed absurdly expensive and mediocre by comparison.
Getting Started: Essential Equipment
Starting your dehydrated food journey doesn’t require a huge investment. Here’s what I found essential:
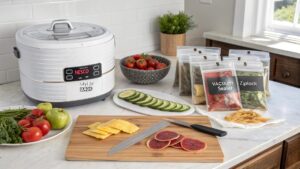
The Dehydrator
While you technically can use your oven on its lowest setting, I quickly discovered that a dedicated dehydrator is worth every penny. After extensive research, I opted for a Nesco FD-75A Snackmaster Pro because it offered a great balance of capacity, temperature control, and affordability.
For those willing to invest more upfront, the Excalibur 3926TB is considered the gold standard among serious dehydrating enthusiasts. Its square trays and rear-mounted fan provide more even drying and greater capacity.
Storage Solutions
Proper storage is critical for maintaining food safety and quality. Here’s what works for me:
- Vacuum sealer: I use the FoodSaver FM2435 for long-term storage of dehydrated ingredients
- Mylar bags with oxygen absorbers: Perfect for meal kits that will be stored for months
- Freezer-grade zip-top bags: For meals I’ll use within a few weeks
Other Essential Tools
- Good quality chef’s knife: Food preparation is much easier with proper tools
- Cutting board: I prefer plastic for easy sanitizing
- Blender: For powdering ingredients like tomatoes or creating vegetable powders
- Digital scale: Critical for portion control and recipe consistency
- Sharpie markers and labels: Trust me, all dehydrated food starts to look similar!
The Dehydration Process: What I’ve Learned
When I started, I assumed dehydrating was just a matter of slicing food and sticking it in the dehydrator. I quickly learned that different foods require different approaches.
Preparing Fruits

Fruits are perhaps the easiest place to start. I slice most fruits 1/4″ thick, with a few exceptions:
- Berries: I leave small berries whole, but prick the skin to help moisture escape
- Bananas: Best sliced about 1/8″ thick for the perfect chewy texture
- Apples: A 1/4″ slice sprinkled with cinnamon creates incredible snacks
Most fruits benefit from a brief soak in a vitamin C solution (1 tablespoon lemon juice per quart of water) to prevent browning.
Vegetables for Meals
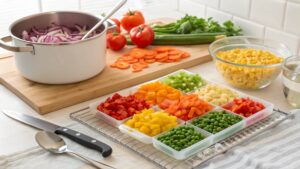 Vegetables require a bit more preparation:
- Blanching: I blanch most vegetables for 1-3 minutes before dehydrating to preserve color, texture, and nutrients
- Size matters: I cut everything to approximately the same size to ensure even drying
- Pre-cooking: Certain vegetables like eggplant, winter squash, and potatoes must be fully cooked before dehydrating
I’ve found that the most versatile dehydrated vegetables for camping meals are onions, bell peppers, carrots, peas, corn, and tomatoes. These form the foundation of many of my recipes.
Meats and Proteins
 Dehydrating meat requires strict food safety protocols:
- Cook thoroughly: All meat must be fully cooked before dehydrating
- Lean is key: Fat can go rancid, so I choose the leanest cuts possible
- Slice thin: 1/8″ to 1/4″ slices dry most efficiently
- Low temperature: I dry meats at 160°F (71°C) for safety
For vegetarian protein options, I’ve had great success dehydrating:
- Cooked beans and lentils
- Tofu (extra firm, pressed, and marinated)
- TVP (textured vegetable protein), which is pre-dehydrated but can be seasoned
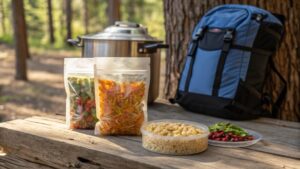
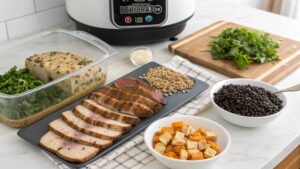
Pre-Made Meals
My greatest breakthrough came when I started preparing complete meals for dehydration:
- Cook the meal as you would normally, but slightly undercook pasta and rice
- Spread on dehydrator trays (lined with non-stick sheets for saucy items)
- Dehydrate at 135°F (57°C) until completely dry and brittle
- Package in individual portions
This approach saves significant fuel and water in the backcountry since you’re simply rehydrating rather than cooking from scratch.
My Favorite Dehydrated Meal Recipes
After much trial and error, I’ve developed a collection of trail-worthy recipes that have become my backcountry staples.

Hearty Beef Stew
Serves 1
Ingredients before dehydrating:
- 4 oz lean ground beef, cooked and rinsed
- 1/2 cup diced potatoes, cooked
- 1/4 cup diced carrots
- 1/4 cup peas
- 1/4 cup diced onion
- 1 tablespoon tomato powder (dehydrated tomato paste)
- 1 beef bouillon cube
- 1/2 teaspoon dried rosemary
- 1/4 teaspoon garlic powder
- Salt and pepper to taste
I cook everything together except the peas (which I add at the end), then spread on a lined dehydrator tray and dry at 135°F for 8-10 hours. The result weighs just a few ounces but rehydrates into a satisfying meal with 1.5 cups of boiling water in about 15 minutes.
Thai Coconut Curry
Serves 1
Ingredients before dehydrating:
- 1/2 cup cooked rice
- 2 oz cooked chicken, diced small
- 1/4 cup bell pepper strips
- 1/4 cup snow peas, sliced
- 2 tablespoons coconut milk powder
- 1 teaspoon Thai curry paste
- 1/2 teaspoon sugar
- 1/4 teaspoon lime powder (dehydrated lime juice)
- Pinch of salt
For this meal, I dehydrate the rice, chicken, and vegetables separately, then combine with the dry ingredients for packaging. It rehydrates in 10-15 minutes with 1 cup of boiling water.
Breakfast Apple Cinnamon Oatmeal
Serves 1
Ingredients:
- 1/2 cup quick oats
- 2 tablespoons powdered milk
- 1/4 cup dehydrated apple pieces
- 1 tablespoon brown sugar
- 1/4 teaspoon cinnamon
- Pinch of salt
- Optional: 1 tablespoon chopped walnuts
This simple breakfast mix doesn’t require pre-cooking before dehydration. I just combine all ingredients in a bag and add 1 cup of boiling water in the morning for a ready-in-5-minute breakfast.
A Comparison of Preservation Methods
When planning for backcountry meals, it’s helpful to understand how different food preservation methods compare:
Food Preservation Methods Comparison
| Method | Weight | Shelf Life | Nutritional Value | Prep Time Needed | Cost | Taste |
|---|---|---|---|---|---|---|
| Dehydrated (DIY) | Very Light | 6-12 months | Good | 10-15 minutes | $ | Very Good |
| Freeze-Dried (Commercial) | Lightest | 5-25 years | Very Good | 5-10 minutes | $$$ | Good |
| Canned | Very Heavy | 2-5 years | Moderate | None | $ | Good |
| Fresh | Heavy | Days | Excellent | Varies | $$ | Excellent |
| Ultralight Dry Foods (pasta, etc.) | Light | 1-2 years | Moderate | 10-20 minutes | $ | Moderate |
As you can see, dehydrated meals offer an excellent balance of weight, nutrition, and cost, with the added benefit of superior taste when made with your own recipes.
Common Dehydrating Mistakes I’ve Made (So You Don’t Have To)
Learning to dehydrate effectively involved plenty of trial and error. Here are some mistakes I made that you can avoid:
1. Not Testing Meals Before a Trip
My first major backpacking trip with homemade dehydrated meals included an experimental curry that simply wouldn’t rehydrate properly. After a long day hiking, I ended up with partially crunchy vegetables and a watery sauce. Now I test every new recipe at home first.
2. Dehydrating High-Fat Foods
Early on, I tried dehydrating regular ground beef without draining and rinsing it. The fat quickly went rancid, ruining an entire batch of chili. I now use only the leanest meats and drain thoroughly.
3. Making Pieces Too Large
Uniform, small pieces dehydrate more evenly and rehydrate much faster. Large chunks might seem dry on the outside but retain moisture inside, leading to spoilage.
4. Forgetting to Label and Date Everything
All dehydrated food looks similar once processed. I learned this lesson when I mixed up my dehydrated tomato sauce with dehydrated strawberry puree. Spaghetti with strawberry sauce is not recommended!
5. Inadequate Storage
I lost a batch of beautifully dehydrated meals to moisture when I stored them in regular zip-top bags during a humid summer weekend. Proper vacuum sealing or moisture-proof containers are essential.
Advanced Techniques I’ve Mastered
As I’ve gained experience, I’ve incorporated some advanced techniques that have elevated my backcountry cuisine.

Creating Vegetable Powders
Dehydrating and then powdering vegetables creates intensely flavorful additions to meals:
- Tomato powder: I use this for sauces, soups, and as a umami flavor booster
- Spinach powder: Adds nutrition and color to pasta dishes and soups
- Mushroom powder: Creates instant depth of flavor
I make these by dehydrating the vegetables completely, then pulverizing them in a blender until they form a fine powder. These powders are incredibly lightweight and versatile trail ingredients.
“Bark” Method for Sauces and Purees
For sauces, I’ve adopted the “leather or bark method” from backpacking chef Glenn McAllister:
- Prepare sauce or puree as normal, but slightly thicker than usual
- Spread thinly (about 1/8″) on dehydrator sheets
- Dry until completely leathery or brittle
- Break into pieces for storage
This works beautifully for tomato sauce, curry bases, and even fruit purees for desserts.
Dehydrating Complete One-Pot Meals
The ultimate convenience comes from dehydrating fully-cooked one-pot meals:
- Prepare your favorite one-pot recipe (pasta dishes, rice meals, stews)
- Slightly undercook pasta or rice to prevent mushiness when rehydrating
- Spread in thin layers on lined dehydrator trays
- Dehydrate until completely dry and brittle
- Break into pieces and package
These meals typically rehydrate in 15-20 minutes with boiling water in a cook pot or food cozy.
Meal Planning for Different Trip Lengths
Effective meal planning varies significantly depending on trip duration:
Weekend Trips (1-3 days)
For shorter adventures, I focus on:
- Higher fresh content at the beginning
- One-bag meals for simplicity
- Perhaps one “luxury” item, like fresh cheese or a small bottle of olive oil
Week-Long Expeditions (4-7 days)
For these medium-length trips:
- Dehydrated meals form the backbone of my food plan
- I carefully balance calories and nutrition
- I implement a staging system for meals
Extended Backcountry Time (8+ days)
For longer journeys:
- Precise calorie counting becomes critical
- I include vitamin supplements
- Variety becomes extremely important for morale
- I sometimes plan mail drops or caches for resupply
Environmental Considerations
As an outdoor enthusiast, I’m committed to minimizing my environmental impact. Dehydrating my own meals has significantly reduced my backcountry waste:
- Packaging: By using reusable containers or biodegradable bags, I’ve reduced single-use packaging waste
- Local and seasonal ingredients: I prioritize local produce when making my meals
- Leave No Trace principles: Proper food storage and waste disposal are essential
I’ve switched to compostable freezer bags for some trips, though they don’t offer the shelf life of mylar options. It’s a constant balance between practicality and environmental ethics.
Storage and Shelf Life
Understanding shelf life is crucial for safely enjoying your creations. Here’s what I’ve learned about storage durations:
- Short-term storage (1-2 months): Simple zip-top freezer bags work fine if kept in a cool, dark, dry place
- Medium-term storage (2-6 months): Vacuum sealing significantly extends shelf life
- Long-term storage (6+ months): Mylar bags with oxygen absorbers provide the best protection
I label everything with:
- Contents
- Date prepared
- Rehydration instructions
- Calorie count
Scaling Up: Preparing for Group Trips
When preparing for group adventures, I’ve developed efficient systems:
- Assembly line preparation: I process ingredients in batches rather than complete meals
- Clear documentation: Everyone gets meal cards with instructions
- Communal and personal components: Some items are shared (spices, oils) while main meals remain individually portioned
- Dietary considerations: Clear labeling for allergens and preferences
This approach has made feeding groups of up to eight people manageable even on extended backcountry trips.
Rehydration Techniques in the Field
Proper rehydration is just as important as the dehydration process. My preferred methods include:
Cold Soaking
 For no-cook lunches or times when I want to conserve fuel:
- Add cold water to the meal in a leakproof container
- Wait 1-4 hours (depending on ingredients)
- Enjoy without cooking
This works best for items like couscous, instant rice, and some vegetables.
Hot Water Rehydration
 My standard approach for most dinners:
- Bring water to a boil
- Add to meal in an insulated food cozy or pot
- Wait 15-20 minutes
- Stir and enjoy
The insulated cozy method saves significant fuel compared to simmering.
Pot Cooking
 For some meals, especially those with rice or heartier ingredients:
- Add the meal to the pot with the prescribed water amount
- Bring to a boil
- Remove from heat, cover, and insulate pot (I wrap mine in a small piece of foam sleeping pad)
- Wait 15-20 minutes
The Economics of DIY Dehydrated Meals
One of the most compelling reasons to create your own dehydrated meals is cost savings. Let’s break it down:
Commercial freeze-dried meal: $8-15 per serving Homemade dehydrated equivalent: $2-4 per serving
For a 7-day trip with 2 dehydrated meals per day:
- Commercial cost: $112-210
- DIY cost: $28-56
- Savings: $84-154
The initial investment in a dehydrator ($50-300) pays for itself within a few trips. Plus, there’s the incalculable value of eating food that actually tastes good and matches your preferences.
Special Dietary Considerations
One of the greatest advantages of making your own meals is accommodation of dietary needs:
Vegetarian/Vegan Options
My plant-based favorites include:
- Lentil curry with dehydrated coconut milk
- Bean and rice burritos with dehydrated guacamole
- Mushroom risotto with nutritional yeast
Gluten-Free Needs
I’ve adapted many recipes for friends with celiac disease:
- Rice noodle stir-fry dishes
- Polenta with dehydrated vegetables
- Quinoa breakfast bowls
Low-Sodium Requirements
By controlling every ingredient, I’ve created lower-sodium versions of typically salt-heavy backpacking meals:
- Using herbs and spices instead of bouillon
- Adding small packets of salt separately for those who want it
- Incorporating lemon/lime powder for flavor enhancement
Seasonal Variations
I adjust my meal planning with the seasons:
Summer Trips
- Lighter meals with refreshing flavors
- More cold-soak options
- Higher electrolyte content for hot weather
Winter Adventures
- Higher calorie density (up to 50% more calories per meal)
- More substantial texture and mouthfeel
- Warming spices like cinnamon, ginger, and cayenne
- Extra hot drinks and soups
Dehydrating for Emergency Preparedness
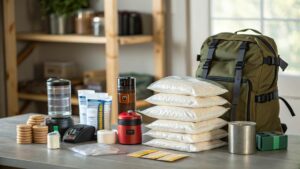
Beyond backpacking, my dehydrating skills have become part of my emergency preparedness strategy:
- I rotate a supply of dehydrated meals in our emergency kit
- These provide nutrition that doesn’t require refrigeration
- The lightweight nature means our emergency food doesn’t take up excessive space
While this wasn’t my original intention, it’s become a valuable secondary benefit of mastering food dehydration.
Troubleshooting Common Issues
Even with experience, challenges arise. Here are solutions to common problems:
Problem: Meals Not Rehydrating Properly
Solution: Cut ingredients smaller before dehydrating, ensure complete dehydration, and give more soaking time in the field.
Problem: Off Flavors Developing
Solution: Check for inadequate drying, improve storage methods, or use vacuum sealing.
Problem: Texture Issues (Too Mushy)
Solution: Slightly undercook pasta and rice before dehydrating, and carefully time the rehydration.
Problem: Uneven Drying
Solution: Rotate trays during the drying process and ensure consistent piece sizes.
The Joy of Trail Cooking
Perhaps the most unexpected benefit of my dehydrated meal journey has been the way it’s enhanced my connection to both food and the outdoors. There’s profound satisfaction in sitting on a mountain ridge, watching the sunset, and enjoying a delicious meal I created specifically for that moment.
Food has become more than fuel—it’s now part of my outdoor experience. The anticipation of a favorite recipe after a challenging day adds motivation when my legs are tired and the trail seems endless.
Getting Started: Your First Dehydrated Meal Project
If you’re intrigued by the possibilities, I recommend starting with a simple project:
Beginner-Friendly Pasta Primavera
Serves 1
Ingredients:
- 1 cup cooked pasta (slightly undercooked)
- 1/4 cup each diced bell peppers, zucchini, and carrots (blanched)
- 2 tablespoons dehydrated onion
- 1 tablespoon olive oil (add when rehydrating)
- 1 teaspoon Italian herb blend
- 2 tablespoons powdered milk
- 2 tablespoons grated parmesan (add when rehydrating)
- Salt and pepper to taste
Preparation:
- Cook pasta until just before al dente
- Blanch vegetables for 1 minute
- Combine pasta and vegetables, spread on dehydrator trays
- Dehydrate at 135°F for 6-8 hours until completely dry
- Mix with dried herbs and powdered milk
- Package with clear instructions to add oil and cheese after rehydration
This simple meal will give you a taste of what’s possible while requiring minimal specialized knowledge.
Conclusion:
My journey into dehydrated meal preparation began with a simple desire for better trail food, but it’s become much more—a creative outlet, a practical skill, and a way to enhance my wilderness experiences.
The learning curve might seem steep at first, but each batch gets better, and the rewards are immediate. There’s nothing quite like pulling out a homemade meal that weighs ounces but delivers comfort and nourishment miles from the nearest road.
If you’re tired of mediocre commercial options or heavily packed food, I encourage you to give dehydrating a try. Start small, experiment freely, and remember that even “failures” are usually edible! Before long, you might find yourself eagerly planning meals for your next adventure before you’ve even planned the route.
Happy trails and happy eating!
This blog post reflects my personal experience over several years of preparing dehydrated meals for backcountry adventures. Food safety is paramount—always research current food safety guidelines from authoritative sources before beginning your own dehydrating projects.
Additional Resources
- The Ultimate Guide to Long-Term Camping Food Storage: Learn proven methods, essential gear, and expert strategies to keep your food fresh, safe, and accessible.
- The Ultimate Guide to Dutch Oven Cooking While Camping: Learn about off-grid camp cooking and recipes.
- Easy One-Pot Off-Grid Camping Meals for Outdoor Adventures: Learn my absolute favorite one-pot wonders that will fuel your wilderness adventures.
- Fireless Cooking Methods: Learn essential fireless cooking methods for remote camping
- Wilderness Cooking Techniques: Learn the best cooking techniques in the wilderness that will give you the best outdoor meal experience.
- How to Read Weather Patterns in the Wild: Learn about weather patterns and how to survive in the wilderness
- 10 Campfire Recipes That Won’t Bomb: Check out this curated list of campfire recipes that keep you going off-grid during camping
- Ultimate Guide to Wilderness Survival Skills: Talks comprehensively about survival skills in the wild or off-grid.
- How to Stay Safe While Camping Off-Grid: Offers safety and survival tips in the wilderness
Frequently Asked Questions
1. How long do homemade dehydrated meals actually last?
When properly dehydrated and stored in ideal conditions (cool, dark, and moisture-free), most homemade dehydrated meals can last 6-12 months. For maximum shelf life, vacuum seal your meals and store them in a cool, dark place. Using oxygen absorbers with mylar bags can extend shelf life even further, potentially up to 1-2 years for low-fat meals. Always inspect food before consuming and discard anything that shows signs of spoilage.
2. Can I dehydrate anything, or are some foods off-limits?
While many foods dehydrate wonderfully, some items simply don’t work well or pose safety risks. Avoid dehydrating high-fat foods (like avocados, fatty meats, or dairy), eggs, foods with high oil content, and very watery items with minimal fiber (like watermelon). Stick to lean meats, vegetables, fruits, legumes, and properly cooked starches for the best results and food safety.
3. Do I really need a food dehydrator, or can I use my oven?
While you can use a conventional oven set to its lowest temperature (usually 170°F) with the door cracked open, a dedicated food dehydrator offers significant advantages. Dehydrators provide consistent, controlled temperatures (crucial for food safety), better airflow for even drying, and greater energy efficiency for long drying sessions. If you plan to dehydrate regularly, a basic dehydrator is a worthwhile investment that will quickly pay for itself compared to commercial backpacking meals.
4. What’s the best way to test if my food is completely dehydrated?
Food must be thoroughly dehydrated to prevent spoilage. To test: fruits and vegetables should be leathery or brittle with no moisture when torn open; jerky should crack when bent but not snap completely; and pre-cooked meals should be completely brittle. After cooling, seal food in a clear container for 24 hours—if any condensation appears, it needs further drying. Remember that under-dried food is dangerous as remaining moisture can support microbial growth.
5. What are the best meals for beginners to start with?
Start with simple recipes that have relatively short ingredient lists and straightforward preparation. Good beginner options include pasta dishes (like spaghetti with meat sauce), oatmeal breakfast packs with dehydrated fruits, basic rice and bean combinations, and simple vegetable soups. These meals typically have reliable dehydration and rehydration properties, use common ingredients, and are forgiving of minor technique issues. As you gain confidence, you can progress to more complex meals with multiple components and flavors.