Introduction:
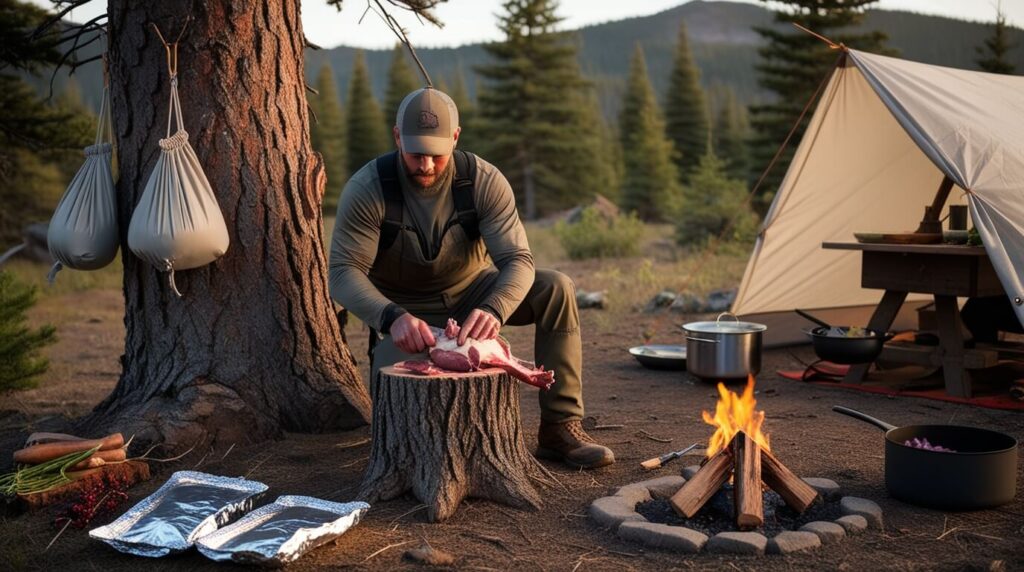
When you’re miles from civilization with nothing but your pack and the wilderness surrounding you, there’s something profoundly satisfying about preparing a meal from wild game you’ve harvested yourself! I’ve been an avid backcountry hunter and off-grid enthusiast for over fifteen years, and I’ve learned (sometimes the hard way) that proper game preparation can make the difference between a memorable wilderness feast and a disappointing—or even dangerous—experience.
In 2025, with more people seeking authentic outdoor experiences than ever before, mastering these skills isn’t just about survival—it’s about connecting with our ancestral roots while enjoying sustainable, organic protein sources. Did you know that properly field-dressed game can stay fresh up to 50% longer in the right conditions? Let’s dive into everything you need to know about preparing wild game when you’re off the grid!
Essential Field Dressing Techniques
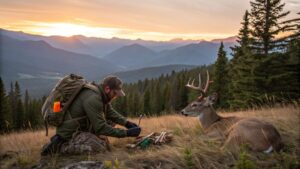
I still remember my first time field dressing a deer. It was a crisp autumn morning in Montana, and I was miles from the nearest road when I took down a modest whitetail buck. The excitement quickly turned to panic as I realized I had about 30 minutes of daylight left and a whole deer to process! Let me tell you, nothing teaches you the importance of good field dressing techniques like racing against the setting sun with a dull knife.
After 15+ years of off-grid hunting trips, I’ve developed a system that works reliably even in the most challenging backcountry situations. Field dressing is truly the foundation of good wild game preparation – mess this up, and nothing else matters.
Step-by-Step Field Dressing Guides
Deer and Similar Large Game
- Positioning is everything. Place the animal on its back, slightly uphill if possible. This positioning uses gravity to your advantage. I learned the hard way that trying to work on flat ground makes the entire process twice as difficult.
- Make the initial cut carefully. Start at the bottom of the breastbone and cut through the hide (not into the body cavity yet!). Insert two fingers into the initial cut with the blade facing upward to guide your knife and prevent puncturing intestines. Continue cutting down to the pelvic bone.
- Open the body cavity. Once the initial cut is made, carefully cut through the thin membrane (peritoneum) exposing the organs. Work slowly here – I once rushed this step and nicked the intestines. Had to throw away several pounds of perfectly good meat because of that mistake.
- Remove the genitals and anus. Cut around the anus with extreme care, tying it off with string if possible to prevent contamination.
- Split the pelvic bone. For larger game, you’ll need a saw. For smaller deer, a sturdy knife might do the job if you find the cartilage between the halves.
- Cut the diaphragm. This is the membrane separating the chest and abdominal cavities. Cut it all the way around the rib cage.
- Reach up and sever the windpipe and esophagus. This allows you to pull all organs out in one package.
- Remove the heart and liver separately. These are edible and delicious if properly prepared! Place them in a clean game bag immediately.
- Prop open the cavity. Use sticks to keep the cavity open for cooling. If you’re in bear country like I often am, this is when you quickly move on to quartering to get the meat away from the carcass.
Rabbit and Small Game
- Make a small incision at the base of the belly. Be extremely careful not to puncture intestines.
- Insert two fingers to lift the abdominal wall away from the organs.
- Cut a straight line up to the rib cage. The small size makes precision crucial.
- Remove entrails with a scooping motion. With rabbits, the entire organ set often comes out cleanly with one pull.
- Check for and remove any remaining tissue. Pay special attention to the chest cavity.
- Rabbit-specific tip. I’ve found that removing the scent glands (small whitish-yellow nodes) in the small of the back and flank areas prevents gamey taste.
Fish
- Insert knife at the anal vent. Cut along the belly toward the head.
- Open the body cavity and remove entrails. Use your fingers to scrape out any remaining blood along the backbone.
- Remove the gills. They spoil quickly and can ruin your catch.
- Decide on scaling vs. skinning. For most wilderness situations, I prefer to fillet larger fish and cook smaller ones with the skin on (scales removed).
- Rinse with clean water if available. If water is scarce (which happens often in real backcountry situations), wiping with clean cloth works too.
Birds
- Remove crop and windpipe. Make a small incision at the base of the neck and pull these out.
- Make a small horizontal cut below the breastbone. Be careful not to cut too deep.
- Insert fingers and pull out intestines and organs. The heart and liver can be kept for eating.
- For longer preservation. Consider skinning rather than plucking in hot weather. I’ve found that skinned birds cool much faster in warm conditions.
Essential Field Dressing Tools
After years of trial and error, here’s what I carry in my pack:
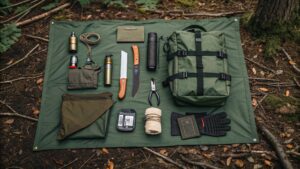
- Primary hunting knife (4-5 inch fixed blade) – The cornerstone of your kit. I started with a $30 knife and nearly cried with frustration trying to process a deer. Now I use a high-carbon steel blade that maintains its edge. Worth every penny when you’re exhausted and still have work to do.
- Backup knife (smaller 2-3 inch blade) – For more detailed work and as a backup. Trust me, dropping your only knife down a ravine is a wilderness nightmare I’ve lived through.
- Bone saw or hatchet – For splitting the pelvis or removing limbs. I prefer a folding saw for weight considerations.
- Paracord or strong string (at least 10 feet) – For tying off the rectum, hanging meat, and a dozen other uses.
- Latex or nitrile gloves (several pairs) – Protects both you and the meat. I once processed game barehanded and got a nasty infection from a tiny cut I didn’t notice.
- Game bags (breathable cotton or synthetic) – Critical for keeping meat clean and away from flies. Old pillowcases work in a pinch!
- Sharpening tool – Even the best knife dulls during field dressing. A small pocket sharpener has saved me countless times.
- Lightweight tarp (at least 5×7 feet) – Provides a clean work surface in muddy or snowy conditions.
Why quality matters so much: When you’re 8 miles from your vehicle with a 180-pound deer on the ground and darkness approaching, tool failure isn’t an option. A quality knife that holds its edge might cost $80-150 instead of $25, but that difference is forgotten when you’re efficiently processing game instead of sawing away with a dull blade.
Critical Timing Considerations
The clock starts ticking the moment the animal dies. Here’s what I’ve learned about timing:
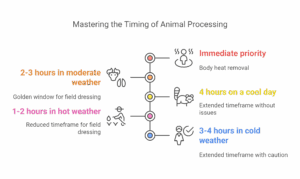
- Immediate priority: Body heat removal. Internal body temperature (around 100°F) is perfect for bacterial growth. This is why opening the body cavity quickly is crucial.
- Golden window: 2-3 hours in moderate weather. You really want to have the animal field dressed within this timeframe. I once pushed this to 4 hours on a cool day (about 45°F) without issues, but I wouldn’t risk longer.
- Temperature danger zone: 40-140°F. Meat spoilage accelerates dramatically in this range.
- In hot weather (above 70°F), you have significantly less time – perhaps just 1-2 hours to complete field dressing and get the meat cooling.
- In cold weather (below 40°F), you gain more time, but don’t get complacent. I still aim to complete field dressing within 3-4 hours maximum.
How this affects meat quality: Delayed field dressing allows bacteria to multiply, blood to coagulate in the meat, and organs to potentially rupture as gas builds up. The result is gamey-tasting, potentially unsafe meat. I’ve tasted the difference between properly and improperly field-dressed venison from the same animal – one cut was sweet and clean-tasting, the other had that “livery” flavor many people mistakenly associate with all wild game.
Common Field Dressing Mistakes
Learn from my errors so you don’t repeat them:
- Using a dull knife. This leads to excessive pressure, slipping, and potential injuries or meat contamination. I check my knife edge before every hunting trip now.
- Puncturing the intestines or stomach. This introduces bacteria and can taint large portions of meat. Work slowly around these organs.
- Cutting the bladder or gallbladder. The first time this happened to me, the bitter gallbladder fluid ruined nearly 5 pounds of perfectly good liver. These fluids are nearly impossible to completely wash off in field conditions.
- Inadequate bleeding. Properly bleeding the animal improves meat flavor and preservation. I make sure to drain blood thoroughly, especially if I didn’t get a clean kill shot that caused significant bleeding.
- Not removing the tarsal glands on deer. These scent glands can taint meat if your knife touches them and then touches meat. I use a separate knife just for removing these glands.
- Rushing the process. I know it’s tempting, especially when you’re tired or cold, but rushing leads to mistakes. The extra 15 minutes of careful work saves hours of trying to salvage contaminated meat.
- Improper cooling. Not propping open the body cavity or hanging the animal incorrectly traps heat and accelerates spoilage.
Minimizing Scent and Avoiding Predators
In predator country, field dressing creates an aromatic invitation you don’t want to extend. Here’s how I handle this:
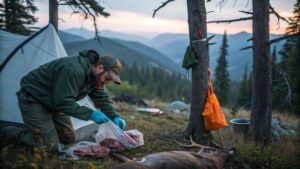
- Distance your processing site from camp. I process game at least 200 yards downwind from my campsite. Learned this after a too-close black bear encounter while sleeping!
- Use rubber gloves. These help prevent your scent from transferring to the meat, which can attract predators to your pack or storage area.
- Bury or hang entrails far from camp. If regulations permit burying, go at least 12 inches deep. Otherwise, hang entrails in a tree far from your travel routes and campsite.
- Use game bags treated with permethrin. This helps deter insects which can attract predators.
- Consider scent-control sprays. These aren’t perfect but add another layer of protection for your meat.
- Process quickly and completely. The longer you have open meat and blood at your site, the more scent you’re putting into the air.
- Pack meat out immediately when possible. If you’re in grizzly country like I often am, getting meat to a secure location quickly is paramount.
Weather-Specific Field Dressing Adaptations
Hot Weather (70°F+)
Hot weather is the enemy of good meat. Here’s how I adapt:
- Prioritize speed. In hot weather, I simplify my approach to get the body cavity open and cooling as quickly as possible.
- Consider skinning immediately. While some argue for leaving the hide on, I’ve found immediate skinning helps cooling in very hot conditions.
- Use a quarter-and-pack strategy. Rather than trying to preserve the animal whole, I quarter it immediately and get the meat into game bags.
- Seek shade aggressively. Even 10-15°F cooler in shade makes a huge difference in meat quality.
- Use creek water if available. I’ve placed bagged meat in cold creek water (in sealed waterproof bags to prevent contamination) to rapidly cool it.
- Consider night hunting. In extremely hot regions, hunting near sunset gives you cooler temperatures for field dressing.
Cold Weather (Below 40°F)
Cold weather provides advantages but creates its own challenges:
- Take advantage of natural refrigeration. Hanging quartered game in the shade can keep it perfectly preserved for days in cold weather.
- Prevent freezing when appropriate. If temperatures drop below freezing, meat can freeze solid, making it difficult to process later. I tend to keep large cuts intact in very cold weather as they freeze more slowly.
- Keep your hands functional. I use fingerless gloves with hand warmers or alternate bare hands with warm pockets. Numb fingers lead to mistakes.
- Watch for steam. In very cold conditions, the steam from a freshly opened body cavity can actually condense and freeze on your outer clothing, potentially attracting predators later.
- Consider leaving the hide on longer. In cold conditions, the hide can protect the meat while still allowing it to cool adequately.
After more hunting trips than I can count, I’ve learned that field dressing isn’t just a task to endure—it’s an art that directly impacts the quality of your wilderness meals. Take pride in doing it right, and you’ll enjoy some of the healthiest, most sustainable protein available anywhere!
Remember, each animal and situation is unique. Adapt these techniques to your specific circumstances, and always prioritize safety—both food safety and personal safety in predator country. The effort you put into proper field dressing will be rewarded many times over when you’re enjoying delicious wild game meals at your campsite.
Portable Preservation Methods for Off-Grid Settings
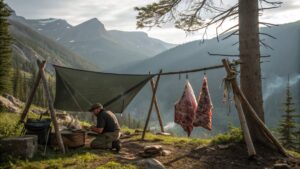
I’ll never forget the time I bagged two deer in a single weekend while camping in the Rockies. It was an absolute blessing until I realized I had way more meat than I could possibly eat before it spoiled! With no cooler big enough and a week left in my trip, I had to get creative or watch most of that precious protein go to waste. That experience taught me more about wilderness meat preservation than any book ever could.
After years of trial and error (and yes, some embarrassing failures), I’ve developed reliable methods for preserving game in even the most remote settings. Let me walk you through what actually works when you’re miles from electricity and refrigeration.
Comparative Analysis of Backcountry Preservation Techniques
Each preservation method has its unique advantages depending on your situation:
Smoking
Pros:
- Creates incredible flavor profiles
- Extends shelf life to 2-4 weeks when done properly
- Works in humid environments where drying is challenging
- Provides some protection against insects
- Can be done with minimal equipment
Cons:
- Requires constant attention to maintain proper smoke and temperature
- Uses significant fuel resources
- Smoke can attract unwanted attention (both human and animal)
- Weather-dependent (wind and rain can disrupt the process)
Best for: Larger camp setups where you’ll be stationary for at least 3-4 days. I’ve found smoking particularly effective for fatty game like bear and duck.
Air Drying/Jerky Making
Pros:
- Requires minimal equipment
- Creates extremely portable, lightweight food
- Can achieve the longest shelf life (3+ months when done perfectly)
- Less fuel-intensive than smoking
- Easiest to do while on the move
Cons:
- Vulnerable to insects and contamination
- Highly dependent on weather conditions (humidity is the enemy)
- Requires consistent air circulation
- Takes longer than other methods (2-4 days minimum)
Best for: Arid environments and when weight is a critical concern for long backpacking trips. Works exceptionally well with lean meats like venison and rabbit.
Salting/Curing
Pros:
- Works in virtually any weather condition
- Can be done with a single resource (salt)
- Requires no heat source
- Effective even in humid conditions
- Most reliable when other methods fail
Cons:
- Requires carrying salt (heavy if preserving large quantities)
- Alters flavor and texture significantly
- Requires careful ratio of salt to meat
- Needs some form of container for the curing process
Best for: Emergency situations, extremely humid environments, or when other resources are limited. Works well with most game meats, though I find it particularly effective with fish.
Pemmican Making
Pros:
- Incredible caloric density
- Extremely long shelf life (years when done properly)
- Highly portable
- Complete nutrition (protein and fat)
- Resistant to temperature fluctuations
Cons:
- Labor intensive
- Requires rendering fat (time and fuel consuming)
- Need dry berries or other plant additions for complete nutrition
- More complex than other preservation methods
Best for: Extended wilderness living or when creating emergency food caches. I prepare pemmican before extreme backcountry trips where I might need emergency rations.
In my experience, the most practical approach is often combining methods. For instance, I’ll smoke a portion of meat for immediate enjoyment over the next week, while simultaneously drying thinner strips for longer-term preservation.
Building Improvised Smoking Racks from Natural Materials
You don’t need fancy equipment to smoke meat effectively. Here’s how I build smoking setups from materials found in nearly any woodland setting:
The Tripod Method (My Go-To Setup)
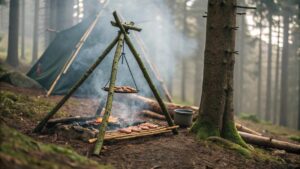
- Gather three sturdy branches (about 6-7 feet long, wrist thickness) and lash them together at one end to form a tripod.
- Create horizontal supports using green sticks about thumb-thickness. These need to be green (not dried) to avoid catching fire. Position them about 3-4 feet above where your fire will be.
- Make a lattice of smaller sticks across your supports. This is where your meat will rest. I space them about 1-2 inches apart for proper smoke circulation.
- Build a small, controlled fire directly beneath the tripod. The key is generating smoke, not flames. I made the rookie mistake of using too large a fire my first time and ended up with charred exteriors and raw interiors!
- Create a smoke containment system using a tarp, poncho, or large leaves draped around (not touching) the tripod. Leave a small opening at the bottom for air intake and at the top for minimal smoke escape.
The beauty of this method is you can scale it up or down depending on your needs. I once used this technique to smoke enough venison to feed five people for a week-long trip.
The Streamside Rock Smoker
If you’re near a water source with plenty of flat rocks:
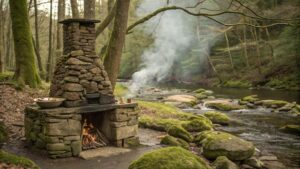
- Build a rock chamber by stacking flat rocks into a rough chimney shape, about 2-3 feet high with a chamber at the bottom for your fire.
- Create a rock platform midway up your chamber using flat stones. This separates your fire from the meat.
- Make a lid from either a large flat rock or layers of foliage covered with mud.
- Build a small fire in the bottom chamber, then place meat on the middle platform and cover.
This method is remarkably effective in windy conditions, as the stone provides natural insulation and wind protection.
The Pit Smoker
When stealth or wind protection is critical:
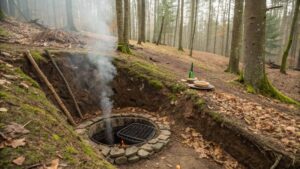
- Dig a pit approximately 2 feet deep and 2 feet in diameter.
- Dig a connecting trench about 3 feet long and 1 foot deep leading to the main pit.
- Cover the trench with flat rocks, bark, or green sticks covered with soil, creating a sealed smoke channel.
- Build your fire at the end of the trench (not in the main pit).
- Place a grill of green sticks over the main pit where smoke emerges.
- Cover the entire smoking area with a layer of leaves and a final layer of soil, leaving tiny ventilation holes.
This method is my preference in bear country since it minimizes scent dispersion. The biggest challenge is temperature control, so I always keep a small opening I can access to monitor the process.
Plant-Based Natural Preservatives You Can Forage
Nature provides remarkable preservatives that can enhance both flavor and shelf-life. Here are my tried-and-tested foraged preservatives:
Juniper Berries
- Where to find them: Coniferous forests, especially at higher elevations
- Preservation properties: Contains natural compounds that inhibit bacterial growth
- How I use them: Crush and rub on meat before smoking or drying
- Flavor profile: Adds a gin-like, slightly resinous flavor that pairs wonderfully with venison
Wild Onion/Garlic
- Where to find them: Forest floors, meadows, often identified by their distinctive smell
- Preservation properties: Natural antimicrobial and antifungal properties
- How I use them: Mash into a paste and apply to meat before preservation
- Flavor profile: Adds depth and helps mask gamey flavors in older animals
White Pine Needles
- Where to find them: Coniferous forests (identify by bundles of 5 needles)
- Preservation properties: High vitamin C content helps prevent oxidation
- How I use them: Add to smoking fires or steep in boiling water to make a brine
- Flavor profile: Subtle citrus notes that complement fish particularly well
Staghorn Sumac (Not poison sumac!)
- Where to find them: Forest edges, characterized by red berry clusters
- Preservation properties: High acidity creates an environment resistant to bacterial growth
- How I use them: Soak berries in water to create an acidic wash for meat
- Flavor profile: Lemony tartness that works beautifully with white-meat game birds
Oak Leaves and Bark
- Where to find them: Deciduous forests
- Preservation properties: Tannins act as natural preservatives
- How I use them: Add to smoking wood or create a tea for soaking
- Flavor profile: Subtle earthiness and slight bitterness that balances rich game meats
I once had to rely entirely on juniper berries and wild onions to preserve a large trout catch when my salt supply got soaked during a surprise river crossing. The meat lasted four days longer than I expected, and several hiking partners asked for my “recipe”!
Minimum Equipment Needed for Each Preservation Method
One of the most common questions I get from novice off-gridders is about equipment. Here’s the bare minimum you need for each method:
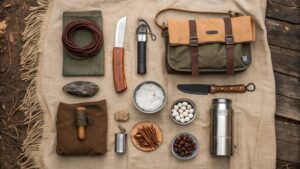
For Smoking:
- Knife (already in your field dressing kit)
- 50 feet of cordage/paracord
- Small hatchet or saw (for collecting wood)
- Optional but recommended: meat thermometer
That’s it! Everything else can be created from natural materials. The key is choosing the right wood – I avoid resinous woods like pine for the actual smoke generation, instead opting for hardwoods like oak, maple, or fruit woods when available.
For Drying/Jerky:
- Knife (for slicing thin, consistent strips)
- 25 feet of cordage
- Clean cloth/bandana (to cover meat and protect from insects)
- Small container for seasonings
The most important “equipment” for drying is selecting the right location – I look for spots with consistent airflow, protection from direct sunlight, and good insect protection.
For Salt Preservation:
- Salt (at least 1 pound per 5 pounds of meat)
- Small container for mixing salt and spices
- Cloth bags or clean bandanas for wrapping
- Small cordage for secure wrapping
When I’m planning a trip where I’ll rely on salting, I pre-measure salt into waterproof containers based on the amount of game I expect to harvest.
For Pemmican:
- Everything needed for jerky production
- Metal container for rendering fat
- Cloth for straining rendered fat
- Container for storing finished pemmican
- Grinding tool (can be improvised with rocks)
I’ve found that pemmican requires the most preparation before heading out, but offers the most reliable long-term preservation in the field.
Time Requirements and Shelf-Life Expectations
Understanding timing is crucial for planning your wilderness preservation strategy:
Smoking
Preparation time: 2-4 hours (building rack, preparing meat, starting fire) Smoking time: 12-48 hours depending on meat thickness and desired preservation level Rest time before consumption: Can be eaten immediately, but flavors improve after 12 hours Shelf-life:
- Hot smoking: 3-7 days in cool weather (below 60°F)
- Cold smoking: 2-3 weeks in cool weather
- Combined with drying: 3-4 weeks
I’ve successfully kept smoked venison for 18 days during a cool autumn trip in Montana, storing it wrapped in breathable cloth and hung in shade.
Drying/Jerky
Preparation time: 1-2 hours (slicing meat uniformly thin) Drying time:
- Thin strips (⅛”): 8-12 hours in hot, dry conditions
- Standard jerky thickness (¼”): 24-48 hours
- Thicker cuts: 3-5 days Shelf-life:
- Properly dried jerky: 2-3 months in cool, dry conditions
- With added salt: 4-6 months
- Vacuum sealed (pre-trip preparation): 6-12 months
Temperature and humidity dramatically affect these timeframes. I’ve had jerky mold within 5 days in humid summer conditions, while the same preparation lasted months during a dry winter expedition.
Salting/Curing
Preparation time: 1 hour (cutting meat, applying salt) Curing time:
- Thin cuts: 24-48 hours
- Medium cuts: 3-5 days
- Thick cuts: 7-10 days Shelf-life:
- Light cure: 1-2 weeks
- Medium cure: 1-2 months
- Heavy cure: 3-6 months
The salt-to-meat ratio is critical. I use roughly 1 part salt to 5 parts meat for a medium cure. Always err on the side of using more salt rather than less when preservation is critical.
Pemmican
Preparation time: 4-6 hours (jerky making, rendering fat, grinding, mixing) Setting time: 2-3 hours for fat to solidify Shelf-life:
- Standard pemmican: 1-5 years
- With added berries/plants: 1-2 years
- In extreme conditions: Potentially decades (historical accounts)
I make pemmican before extreme wilderness trips and have consumed portions stored for over a year with no noticeable degradation in quality or safety.
Safely Storing Preserved Meat in Various Wilderness Conditions
Even perfectly preserved meat can be compromised by improper storage. Here’s how I adapt storage methods to different environments:
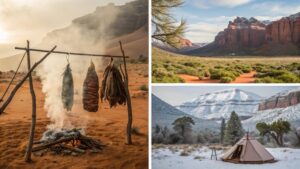
Hot, Dry Environments (Desert/Scrubland)
- Primary threat: Extreme heat and dehydration
- Best storage method: Breathable cloth bags suspended in shade, ideally at least 3 feet off the ground
- Key technique: Create double-layer storage with an outer protective layer and inner breathable layer
- Natural enhancement: Bury preserved meat in dry sand during the hottest hours of the day, marking the location carefully
During a Utah backcountry trip, I discovered that wrapping jerky in cotton cloth, then placing it in a paper bag buried in 18 inches of sand kept it remarkably cool and preserved, even in 95°F daytime temperatures.
Hot, Humid Environments (Jungle/Swamp)
- Primary threat: Mold and insect infestation
- Best storage method: Suspended smoking/drying continued overnight
- Key technique: Create a small, continuous smoking environment, even during storage
- Natural enhancement: Wrap preserved meat with certain leaves like banana or oak that provide natural protection
In humid environments, I’ve found that the preservation never truly “stops” – it’s an ongoing process throughout your trip. During a particularly humid expedition in the Southeast, I maintained a small smoke production under my hanging meat throughout the entire week-long trip.
Cold, Dry Environments (Mountain/Winter)
- Primary threat: Freezing and thawing cycles
- Best storage method: Natural refrigeration hanging systems
- Key technique: Protect from direct sunlight while leveraging cold temperatures
- Natural enhancement: Snow caches marked with branches
Cold environments are preservation-friendly, but introduce the risk of meat freezing solid. I prepare for this by cutting preserved meat into portion-sized pieces before it freezes, making it more usable when needed.
Cold, Wet Environments (Northern Forest/Rainforest)
- Primary threat: Persistent dampness causing mold
- Best storage method: Elevated, covered hanging systems with smoke preservation
- Key technique: Create moisture barriers between meat and environment
- Natural enhancement: Conifer bough coverings that shed water while allowing airflow
I once constructed an effective storage system during a rainy Pacific Northwest expedition by creating a tiered hanging system under a thick hemlock, with smoked meat hanging from the highest tier, allowing continued smoke treatment from below.
Universal Storage Principles I Always Follow:
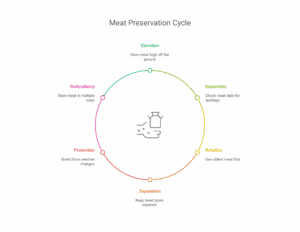
- Elevation: Always store preserved meat at least 3 feet off the ground (higher in bear country).
- Inspection: Check meat daily for signs of spoilage (sliminess, off odors, mold).
- Rotation: Use oldest preserved pieces first.
- Separation: Keep different types of preserved meat separate to prevent cross-contamination.
- Protection: Always have a system to protect against unexpected weather changes.
- Redundancy: Never store all preserved meat in one location or using one method.
Mastering these preservation techniques has transformed my wilderness experiences. Instead of worrying about food or carrying excessive weight, I can hunt and gather opportunistically, knowing I can preserve whatever I’m fortunate enough to harvest. There’s something profoundly satisfying about sitting beside a campfire, enjoying jerky made days earlier from an animal you harvested yourself, preserved using techniques our ancestors relied on for thousands of years.
The learning curve can be steep, but I encourage you to start simple – perhaps with basic jerky making on your next trip – and expand your preservation skills with each wilderness adventure. Your future self, enjoying preserved wild game under the stars weeks after harvest, will thank you!
Off-Grid Cooking Techniques for Wild Game
The first time I prepared rabbit over a campfire, I was so proud of my hunting success that I didn’t pay enough attention to the cooking process. Two hours later, I was gnawing on what felt like leather boots with a vague hint of meat flavor! That humbling experience taught me that harvesting the game is only half the battle—cooking it properly in wilderness conditions is an art form all its own.
After countless backcountry trips and many (sometimes disastrous) cooking experiments, I’ve developed approaches that consistently deliver delicious wild game meals with minimal equipment and maximum flavor. Let me share what actually works when you’re miles from the nearest kitchen.
Equipment Considerations for Wild Game Preparation
The key to successful off-grid cooking is bringing versatile equipment that serves multiple purposes. Here’s my field-tested kit:
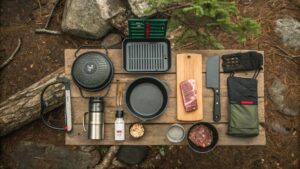
Essential Cookware
- Cast Iron Skillet (8-10 inch) – The workhorse of wilderness cooking. I’ve found cast iron’s heat retention makes it perfect for searing game meat and developing flavors that lighter pans simply can’t achieve. Yes, it’s heavy, but worth every ounce when you’re eating perfectly seared venison steaks instead of charred, flavorless meat.
- Nesting Pot Set (1-2 quarts) – Ideal for stews, broths, and boiling. Look for pots with folding/removable handles to save space. I once made a remarkable rabbit stew for four people using just a single 2-quart pot during a rainstorm when no other cooking method was possible.
- Grill Grate – A small, foldable grill grate weighs almost nothing but transforms what you can cook over an open fire. I prefer the models with legs that can stand directly in coals or balance on rocks around a fire.
- Dutch Oven (optional for longer trips) – If weight isn’t a primary concern (canoe trips, base camping), a small dutch oven unlocks incredible cooking possibilities. I’ve baked fresh bread and made tender pulled bear meat using mine.
Critical Tools
- High-Quality Knife – Beyond field dressing, your knife is essential for food prep. A 6-inch fixed blade with a full tang handles everything from fileting fish to splitting small kindling for cooking fires.
- Meat Thermometer – This might seem like a luxury, but it weighs almost nothing and eliminates guesswork with game meats. Especially important when cooking bear or other meats with safety concerns.
- Lightweight Cutting Board – A thin plastic cutting board weighs mere ounces but provides a clean, safe cutting surface. I’ve tried using flat rocks or logs in a pinch, but always regretted not bringing a proper cutting surface.
- Heavy-Duty Aluminum Foil – Perhaps the most versatile item in my kit. Use it for packet cooking, as a wind screen, makeshift lid, or even as a reflector oven. I never leave for the backcountry without at least 10 feet of heavy-duty foil.
- Tongs and Spatula – Silicone-tipped tools that can handle high heat without melting or scratching cookware. The control these give you versus trying to flip meat with a knife or stick is remarkable.
Specialized Items Worth Their Weight
- Spice Kit – Pre-mixed spice blends in small waterproof containers transform bland wild game into gourmet meals. My standard kit includes salt, pepper, garlic powder, smoked paprika, and an Italian herb blend.
- Cooking Oil in Leak-Proof Container – Critical for preventing sticking and adding needed calories to lean game meat. I use a small screw-top plastic bottle with a couple of tablespoons of oil.
- Instant Read Thermometer – When cooking potentially dangerous meats like bear or wild pig, this tiny tool can literally save you from serious illness.
What to leave behind: I’ve learned through many heavy packs that specialized single-use tools like meat mallets, burger presses, or bulky grinders just aren’t worth their weight. A rock works fine as a meat tenderizer, and hands form burgers just as well as any press!
Heat Management Strategies for Different Game Types
Cooking wild game successfully requires understanding that different meats need vastly different heat approaches:
Lean Game (Venison, Rabbit, Most Game Birds)
The biggest mistake I see wilderness cooks make is treating all game like domestic meat. Venison has approximately 1/5 the fat content of beef—cook it like a beef steak and you’ll end up with shoe leather!
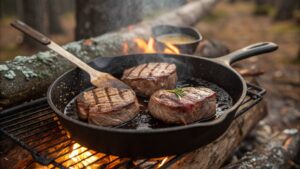
My approach:
- Use high heat for very short periods to sear the outside (locks in moisture)
- Rest the meat away from direct heat to let residual heat finish the cooking
- Keep temperatures lower than you would for fatty domestic meats
- Avoid overcooking at all costs – medium-rare to medium is ideal for most lean game
- Add fat during the cooking process (oil, bacon fat, butter)
I once cooked elk steaks for four hunters who swore they didn’t like “gamey” meat. By quickly searing each side over hot coals for just 90 seconds, then moving the meat to cooler indirect heat for 4 minutes, the results changed their minds completely. The meat was tender, juicy, and without a hint of gaminess.
Fatty Game (Bear, Beaver, Some Waterfowl)
These meats present the opposite challenge—they have plenty of fat, but it’s not always pleasant fat.
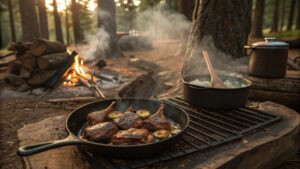
My approach:
- Use medium heat to render fat slowly
- Drain fat periodically during cooking
- Position fatty game downwind from your sitting area (melting fat can produce strong odors)
- Consider par-boiling before final cooking for very fatty meats like bear
- Use stronger seasonings to complement the robust flavors
During an autumn Boundary Waters trip, I turned a fatty goose into an amazing meal by first simmering the quartered bird in water with wild onions for 30 minutes, then finishing it over direct heat. The par-boiling removed the excessive fat while keeping the meat tender.
Fish and Seafood
The delicate nature of fish demands special consideration:
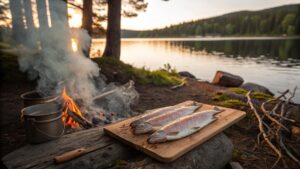
My approach:
- Use medium-high heat with careful attention
- Cook just until flesh turns opaque and flakes easily (usually just 2-4 minutes per side)
- Consider packet cooking in foil to retain moisture
- Try cold-smoking larger fish before cooking
- For very fresh fish, minimal cooking preserves the best texture
I accidentally discovered a wonderful technique during a boundary waters trip when our fire wouldn’t get hot enough. By placing trout fillets on a cedar plank and positioning it near (not over) the flames, the fish gently cooked while absorbing amazing smoky cedar flavor over about 20 minutes.
Temperature Targets for Safety and Flavor
- Venison, elk, antelope: 130-140°F (medium-rare to medium)
- Wild turkey/upland birds: 165°F at thickest point
- Bear, wild boar: Minimum 160°F (preferably 165°F)
- Rabbit and squirrel: 160°F
- Fish: 145°F or until flesh is opaque and flakes easily
Flavor Enhancement Using Foraged Herbs and Plants
One of the joys of wilderness cooking is incorporating ingredients from the landscape around you. Here are some of my favorite foraged flavor enhancers:
Conifer Needles (Pine, Spruce, Fir)
Identification: Needle-like leaves, distinct resinous smell Flavor profile: Citrusy, bright, slightly resinous Best with: Fish, chicken, turkey How I use them: Strip needles and chop finely to use as an herb, or make a tea to use as a marinade My experience: During a spring trip in the Cascades, I crusted a rainbow trout with chopped Douglas fir needles before cooking it in foil. The citrus notes perfectly complemented the fish and impressed my normally skeptical camping partners.
Wild Alliums (Ramps, Wild Onions, Wild Garlic)
Identification: Onion/garlic smell when crushed, strap-like leaves Flavor profile: Like milder versions of their cultivated counterparts Best with: Everything! Particularly good with red meat How I use them: Chop and use raw in the last few minutes of cooking My experience: Finding a patch of ramps during a spring turkey hunt in Appalachia completely transformed our camp meals. We added them to everything from turkey breast to foraged mushrooms.
Wild Berries
Identification: Various; learn the safe species in your region Flavor profile: Sweet-tart complexity domestic berries often lack Best with: Game birds, bear meat How I use them: Crush and mix with oil for a simple sauce, or reduce with a bit of water for a glaze My experience: Salmonberries mashed with a rock and mixed with salt created an amazing glaze for duck breast during a Pacific Northwest trip. The acidity cut through the fattiness perfectly.
Dandelion
Identification: Distinctive jagged leaves, yellow flowers Flavor profile: Pleasant bitterness similar to arugula Best with: Fatty meats like beaver or bear How I use them: Young leaves as a bed for cooking meat, flowers and buds as a garnish My experience: Placing a beaver roast on a bed of dandelion greens imparted a subtle bitterness that balanced the rich meat wonderfully.
Wood Sorrel
Identification: Looks like clover but with heart-shaped leaves Flavor profile: Bright lemon-like acidity Best with: Fish, rabbit How I use them: Chopped and sprinkled on just before serving My experience: A handful of wood sorrel leaves scattered over slow-cooked rabbit provided a bright, acidic counterpoint that made the dish feel complete.
Safety note on foraging: Always be 100% certain of plant identification before consuming. When in doubt, leave it out. I carry a compact plant identification guide on every trip and only use plants I can positively identify. Start with just these few easily recognizable plants before expanding your foraging repertoire
Cooking Techniques Requiring Minimal Equipment
When you’re carrying everything on your back, specialized cooking equipment isn’t practical. Here are my go-to techniques that deliver amazing results with minimal gear:
Stone Boiling
This ancient technique requires only a container (even a bark or hide container works):
- Heat fist-sized rocks in your fire until they’re extremely hot (30+ minutes)
- Using sticks or tongs, transfer rocks to your water-filled container
- Add small pieces of meat and vegetables
- Replace cooling rocks with hot ones to maintain temperature
I’ve used this method during a primitive skills course when my pot was being used for plant processing. The resulting rabbit stew was remarkably good, and there was something deeply satisfying about using a technique that’s thousands of years old.
Coal Cooking
Perfect for small cuts of meat with no cookware required:
- Develop a bed of hot coals (hardwood preferred)
- Place meat directly on the coals
- Cook 2-3 minutes per side, brushing off any ash before eating
This technique works brilliantly for heart and liver especially. The direct contact with coals creates an amazing crust while keeping the interior tender.
Packet Cooking
My favorite low-maintenance cooking method:
- Create a packet from heavy-duty aluminum foil
- Add meat, foraged greens, and perhaps wild onions
- Seal tightly and place near (not in) coals
- Cook until meat is done (time varies by type and thickness)
The beauty of this method is that it’s almost impossible to dry out the meat. During a solo trip in Idaho, I created packets of grouse with wild onions and serviceberries that steamed to perfection while I set up camp.
Spit Roasting
The classic wilderness cooking method:
- Create a sturdy spit from a green branch
- Skewer meat securely
- Position it over coals (not flames)
- Rotate frequently for even cooking
The key insight I’ve gained over years of spit cooking is that height and distance from the coals matters tremendously. Too close and you get a charred exterior with raw interior; too far and the meat dries out before cooking through.
Hot Rock Frying
When you don’t have a pan:
- Find a flat rock (non-porous types like slate work best)
- Heat thoroughly in fire (caution: some rocks can explode when heated)
- Remove carefully and brush clean
- Add oil and use as a primitive frying surface
I’ve successfully cooked fish fillets on hot rocks during several trips. The key is heating the rock gradually and thoroughly before cooking.
Clay Baking
For patient wilderness chefs:
- Wrap meat in large leaves (grape, burdock, or maple work well)
- Encase completely in mud/clay mixture
- Bury in coals for 30+ minutes, depending on size
- Break open clay – leaves and skin pull away with the clay
This method excels with small game like squirrel or grouse. The clay shell traps moisture, essentially steaming the meat in its own juices.
Nutrient Retention Methods for Extended Wilderness Stays
On shorter trips, maximum flavor might be your primary concern. But on extended wilderness journeys, getting the most nutrition from your food becomes crucial:
Organ Meat Prioritization
Heart, liver, and kidneys contain 3-10 times the nutrients of muscle meat and degrade faster. I always cook these first, usually the same day as the harvest. A simple approach I use:
- Slice organs thinly
- Cook quickly over medium-high heat
- Add foraged greens for additional nutrients
During a two-week remote trip in Alaska, our guide insisted we eat the heart and liver from our caribou immediately. By day 10, I understood why—we maintained energy levels that would have flagged on muscle meat alone.
Bone Broth Utilization
Joints, bones, and connective tissue contain valuable nutrients that can be extracted through slow simmering:
- Crack bones to expose marrow
- Simmer with water and wild herbs for several hours
- Drink broth directly and use liquid for cooking other foods
I keep a “perpetual stew” going during longer camps, adding bones and trimmings to the pot and taking broth as needed. This provides continuous nutrition with minimal waste.
Blood Conservation
Though it might sound primitive, blood is incredibly nutrient-dense:
- Collect blood in a clean container during field dressing
- Add to stews and broths for iron and protein
- Traditional cultures mix blood with rendered fat and herbs for a power-packed food
During a survival training course, our instructor showed us how to make a simple blood sausage using a cleaned section of intestine. The resulting food was remarkably energizing during strenuous activities.
Minimal Processing
Each processing step can reduce nutrients:
- Cook meat on bones when possible
- Utilize “nose-to-tail” eating, including skin, cartilage, and tendons
- Eat some portions raw when safe (fish in cold, clean waters)
On a winter camping trip, I noticed a remarkable difference in sustained energy when eating meat cooked on the bone versus boneless cuts.
Cooking Temperature Awareness
Certain nutrients are heat-sensitive:
- B vitamins (critical for energy) diminish with prolonged cooking
- For maximum nutrition, aim for medium-rare to medium for red meats
- Save and drink cooking liquids rather than discarding them
I’ve found a noticeable difference in my energy levels on trips where I’m careful about not overcooking game versus trips where meats are well-done.
Avoiding Foodborne Illness in Remote Locations
When you’re miles from medical help, food safety takes on new importance. Here’s how I ensure my wilderness game cooking is safe:
Critical Control Points
- Temperature control: Always cook bear, wild pig, and other omnivores to at least 160°F. I carry a small instant-read thermometer that weighs less than an ounce.
- Cross-contamination prevention: Designate separate areas for processing raw meat versus cooking and eating. I use different colored bandanas to mark these areas at camp.
- Hand sanitation: Keep hand sanitizer accessible during the cooking process. I hang a small bottle from my belt when processing and cooking game.
- Cooling management: Never partially cook meat and finish later—this creates a perfect environment for bacterial growth. I once saw a wilderness guide make this mistake with grouse, and two people became ill.
Species-Specific Concerns
Different game animals present different safety challenges:
Bear and Wild Pig
Primary concern: Trichinosis Safe cooking temperature: 165°F throughout Special considerations: Never consume rare or medium; consider pre-boiling before final cooking
I use a “when in doubt, boil it out” approach with bear meat, first simmering it for 20 minutes before finishing with more flavorful cooking methods.
Wild Turkey and Game Birds
Primary concern: Salmonella Safe cooking temperature: 165°F in thickest part Special considerations: Pay special attention to proper field cleaning
For wild turkeys, I focus on proper field dressing and cooling immediately after harvest, then ensure thorough cooking by separating larger muscles from the carcass rather than cooking the bird whole.
Venison and Other Ruminants
Primary concern: Surface bacteria (interior is generally safe) Safe cooking temperature: 145°F for whole muscle cuts Special considerations: Can be enjoyed medium-rare if properly handled
Surface searing is critical with venison. I typically sear all surfaces over high heat, then finish to medium-rare over lower heat.
Fish
Primary concern: Parasites Safe cooking temperature: 145°F or cook until opaque and flakes easily Special considerations: Visual inspection for parasites; consider freezing first if you have access to a freezer before your trip
I always check the body cavity and fillets carefully when cleaning fish, looking for the tell-tale spiral parasites or cysts that indicate potential problems.
Universal Safety Practices
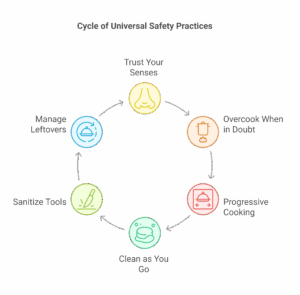
- Trust your senses: Discard meat with off odors, sliminess, or unusual colors.
- When in doubt, overcook rather than undercook: In wilderness settings, a slightly dry meal is preferable to illness.
- Progressive cooking approach: Start with small portions of a new animal and wait a few hours before consuming more.
- Clean as you go: In warm weather especially, process and cook game immediately rather than saving for later.
- Keep cooking tools clean: Sanitize knives and cooking tools between uses.
- Manage leftovers carefully: In warm weather, cook only what can be immediately consumed.
My most important wilderness cooking lesson came during a remote trip when a companion became severely ill from improperly cooked bear meat. The four-day evacuation that followed impressed upon me that in wilderness cooking, safety absolutely comes before culinary preferences.
The beauty of wilderness game cooking is that it connects us to our ancestral roots while providing some of the healthiest, most sustainable protein available. With these techniques and a bit of practice, you’ll soon be enjoying wilderness meals that rival anything available in fine restaurants—with the added satisfaction of having harvested, prepared, and cooked the food yourself in one of nature’s most beautiful settings.
Remember that each wilderness trip is an opportunity to refine these skills. Start with simpler techniques like packet cooking, then progress to more advanced methods as your confidence grows. The journey from basic campfire cooking to wilderness culinary expertise is immensely rewarding, and I hope these techniques help you along the way!
Safety Considerations and Risk Management
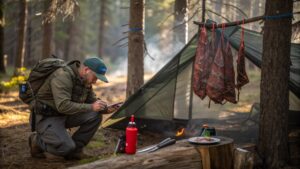
Let me tell you something – there’s nothing that ruins a wilderness adventure faster than food poisoning in the backcountry. Trust me, I’ve been there, and it’s a mistake you only make once.
About 15 years ago, I was on a week-long hunting trip in the Montana wilderness when I made a rookie error with a whitetail deer I’d harvested. The temperature was hovering around 45°F, and I figured that was cool enough to skip proper cooling procedures.
Big mistake. By day three, I noticed a greenish tinge and sour smell around the cavity. I’d just wasted pounds of perfectly good meat because I got lazy with my safety protocols.
Identifying spoilage without refrigeration is actually pretty straightforward once you know what to look for. First, trust your nose – nature gave us that sense for a reason. Fresh game meat should have a clean, almost sweet smell. Anything sour, ammonia-like, or reminiscent of rotten eggs means bacteria have moved in.
The meat’s texture tells you a lot too. If it’s slimy or tacky to the touch rather than relatively dry, that’s another warning sign. And color changes – particularly green, gray, or brown patches – are your final red flag.
Temperature is your biggest enemy when preserving game. Without refrigeration, you’ve gotta work fast. I always field dress immediately and get the hide off as soon as possible to allow cooling. If it’s below 40°F outside, you’re in luck – nature provides your refrigeration. Above that, you need a plan.
For larger game, I quarter the animal and hang the meat in mesh game bags in the shadiest, coolest spot available. Hanging it allows air circulation, which prevents bacterial growth on the surface. I’ve started carrying lightweight breathable game bags with antimicrobial treatment – worth every ounce of pack weight.
Now let’s talk parasites, because they’re specific to different game and regions. With wild pigs, trichinosis is the big concern. Always cook wild pork to 165°F throughout – no medium-rare wild pork, period. For bear meat, same thing applies. I use a good instant-read thermometer that I keep calibrated.
With deer and elk, chronic wasting disease (CWD) has become a major concern in many regions. While there’s no evidence yet of CWD transmitting to humans, I follow wildlife agency guidelines and avoid eating brain, spinal cord, eyes, spleen, and lymph nodes from deer and elk taken in CWD areas.
Cross-contamination in a primitive camp setting requires extra vigilance. I keep a dedicated set of colored bandanas – red for game processing, blue for camp kitchen duties. Never mix them. I also bring multiple knives: one for field dressing, another for butchering, and a separate one for camp cooking.
After handling raw game, I clean my hands and tools with biodegradable soap and hot water when possible. If water conservation is necessary, I keep a small spray bottle with a diluted bleach solution (about 1 tablespoon bleach per gallon of water) to sanitize surfaces and tools.
For emergency protocols, I always pack activated charcoal tablets in my first aid kit. If someone shows signs of food poisoning – nausea, vomiting, diarrhea, abdominal cramps – keeping them hydrated becomes critical. Wilderness evacuations are complicated, so prevention is truly your best medicine.
Regional awareness matters too. In parts of the Southwest, rabbits can carry tularemia. In beaver and muskrat country, giardia is a concern. Before any hunting trip, I check with local wildlife officials about any disease outbreaks in the area.
The safety measures might seem excessive to some, but I’ve seen grown men laid flat by foodborne illness in the backcountry. When you’re two days from the nearest road, “being too careful” suddenly doesn’t seem so silly anymore!
Ethical and Legal Considerations
Conclusion:
Mastering wild game preparation when you’re off the grid isn’t just a practical skill—it’s an art form that connects us to our ancestors and deepens our relationship with the natural world. By understanding the proper techniques for field dressing, preservation, and cooking, you’ll not only ensure delicious and safe meals during your wilderness adventures but also develop self-reliance that few experience in today’s world.
Remember that each animal harvested deserves respect and proper handling—the effort you put into preparation honors both the animal and the ecosystem you’re temporarily calling home. Ready to elevate your off-grid experience? Start with mastering just one preservation technique before your next trip, and build your skills from there. Your future self—sitting beside a campfire enjoying a perfectly prepared wild game feast under the stars—will thank you!
What wild game preparation techniques have you tried in the backcountry? Share your experiences in the comment section below!
Frequently Asked Questions
Q1: I’m new to hunting and off-grid camping. What’s the absolute minimum gear I need to safely process wild game in the backcountry?
For beginners, I recommend these essentials: a quality fixed-blade hunting knife (4-6″ blade), a compact diamond sharpener, nitrile gloves (5+ pairs), game bags (2-4 depending on animal size), paracord (25ft), antimicrobial wipes, and a small container of salt.
This minimalist kit weighs under a pound but gives you everything necessary for basic field dressing and processing. As you gain experience, you might add specialty tools, but this setup has gotten me through dozens of successful backcountry hunts.
Q2: How do I know if my wild game meat has spoiled when I don’t have refrigeration?
Trust your senses—they’ve kept humans safe for thousands of years. Fresh game meat should have a clean, sometimes metallic smell (not sour or putrid), firm texture (not slimy or sticky), and a relatively bright color (not greenish or grayish).
Small-scale bacterial growth often shows up first as sliminess on the surface and a sour smell. When in doubt, remember the old wilderness saying: “When in doubt, throw it out.” One spoiled meal isn’t worth days of intestinal distress in the backcountry.
Q3: What’s the biggest mistake people make when cooking wild game over a campfire?
Without question, the biggest mistake is overcooking! Wild game typically contains 50-75% less fat than domesticated meat, which means it dries out incredibly quickly. Most people instinctively cook game like they would beef or pork, resulting in tough, livery-tasting meat.
Instead, aim for medium-rare for most cuts (except ground meat and certain species like wild boar that require thorough cooking). Remember that meat continues cooking after being removed from heat, so take it off the fire slightly before your target doneness.
Q4: Is it safe to eat organ meats from wild game in the field?
Yes, with proper assessment! Organ meats like heart, liver, and kidneys are incredibly nutritious and were prized by traditional hunters. I typically examine the organs carefully during field dressing—they should appear healthy with normal coloration and no cysts, discoloration, or abnormal growths.
The liver particularly serves as a good indicator of the animal’s overall health. If the organs look clean and healthy, they’re generally safe to eat and actually contain more vitamins and minerals than muscle meat. Heart is my personal favorite—simple to cook and exceptionally tender when prepared properly.
Q5: How do I prevent predators from stealing my game meat at camp?
This is a legitimate concern I’ve faced many times. The best approach is a combination of height, distance, and containment. Hang your game bags at least 10-12 feet high and 4-5 feet away from the tree trunk to prevent climbing animals from reaching them. Position your hanging site at least 100 yards downwind from your sleeping area.
In bear country, consider using the “triangle method”—creating separate areas for sleeping, cooking, and food/game storage with at least 100 yards between each point. Additionally, I sometimes create simple alarms using fishing line and metal camp items that make noise if disturbed—this has saved my harvest from enterprising raccoons more than once!
Additional Resources
- Minimalist Camp Kitchen Setup: This will help you create a more efficient outdoor cooking system.
- How to Make Dehydrated Camping Meals: Learn how to pack food that is lightweight, doesn’t spoil and tastes good.
- The Ultimate Guide to Long-Term Camping Food Storage: Learn proven methods, essential gear, and expert strategies to keep your food fresh, safe, and accessible.
- The Ultimate Guide to Dutch Oven Cooking While Camping: Learn about off-grid camp cooking and recipes.
- Easy One-Pot Off-Grid Camping Meals for Outdoor Adventures: Learn my absolute favorite one-pot wonders that will fuel your wilderness adventures.
- Fireless Cooking Methods: Learn essential fireless cooking methods for remote camping
- Wilderness Cooking Techniques: Learn the best cooking techniques in the wilderness that will give you the best outdoor meal experience.
- 10 Campfire Recipes That Won’t Bomb: Check out this curated list of campfire recipes that keep you going off-grid during camping
- Ultimate Guide to Wilderness Survival Skills: Talks comprehensively about survival skills in the wild or off-grid.
- How to Stay Safe While Camping Off-Grid: Offers safety and survival tips in the wilderness

