Introduction:
Let me tell you something – there’s nothing quite like the smell of fresh bread wafting through the crisp mountain air! I still remember my first attempt at baking bread during a weeklong backpacking trip in the Cascades. What a disaster that was! The dough was too wet, my makeshift oven collapsed, and I ended up with what can only be described as a “bread rock” that even the local wildlife wouldn’t touch.
But over the years, I’ve refined my techniques and learned that wilderness bread baking isn’t just possible – it’s one of the most rewarding camp cooking experiences you can have. Whether you’re a weekend warrior or a seasoned backcountry explorer, mastering the art of wilderness bread baking techniques will elevate your camping experience to new heights. In this guide, I’ll share everything I’ve learned about creating delicious bread with minimal equipment while immersed in nature.
Understanding Wilderness Bread Basics
I’ve been baking bread in the wilderness for nearly 15 years now, and let me tell you – my first attempts were nothing to write home about! I still laugh thinking about the time I tried to make a loaf using just my campfire and a makeshift tin foil “oven.” My hiking buddies still tease me about that charred-on-the-outside, raw-on-the-inside disaster!
Rethinking Bread Recipes for the Outdoors
When I first started exploring wilderness bread baking, I made the mistake of trying to replicate my kitchen bread recipes. Big mistake! Wilderness baking requires a completely different approach. Through countless trips (and many bread failures), I’ve learned which breads actually work when you’re miles from civilization.
Best Bread Types for Backcountry Baking
Flatbreads: Quick, Forgiving, and Reliable
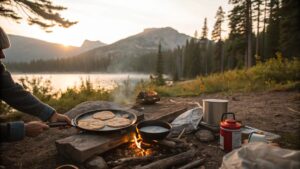
Flatbreads are absolutely your best friend in the backcountry. They’re forgiving, quick, and don’t need much in terms of leavening or equipment. My go-to is a simple flour, water, salt and baking powder combo that I can cook on a rock next to the fire or in my cast iron pan. In about 15 minutes, I’ve got warm bread to accompany dinner – so much better than another night of just freeze-dried meals!
Bannock: The Traditional Trail Favorite
Bannock is another wilderness bread superstar. This traditional bread originated with indigenous peoples and has sustained travelers for centuries, for good reason! It’s basically a heavier flatbread that can be wrapped around a stick and cooked over an open flame. I’ve found that adding a handful of dried cranberries and a pinch of cinnamon makes it feel like a real treat after a long day of hiking.
Dutch Oven Loaves: A Rewarding Indulgence
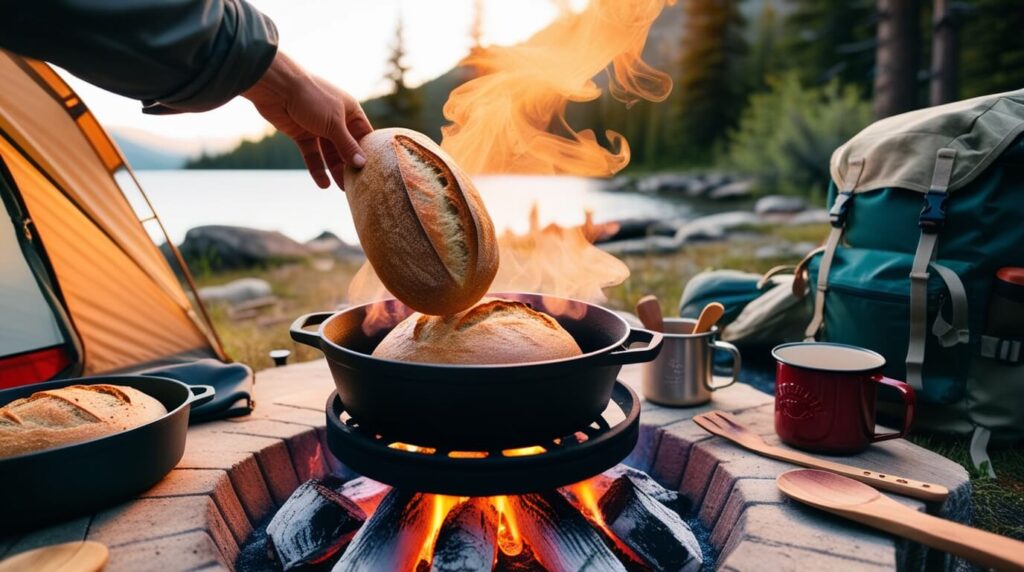
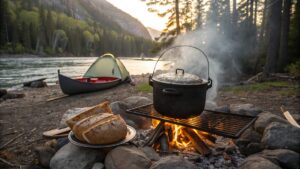
For those willing to carry a bit more weight, dutch oven loaves are absolutely magical in the wilderness. There’s something about pulling a perfect crusty loaf from a dutch oven while you’re surrounded by mountains that feels almost spiritual. Of course, this method requires hauling that heavy dutch oven, which isn’t practical for backpacking trips!
Essential Wilderness Bread Ingredients
Keep It Simple and Pre-Mixed
When it comes to ingredients, simplicity is key. I always pre-mix my dry ingredients at home in ziplock bags. For a basic bread mix, I’ll combine flour, salt, and whatever leavening agent I’m using (more on that in a sec). Then I just need to add water at camp. For extended trips, I sometimes add powdered milk to my mix for extra richness and nutrition.
Measure by Weight, Not Volume
One thing that took me years to learn – weight measurements are WAY more reliable than volume in the wilderness! Temperature changes, altitude, and humidity can all affect how flour settles in a measuring cup. I now use a tiny digital scale that weighs just 3 ounces. Seems fussy, but it’s made a huge difference in my bread consistency.
Choosing the Right Leavening
Baking Powder: Fast and Foolproof
For leavening, you’ve got options depending on your trip length. Baking powder is my go-to for short trips – it’s reliable and doesn’t require rising time.
Sourdough Starter: Flavorful and Sustainable
For longer adventures, I maintain a tiny sourdough starter in a small plastic container. Just a tablespoon is enough to keep going, and it adds such a wonderful dimension to wilderness bread! The natural yeasts actually adapt to your surroundings, which I find fascinating.
Equipment Options for Wilderness Baking
Minimalist Essentials
Equipment-wise, you can go as minimal or elaborate as your pack space allows. At absolute minimum, you need something to mix in (I use a lightweight silicone bowl that collapses), something to cook on (a small non-stick pan works great), and perhaps a lightweight cutting tool.
Car Camping Upgrade: The Dutch Oven
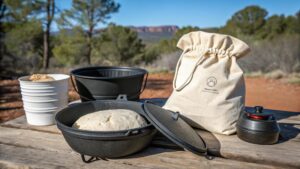
If you’re car camping, a dutch oven opens up amazing possibilities, but it’s definitely not backpacking friendly!
Embracing Simplicity: The Joy of Wilderness Bread
I’ve found that the best wilderness breads embrace simplicity rather than fighting against it. There’s something deeply satisfying about creating bread with just a few ingredients and minimal equipment while watching the sunset over a mountain lake. It connects you to thousands of years of human history – people have been baking simple breads in the wilderness since long before fancy kitchen gadgets existed!
Trust me, once you’ve shared fresh, warm bread with fellow hikers who’ve been eating nothing but trail mix and dehydrated meals, you’ll be the most popular person at the campsite! Just be prepared to share your techniques – and maybe pack extra flour!
Essential Equipment for Off-Grid Bread Baking
When I first started baking bread in the wilderness, I made the classic rookie mistake of bringing way too much equipment! I’ll never forget struggling up a steep trail with my backpack weighing a ton because I’d packed a full-size mixing bowl, measuring cups, and even a small cast iron dutch oven. My hiking partner still teases me about it – “Remember when you basically packed your entire kitchen to make one loaf of bread?”
Over the years, I’ve refined my approach and discovered what’s truly essential versus what’s just nice to have. Trust me, your back will thank you for learning this distinction before your next trip!
Mixing Tools: Keep It Light and Flexible
Lightweight Silicone Bowl
For mixing your dough, a lightweight silicone bowl is absolutely worth its weight. Mine collapses flat and weighs next to nothing, but expands to hold enough dough for 4–6 people.
Alternative Mixing Options
I’ve also used a clean stuff sack in a pinch – just make sure it’s not one that previously held your dirty socks! Some ultralight backpackers I know even mix directly in their ziplock bag of pre-measured dry ingredients, though this can get messy if you’re not careful.
Heat Sources: Adaptability Is Key
When it comes to heat sources, versatility is key. A simple backpacking stove works wonderfully for flatbreads using a pan, but for anything more complex, you’ll need to get creative. I’ve become a master at using my campfire in different configurations – from direct cooking on rocks I’ve placed near the flames to more sophisticated setups involving reflective surfaces.
Cooking Surfaces: Choose Based on Trip Type
Solo or Ultralight Trips
For solo trips or when I’m going ultralight, I bring a lightweight titanium pan that doubles as my eating dish.
Group Camping
For group trips, I’ve found that a small cast iron skillet is worth the extra weight – the heat distribution is so much better, and my flatbreads come out with that perfect combination of crispy exterior and chewy inside.
Game-Changing Accessories
Silicone Baking Mat
The most transformative addition to my wilderness baking kit was a silicone baking mat that weighs almost nothing but gives me a clean surface for kneading and shaping dough. Before that, I was using the cleanest flat rock I could find (not ideal) or the bottom of my tent footprint (desperate times!).
Portable Camping Ovens
For those willing to carry a bit more weight, portable ovens can be game-changers. I splurged on a collapsible silicone camping oven that weighs about a pound and works with most heat sources.
Dutch Oven for Car Camping
For car camping, nothing beats a proper dutch oven with feet that can sit directly in the coals – though positioning those coals correctly took me years to master!
Alternative Cooking Methods That Work
Alternative cooking methods have saved me many times when equipment has failed. Foil packet baking works surprisingly well for small rolls – just create a packet with heavy-duty foil and nestle it among hot coals.
The old stick-wrapping method for bannock bread has become a favorite with my nieces and nephews when we camp – they love twisting the dough around sticks and watching it cook over the fire.
Multi-Purpose Tools: Small but Mighty
One multipurpose tool I never leave home without is my silicon spatula with a temperature-resistant handle. It serves as mixing tool, scraper, flipper, and even emergency knife in a pinch. When every ounce counts, items that serve multiple purposes are worth their weight in gold!
Managing Heat Without a Thermometer
Temperature control is probably the trickiest part of wilderness baking. Without the luxury of an oven thermometer, you learn to “read” your heat source. I use the “hand test” – holding my hand about 6 inches above the cooking surface and counting seconds until it gets uncomfortable. Five seconds means a medium heat, perfect for most bread applications. It sounds primitive, but it works!
Don’t Forget the Basics
I’ve made the mistake of forgetting basic tools like something to actually get my beautiful bread OUT of the cooking vessel. A lightweight pair of silicone-tipped tongs now lives permanently in my camp kitchen bag after a particularly frustrating incident involving hot rocks, a perfect loaf, and ultimately very burnt fingers!
Remember, the best wilderness baking equipment is the stuff you’ll actually carry. An elaborate setup left at home because it’s too heavy does you no good on the trail. Start simple, find what works for your style of camping, and gradually refine your kit. Your back and your bread will both be better for it!
Simple No-Knead Wilderness Bread Recipes
I’ll never forget the look on my hiking buddies’ faces when I pulled out freshly baked bread on day three of our backcountry trip!
“You made that out here?!” they gasped. What they didn’t realize was that wilderness bread doesn’t have to be complicated – in fact, the simplest recipes often work best when you’re off-grid.
My Emergency Flatbread: Quick, Simple, Satisfying
My absolute lifesaver is what I call my “emergency flatbread” recipe. I came up with this after a particularly grueling day of hiking when we desperately needed something substantial but had limited energy.
Ingredients:
-
1 cup flour
-
1/2 teaspoon salt
-
1/2 teaspoon baking powder
-
About 1/3 cup water
Mix until it forms a shaggy dough, pat it into a thin round, and cook on a hot rock, pan, or even directly on cleaned foil over coals for about 3–4 minutes per side. The whole process takes less than 15 minutes from start to finish, and the results are way better than another freeze-dried meal!
No-Knead Techniques: Let Time Do the Work
What really revolutionized my wilderness baking, though, was discovering no-knead techniques. Traditional bread recipes call for lengthy kneading to develop gluten, but who has the energy for that after hiking all day?
Instead, I mix my dough to just barely combine the ingredients, then let time do the work. The longer fermentation develops gluten naturally and creates amazing flavor.
My Favorite Overnight Bread Trick
Here’s my favorite overnight wilderness bread trick: before heading to bed, I mix:
-
2 cups flour
-
1 teaspoon salt
-
1/4 teaspoon instant yeast
-
About 1 cup of water
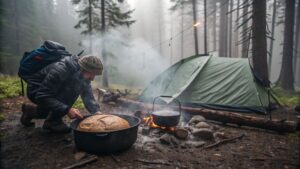
I mix this in my collapsible bowl. The dough should be wet and shaggy – no kneading needed! I cover it and leave it near (but not too near) my tent. By morning, the natural fermentation has worked its magic, creating bubbles and that wonderful yeasty smell. I shape it minimally, let it rest while I make coffee, then bake it in my makeshift Dutch oven setup.
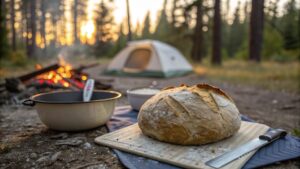
The result is a crusty, chewy bread with complex flavors that feels like a miracle in the wilderness!
Sourdough Starter in the Wild
For longer trips, maintaining a sourdough starter has become my secret weapon. Most people think sourdough is too fussy for camping, but I’ve found the opposite!
How I Do It:
Wild sourdough is incredibly resilient and actually loves the changing temperatures of outdoor life. I keep about 2 tablespoons of starter in a small container and feed it a spoonful of flour and water whenever I make camp. By morning, it’s usually bubbling and ready to use.
The trick is keeping the quantity tiny – you don’t need much to leaven wilderness bread.
Let Nature Help: Using Temperature Fluctuations
Temperature fluctuations are actually your friend with wilderness fermentation.
During one summer trip in the Rockies, I noticed my dough rose faster during the warm days but developed better flavor when temperatures dropped at night.
Now I intentionally use this pattern:
-
Evening – mix the dough
-
Overnight – ferment in cooler temps
-
Morning – bake as the day warms up
It’s become one of my most reliable systems.
Hydration Ratio: The Secret to Forgiving Dough
For foolproof wilderness bread, I’ve found that hydration ratios matter more than exact measurements.
A dough with 65–70% hydration (water weight as a percentage of flour weight) tends to be forgiving in various cooking methods.
If you don’t have a scale, aim for this texture:
-
Tacky but not sticky
-
Clears the sides of your bowl but still clings slightly to the bottom
Foraged Ingredients: Next-Level Wilderness Baking
One of my most memorable wilderness baking experiences was incorporating foraged ingredients.
After receiving proper training in plant identification (super important!), I discovered that certain wild berries, pine nuts, and even some edible flowers can transform a basic bread into something spectacular.
During a trip in the Pacific Northwest, I added foraged huckleberries and a tiny bit of pine needle (checked for safety) to my basic dough – the subtle flavor reminded everyone of the forest around us.
Avoid Complexity, Embrace Reliability
The biggest mistake I see wilderness bakers make is trying recipes that are too complex.
When you’re tired from hiking all day, you want something reliable that won’t waste your precious ingredients if it fails.
Start with the simplest flatbread recipes, master those, then gradually experiment with variations.
Flexible Timing and Temperature for Success
Temperature and timing flexibility are essential for wilderness baking success.
Unlike home kitchens, where you control everything, in the wilderness, you adapt to conditions. My recipes now include ranges rather than exact times –
“bake until the bottom sounds hollow when tapped”
instead of
“bake for exactly 35 minutes.”
Learning to read your bread’s doneness by sight, sound, and touch will serve you better than any timer!
Remember, wilderness bread isn’t about perfection – it’s about creating something delicious in challenging circumstances.
Some of my most “imperfect” loaves have tasted the best, especially when shared with hungry friends against the backdrop of a stunning mountain sunset!
Advanced Wilderness Baking Techniques
I still laugh when I think about my first attempt at “advanced” wilderness baking. There I was, on a backcountry trip in Wyoming, confidently announcing to my friends that I’d make them artisan bread with a crispy crust. What followed was three hours of me frantically trying to maintain temperature in a rickety foil contraption while everyone’s stomach growled louder by the minute!
Now, years later, I’ve actually figured out how to create legitimately impressive breads in the wilderness – but it took a lot of embarrassing failures to get here!
The Dutch Oven: A Game-Changer for Crusty Bread
Getting the Coal Ratio Right
The dutch oven technique was my first real breakthrough in advanced wilderness baking. After much experimentation, I discovered that a well-seasoned 10-inch cast iron dutch oven creates an almost perfect environment for crusty bread. The trick is all about coal placement! For years, I made the mistake of putting too many coals underneath, resulting in burnt bottoms and undercooked tops. The magic ratio I’ve found is roughly 1:3 – for every coal underneath, you want three on top. This creates a more oven-like environment where heat circulates properly.
Reading Coal Temperature by Color
Temperature control is absolutely critical with dutch oven baking. I’ve learned to “read” my coals by color. When they’re covered with white ash, they’re at ideal temperature – about 350-400°F. Too red and they’re too hot; too gray and they’re cooling down. I rotate my dutch oven a quarter turn every 10 minutes or so, and also rotate the lid in the opposite direction to distribute heat evenly. My friends think I’m being fussy, but this simple step prevents hotspots!
Building a Temporary Stone Oven
For truly ambitious wilderness bakers, building a temporary oven can be life-changing. On a two-week trip in the Southwest, I constructed a simple stone oven using river stones (important: never use porous stones as they can explode when heated). I arranged them in a dome shape with an opening, built a fire inside to superheat the stones, then raked out most of the coals before inserting my bread. The thermal mass of the stones created a surprisingly consistent baking environment. It took half a day to build, but we used it for the rest of the trip!
Reflector Ovens: Efficient for Longer Camps
Reflector ovens are another game-changer, especially for longer stays at one campsite. I fashioned one from heavy-duty aluminum foil shaped into a semicircle behind my bread, reflecting campfire heat onto the dough. It’s remarkably effective for open-air baking and creates a beautiful crust. The key is positioning – too close to flames and you’ll have burnt bread; too far and it won’t cook through.
Creating Steam for the Perfect Crust
Creating steam in wilderness baking environments was my white whale for years. In home ovens, steam helps develop that coveted crispy crust, but how do you create steam in the wilderness? My solution: pre-heating a few small rocks in the fire, then placing them in a small container of water right next to my bread in the Dutch oven. The rocks release steam throughout the baking process, and the results are remarkable – a crackling crust that rivals anything from a brick oven!
Baking at Altitude: Lessons from the Rockies
Altitude has been one of my biggest challenges in wilderness baking. During a trip in Colorado at about 9,000 feet, my usual recipes completely failed – too much rise too quickly, then collapse. I’ve since learned that for every 1,000 feet above sea level, you need to reduce leavening agents by about 5-10% and increase liquid slightly to account for faster evaporation. Fermentation happens much quicker at altitude too – a dough that normally takes 8 hours might be ready in 5-6 hours.
Adapting to Extreme Environments
Baking in extreme environments requires special techniques.
Surviving the Desert
In desert conditions, dough dries out incredibly fast – I’ve learned to increase hydration by about 5% and keep dough covered with a damp cloth.
Tackling Humidity
In very humid environments like the Pacific Northwest, I reduce liquid slightly and expect longer cooking times. These small adjustments make a huge difference!
Mastering Heat Zones for Better Control
The most advanced technique I’ve mastered is maintaining different temperature zones in my wilderness baking setup. Just like a professional bakery has ovens set to different temperatures, I create zones around my campfire – a very hot area for initial searing, a medium area for consistent baking, and a cooler area for gentle finishing. Moving bread between these zones gives me remarkable control even without modern equipment.
My Wilderness Croissant Victory
Perhaps my proudest wilderness baking moment was creating laminated dough (think croissants) on a week-long canoe trip. The secret was bringing frozen butter that slowly thawed over the first day, then using the naturally cool river water to keep my dough at the proper temperature between folds. Were they perfect Paris-quality croissants? Absolutely not! But pulling off flaky layers in the middle of nowhere felt like a personal Olympic gold medal moment.
These advanced techniques aren’t necessary for enjoyable wilderness bread, but they’re incredibly satisfying to master. Start with the basics, then challenge yourself to try one new technique per trip. The wilderness has been my best teacher, forcing me to understand the science behind baking rather than just following recipes. And there’s something magical about creating something so civilized and perfect in such a wild setting!
Troubleshooting Common Wilderness Bread Problems
Let me tell you about my biggest wilderness bread disaster—it happened during a rainy week in the Olympic National Forest. My dough turned into a gooey mess that refused to cook through, and we ended up with what my hiking partner dubbed “sad bread soup.” It was edible… technically… but definitely not what I was going for!
After years of wilderness baking, I’ve encountered pretty much every problem imaginable and figured out solutions through plenty of trial and error.
Dealing with Weather Extremes
Cold Weather Challenges
Extreme weather conditions are probably the biggest challenge you’ll face. In cold environments, your dough will rise incredibly slowly, sometimes barely at all. I once waited 5 hours for a rise that would take 1 hour at home!
My solution? I now create a mini greenhouse effect by placing my covered dough in a dark stuff sack and setting it on sun-warmed rocks. In really cold conditions, I’ll even tuck the dough container into my sleeping bag while I do other camp chores!
Hot Weather Problems
Hot weather creates the opposite problem—fermentation happens so quickly that you can easily miss the optimal baking window. During a summer trip in Utah where temperatures hit 95°F, my dough over-proofed in just 30 minutes!
I now check dough much more frequently in hot weather and have learned to recognize the signs of proper fermentation—dough that’s expanded but still has tension, with small bubbles visible at the edges.
Tackling Humidity and Moisture Control
Dry Conditions
Humidity wreaks absolute havoc on wilderness bread. In dry conditions, your dough loses moisture rapidly, resulting in a dense, dry loaf. I’ve learned to increase my recipe’s hydration by about 5–10% in desert environments and keep dough tightly covered.
Humid Environments
On the flip side, in super humid conditions like those Olympic rainforests, dough becomes sticky and difficult to handle. A bit of extra flour for dusting and slightly lower hydration recipes have saved many loaves.
Adapting to Local Water Quality
Water quality variations surprised me when I first started wilderness baking. During a trip in the Southwest, my bread had an odd, slightly bitter taste despite following my usual recipe.
I eventually traced it to the mineral-heavy water! Now I taste my water source before baking. For water with high mineral content, I reduce salt slightly; for very soft water, I might add a pinch more. These small adjustments make a huge difference in flavor.
Fermentation Issues and Fixes
Under-Fermented Dough
One of the most frustrating wilderness baking problems is under or over-fermented dough. If your dough hasn’t fermented enough, it’ll be dense and doughy after baking.
The fix: patience! Even in the wilderness, you can’t rush fermentation. If you’re working with sourdough that seems sluggish, try keeping your starter container in a warm pocket during the day to encourage more activity.
Over-Fermented Dough
Over-fermented dough is trickier to save but not impossible. During a canyon trip, my dough over-proofed while I was off hiking. When I returned, it had collapsed into a soupy mess.
Instead of tossing it, I added a bit more flour to strengthen it, shaped it minimally, and immediately baked flatbreads rather than attempting a loaf. They weren’t perfect, but definitely better than wasting ingredients!
Solving Texture and Baking Problems
Dense Bread
Dense bread is probably the most common wilderness baking complaint. I’ve found this usually happens because of insufficient hydration. Wild environments are typically drier than kitchens, so dough loses moisture faster.
My solution is to err on the side of slightly wetter dough than I’d use at home. It’s harder to handle but produces a better crumb structure.
Burnt Crusts and Doughy Centers
Burnt crusts with doughy centers have frustrated me countless times! This usually means your heat source is too intense.
When using a Dutch oven, I’ve learned to create a simple barrier by placing a flat rock or extra layer of foil underneath to moderate the heat from below. For campfire baking, moving your setup to the edge of the fire rather than directly above flames makes a world of difference.
Bread Storage in the Wilderness
Storage issues have ruined many successful loaves. After spending hours creating perfect bread, it’s heartbreaking to find it moldy or stale the next day!
In humid environments, I now cool bread completely before storing and use breathable cloth bags rather than plastic. In very dry conditions, a light sprinkle of water on the crust before storing helps maintain freshness.
If all else fails, slightly stale bread makes excellent wilderness French toast the next morning!
Adjusting for High Altitudes
One hard-earned lesson: altitude dramatically affects bread baking. At elevations above 5,000 feet, dough rises much faster but with less strength.
I reduce yeast by about 25% when baking at high altitudes and allow for shorter fermentation times. The lower air pressure means bubbles expand more rapidly, potentially collapsing your carefully crafted dough structure.
Embracing Flexibility and Adaptation
Through all these challenges, I’ve learned that wilderness bread baking requires flexibility and observation. The recipes that work perfectly in your kitchen need to be adapted to your environment.
The wilderness baker who succeeds is the one who watches their dough, not their watch! Each loaf teaches you something new about your environment—becoming a better bread baker has actually made me a more observant camper overall.
And remember—even “failed” wilderness bread is usually delicious. Some of my most memorable camping meals have come from creative solutions to bread disasters.
That “sad bread soup” from the Olympic Peninsula? We turned it into dumplings for our stew that night. Wilderness baking isn’t about perfection—it’s about adaptation!
Creative Additions and Variations
I used to be a wilderness bread purist – just flour, water, salt, and leavening. But during a memorable backpacking trip through Vermont, I met an older hiker who shared some bread with foraged blackberries kneaded right into the dough. That single bite completely changed my approach to wilderness baking! The contrast between the warm bread and bursts of tart berry juice was absolutely magical against the backdrop of autumn foliage.
Foraging for Flavor
Since then, I’ve become somewhat obsessed with creative additions to my wilderness breads. Foraging has become one of my favorite ways to connect with the landscape through bread. Of course, this comes with serious responsibility – I only forage ingredients I can identify with 100% certainty. During spring trips, wild onions add an amazing savory note to flatbreads. In summer, tiny wild berries create pops of flavor throughout the crumb. Even certain pine nuts and seeds can be gathered and incorporated for both flavor and nutrition.
Foraging Safety Tip
My best foraging tip: carry a small reference guide specific to your region, and when in doubt, don’t put it in your mouth! I once mistook a plant for wild oregano and thankfully double-checked before adding it to my bread – turns out it wasn’t oregano at all! Now I stick to ingredients I’m completely confident about, or learn from experienced local guides.
Dried Ingredients as Reliable Flavor Boosters
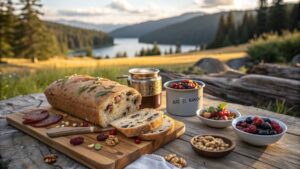
For those not comfortable with foraging (and even I have my cautious days), dried fruits and nuts are game-changers for wilderness bread. They pack serious nutritional density and keep indefinitely. Dried cranberries and chopped walnuts make a combination that’s gotten me through many tough hiking days. The natural sugars provide quick energy while the fats and proteins offer sustained fuel.
Preparation Tips for Dried Ingredients
I’ve learned to chop dried fruits finely before trips – larger pieces can create steam pockets that leave gummy spots in your bread. Pre-toasting nuts slightly before your trip brings out oils that infuse the entire loaf with flavor. Just store them in a separate container to maintain freshness.
Savory Bread for the Campfire Table
Savory wilderness breads have become my specialty for dinner accompaniments. Shelf-stable ingredients like sun-dried tomatoes, dried herbs, and hard cheeses like parmesan can transform basic bread into a meal centerpiece. During a particularly grueling section of the Appalachian Trail, my garlic and herb flatbread with shelf-stable cheese made us the envy of everyone at the shelter!
Tiny Flavor Boosters with Big Impact
One of my favorite tricks is to bring small amounts of concentrated flavor boosters. A tiny container of dried herb blend weighs practically nothing but transforms plain bread into something special. I’ve found that stronger herbs like rosemary and thyme stand up better to wilderness cooking conditions than more delicate herbs.
Sweet Wilderness Bread Variations
For sweet wilderness bread variations, I’ve discovered that a small amount of honey powder or maple sugar creates wonderful results without the stickiness and weight of liquid sweeteners. Combined with cinnamon and dried apples, it makes a breakfast bread that’s motivated me out of my sleeping bag on many cold mornings!
Cultural Inspirations from Around the World
Cultural bread variations have enriched my wilderness cooking immensely. Learning techniques from global traditions has shown me just how universal bread-making is. Native American ash cake methods work beautifully when wrapped in leaves and nestled in dying campfire embers. Middle Eastern flatbread techniques create perfect vehicles for whatever toppings you’ve brought along. Scandinavian-inspired crispbreads last for days without staling – perfect for longer expeditions.
A Taste of Morocco in the Mountains
My Moroccan-inspired wilderness bread has become legendary among my hiking friends. I add a tiny amount of ras el hanout spice blend (pre-mixed at home) to basic flatbread dough. The aromatic spices transport you instantly to North African markets, even when you’re sitting beside an alpine lake!
Enhancing Texture in the Wilderness
I’ve learned that texture additions are just as important as flavor. Sprinkling cornmeal on the bottom of Dutch oven loaves creates a wonderful crunch. Rolling flatbreads in oats before cooking adds both nutrition and a pleasant chewiness. These small touches elevate wilderness bread from mere sustenance to genuine pleasure.
A Word on Restraint in Flavoring
The most important lesson I’ve learned with creative wilderness bread is restraint. In the backcountry, subtle flavors actually shine more brightly than they might in civilization. A hint of orange zest (dried and carried in a small container) comes through much more vibrantly when you’re eating beside a mountain stream than it would at your dining table. The wilderness itself seems to heighten your taste buds!
Creative Cooking Methods
Don’t forget that creativity extends to cooking methods too. On a desert trip, I once buried dough wrapped in foil beneath the still-warm sand where our fire had been the night before. The residual heat slowly baked it while we hiked during the day. Returning to camp to dig up perfectly baked bread felt like discovering buried treasure!
Remember that wilderness baking isn’t just about sustenance – it’s about creating moments of surprise and delight in unexpected places. There’s something profoundly satisfying about producing something as civilized as flavored bread in the middle of nowhere. It reminds us that humans have been finding creative ways to break bread together in wild places for thousands of years. In that way, each loaf connects us not just to the landscape around us, but to a deeply human tradition!
Conclusion:
Wilderness bread baking is truly one of the most satisfying skills you can develop as an off-grid camper. From the simplicity of a basic flatbread to the complexity of a dutch oven sourdough, there’s a wilderness bread technique suitable for every outdoor adventure.
By understanding the basic principles, packing the right lightweight equipment, and practicing these techniques, you’ll be able to enjoy fresh, delicious bread no matter how far from civilization you roam.
Remember, it’s not just about the end product—it’s about embracing the process and connecting with age-old traditions while surrounded by nature’s beauty. So, on your next camping trip, don’t settle for pre-packaged bread—try your hand at wilderness baking and taste the difference!
Have you tried baking bread in the wilderness? I’d love to hear about your experiences and techniques in the comments section below!
Frequently Asked Questions
1. What’s the simplest bread I can make while camping with minimal equipment?
The absolute simplest option is an emergency flatbread that requires just four ingredients: flour, salt, baking powder, and water. Mix 1 cup flour with 1/2 teaspoon each of salt and baking powder, then add about 1/3 cup water until you get a shaggy dough.
Pat it into a thin round and cook 3-4 minutes per side on any hot surface—a pan, hot rock, or even foil over coals. The entire process takes less than 15 minutes and requires no special equipment beyond something to mix in and a cooking surface. This basic flatbread can be enhanced with dried herbs or spices packed from home for variety.
2. How do I maintain a sourdough starter while backpacking? Isn’t that too complicated?
Maintaining a tiny sourdough starter while backpacking is actually simpler than most people think! The key is keeping the quantity very small—I use just 1-2 tablespoons of starter in a small container. Feed it once a day with equal parts flour and water (just a teaspoon or so of each), preferably when you make camp. The natural temperature fluctuations of outdoor life actually help develop flavor, and wild sourdough is incredibly resilient.
For longer trips, you can even let it go dormant for a day or two if needed—just “wake it up” with a feeding about 12 hours before you want to bake. The starter adds incredible flavor and nutrition to your wilderness breads and connects you to one of humanity’s oldest food traditions.
3. How do I adjust my baking for different weather conditions and altitudes?
Weather and altitude dramatically affect wilderness bread baking. In cold conditions, fermentation slows significantly—place your covered dough in a dark stuff sack on sun-warmed rocks or even in your sleeping bag to encourage rising.
In hot weather, check dough frequently as it can over-ferment in as little as 30 minutes. For humidity, increase your recipe’s hydration by 5-10% in dry environments and reduce it slightly in very humid conditions.
For altitude adjustments, reduce your leavening agent (yeast or baking powder) by about 5-10% for every 1,000 feet above 3,000 feet elevation. At higher altitudes, dough rises faster but with less strength, so you’ll need shorter fermentation times and slightly more flour for structure. Also expect faster moisture evaporation—you may need to increase liquid slightly in your recipes above 5,000 feet.
4. What’s the best cooking method if I can only bring minimal equipment on a backpacking trip?
For ultralight backpacking, where every ounce matters, the stone cooking method is remarkably effective. Find a flat, non-porous river stone (avoid porous rocks as they can explode when heated), clean it thoroughly, and place it near your campfire to heat gradually. Once hot, it becomes a perfect cooking surface for flatbreads.
Alternatively, cook directly on a cleaned section of campfire coals that have burned down to white ash—just dust your flatbread with a little extra flour to prevent sticking. Both methods require no packed equipment beyond your basic cooking pot.
For those willing to carry just one dedicated baking item, a lightweight aluminum pan with a lid offers the most versatility. You can use it for frying flatbreads, as a makeshift oven when partially buried in coals, and it serves double-duty for other camp cooking needs.
5. How can I create interesting bread varieties without carrying lots of extra ingredients?
The secret to bread variety without weight is pre-mixing dry flavor combinations at home and carrying them in tiny ziplock bags. A tablespoon of herbs de Provence weighs almost nothing but transforms a basic bread. Small amounts of spice blends like curry powder or za’atar can be mixed directly into your dry ingredients before the trip.
Another approach is to use what nature provides—learn to identify safe, edible additions from your environment (with proper training). Wild berries, certain pine nuts, and edible flowers can create unique breads that connect you with your surroundings. Even without foraging, the outer parts of wild onions or garlic you’re already using in camp cooking can be finely chopped and added to bread for flavor.
Finally, carrying one “luxury” ingredient with multiple uses—like shelf-stable hard cheese or dried tomatoes—allows you to create several bread variations while also using these ingredients in other camp meals. A small piece of parmesan can be grated into bread dough, shaved onto a flatbread after cooking, or added to your camp pasta dinner. https://davidzer.com/titanium-camping-cookware/
Additional Resources
- Titanium Camping Cookware: Learn about how important it is to upgrade your camp kitchen with this premium material.
- Minimalist Camp Kitchen Setup: This will help you create a more efficient outdoor cooking system.
- How to Make Dehydrated Camping Meals: Learn how to pack food that is lightweight, doesn’t spoil and tastes good.
- The Ultimate Guide to Long-Term Camping Food Storage: Learn proven methods, essential gear, and expert strategies to keep your food fresh, safe, and accessible.
- The Ultimate Guide to Dutch Oven Cooking While Camping: Learn about off-grid camp cooking and recipes.
- Easy One-Pot Off-Grid Camping Meals for Outdoor Adventures: Learn my absolute favorite one-pot wonders that will fuel your wilderness adventures.
- Fireless Cooking Methods: Learn essential fireless cooking methods for remote camping
- Wilderness Cooking Techniques: Learn the best cooking techniques in the wilderness that will give you the best outdoor meal experience.
- 10 Campfire Recipes That Won’t Bomb: Check out this curated list of campfire recipes that keep you going off-grid during camping
- Ultimate Guide to Wilderness Survival Skills: Talks comprehensively about survival skills in the wild or off-grid.
- How to Stay Safe While Camping Off-Grid: Offers safety and survival tips in the wilderness

Useful tricks for DIY appliance repair, learn with simple tips.
DIY freezer repair and maintenance [url=http://technirepair.com/common-freezer-problems-and-how-to-fix-them/]http://technirepair.com/common-freezer-problems-and-how-to-fix-them/[/url] .